Page 63
9.4 Setting Trim Pots
As discussed in sections 3.4.5 and 3.4.6, Hilo’s Line Inputs and Line Outputs can be set to Trim values of +18 dBu; +20 dBu; +22
dBu; +24 dBu; +0 dBV; +2 dBV; +4 dBV and +6 dBV. These trim positions are factory calibrated to these values within 1/100th of a
dB. Trim levels can be selected from the Hilo Home Page. These set levels will satisfy the overwhelming majority of Hilo users.
In some cases, these levels may need to be tweaked to match the reference level of gear that is not calibrated as accurately. Also, in
time and due to changes in temperature, it may be necessary to tweak trim levels to set them back to their original reference.
For this purpose, Hilo has ultra-accurate, 25-turn trim pots accessible from the bottom of the chassis that can be used to adjust + or -
.5dB from the established trim level. Here are the steps to calibrate via these trim pots:
1. Remove the plate from the bottom of Hilo. There are four screws that hold
it in place. The front-right rubber foot will need to be removed to allow
access to one of the screws. Locate the input and output trim pots on the
underside of the Hilo main board.
2. Set the Line In and/or Line Out trim levels on the Hilo Home page to the
value closest to your desired level.
3. It is best to use sine wave tones to adjust trims. If adjusting Input trim levels, send tones from an external device and
measure the results in either software or a scope with digital inputs. It is best to avoid analog input routed to analog output
paths for this kind of calibration. If adjusting Hilo Output Trims, send tones from a software source via the USB connection,
or tones from an external device connected to one of Hilo’s digital inputs routed to the Line Out. Make sure that the entire
signal path is set to unity gain.
4.
Adjust the trims clockwise to increase the gain on the inputs or outputs, or counter clockwise to decrease gain until the
desired reference level is achieved.
Keep in mind that this variation will also be represented in other trim levels that are selected. For instance if a trim level of +22dB is
active, and the trim pots have altered that to 22.25dB, if later a trim value of +24dB is selected from the Hilo, the resulting signal will
be +24.25 dB.
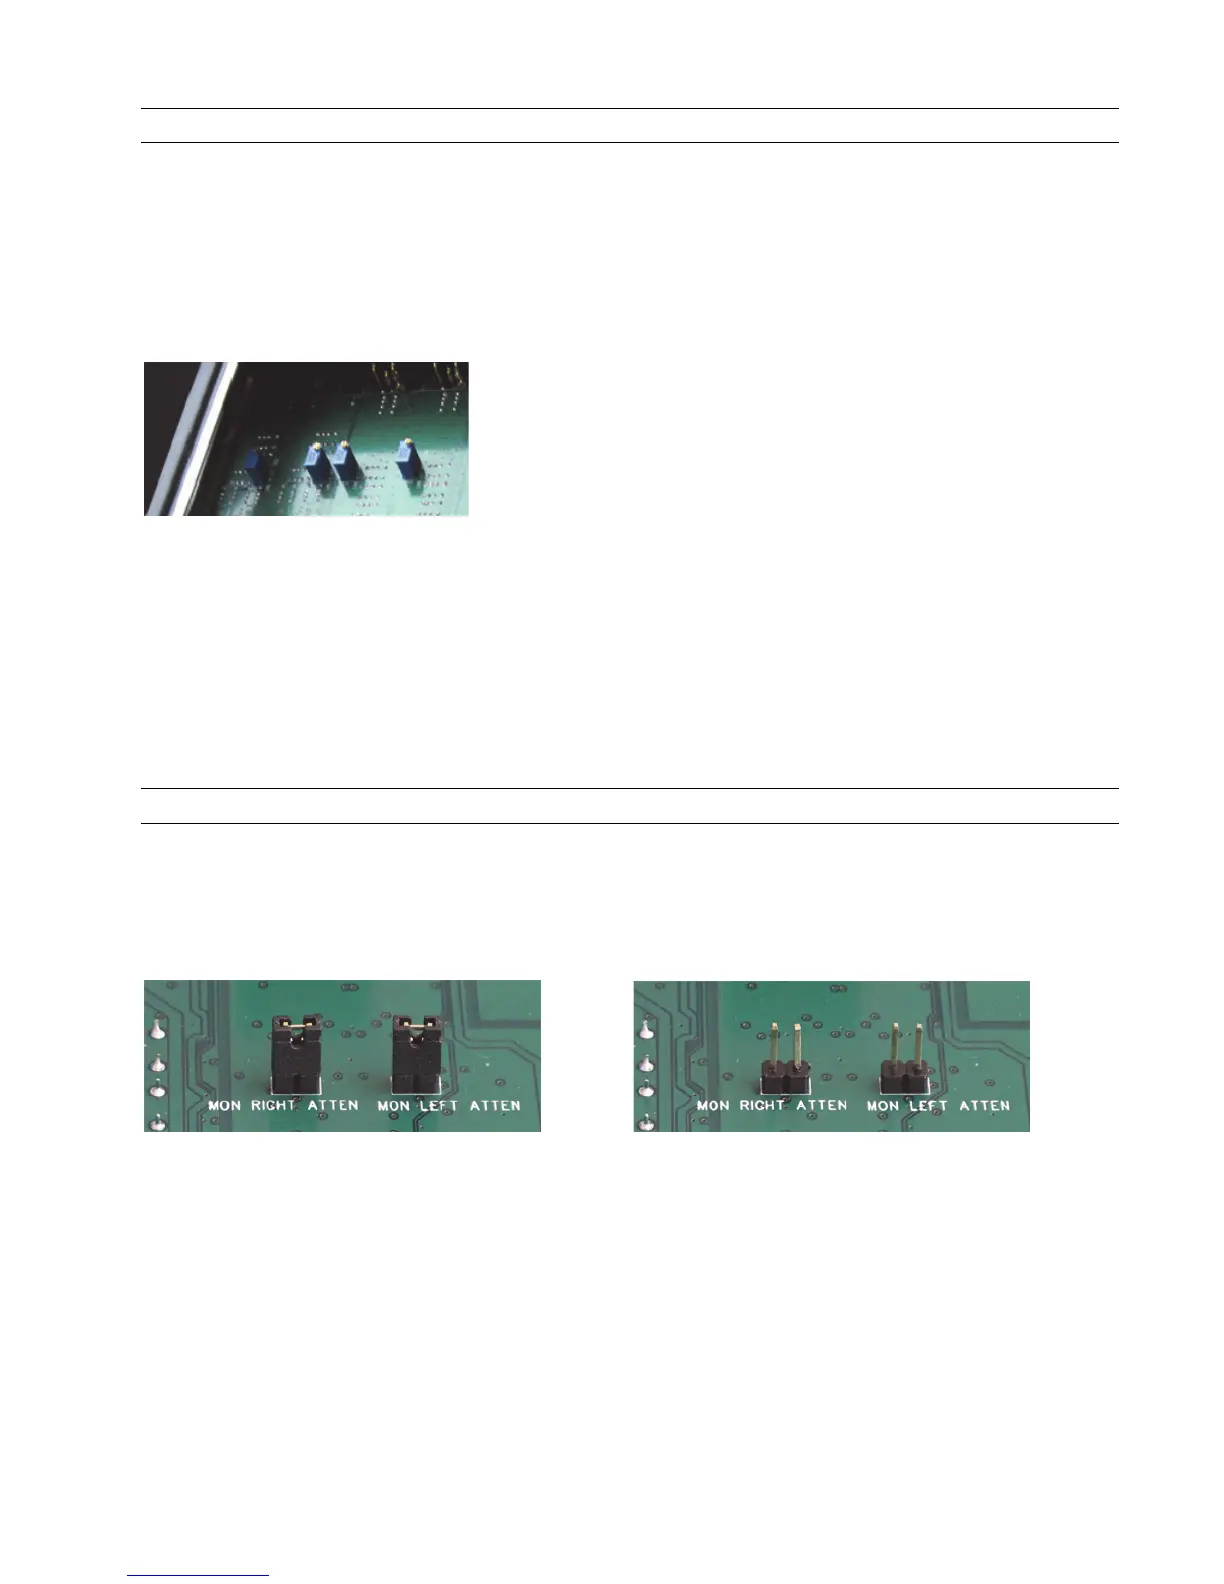
9.5 Setting the Monitor out Level Mode
By default, the Hilo Monitor Outputs are calibrated to a maximum of +10dBu. This is a standard reference level for powered monitors.
If the Monitor Outputs are to be used with powered monitors or a power amp connected to passive monitors, then this setting is likely
appropriate.
If instead, one wishes to connect the Monitor Output to some other professional line level device, then it may be desirable to set the
Monitor Out to its alternate setting, which is +24dBu.
Monitor Output Level Default +10 dBu Monitor Output Level Option +24 dBu
This setting is established with jumpers on the Hilo mainboard. To access them, remove the bottom plate on the Hilo (it will be
necessary to remove one of the rubber feet to accomplish that). The pins in question are labeled Mon Right Atten (short for Monitor
Output Right Channel Attenuation) or Mon Left Atten. Removing the jumpers sets the levels to the alternate +24dBu mode.
If the desired level is less than +24dBu (+22dBu) for instance, then you can additionally attenuate with the Hilo Monitor Out volume
control.