Page 38
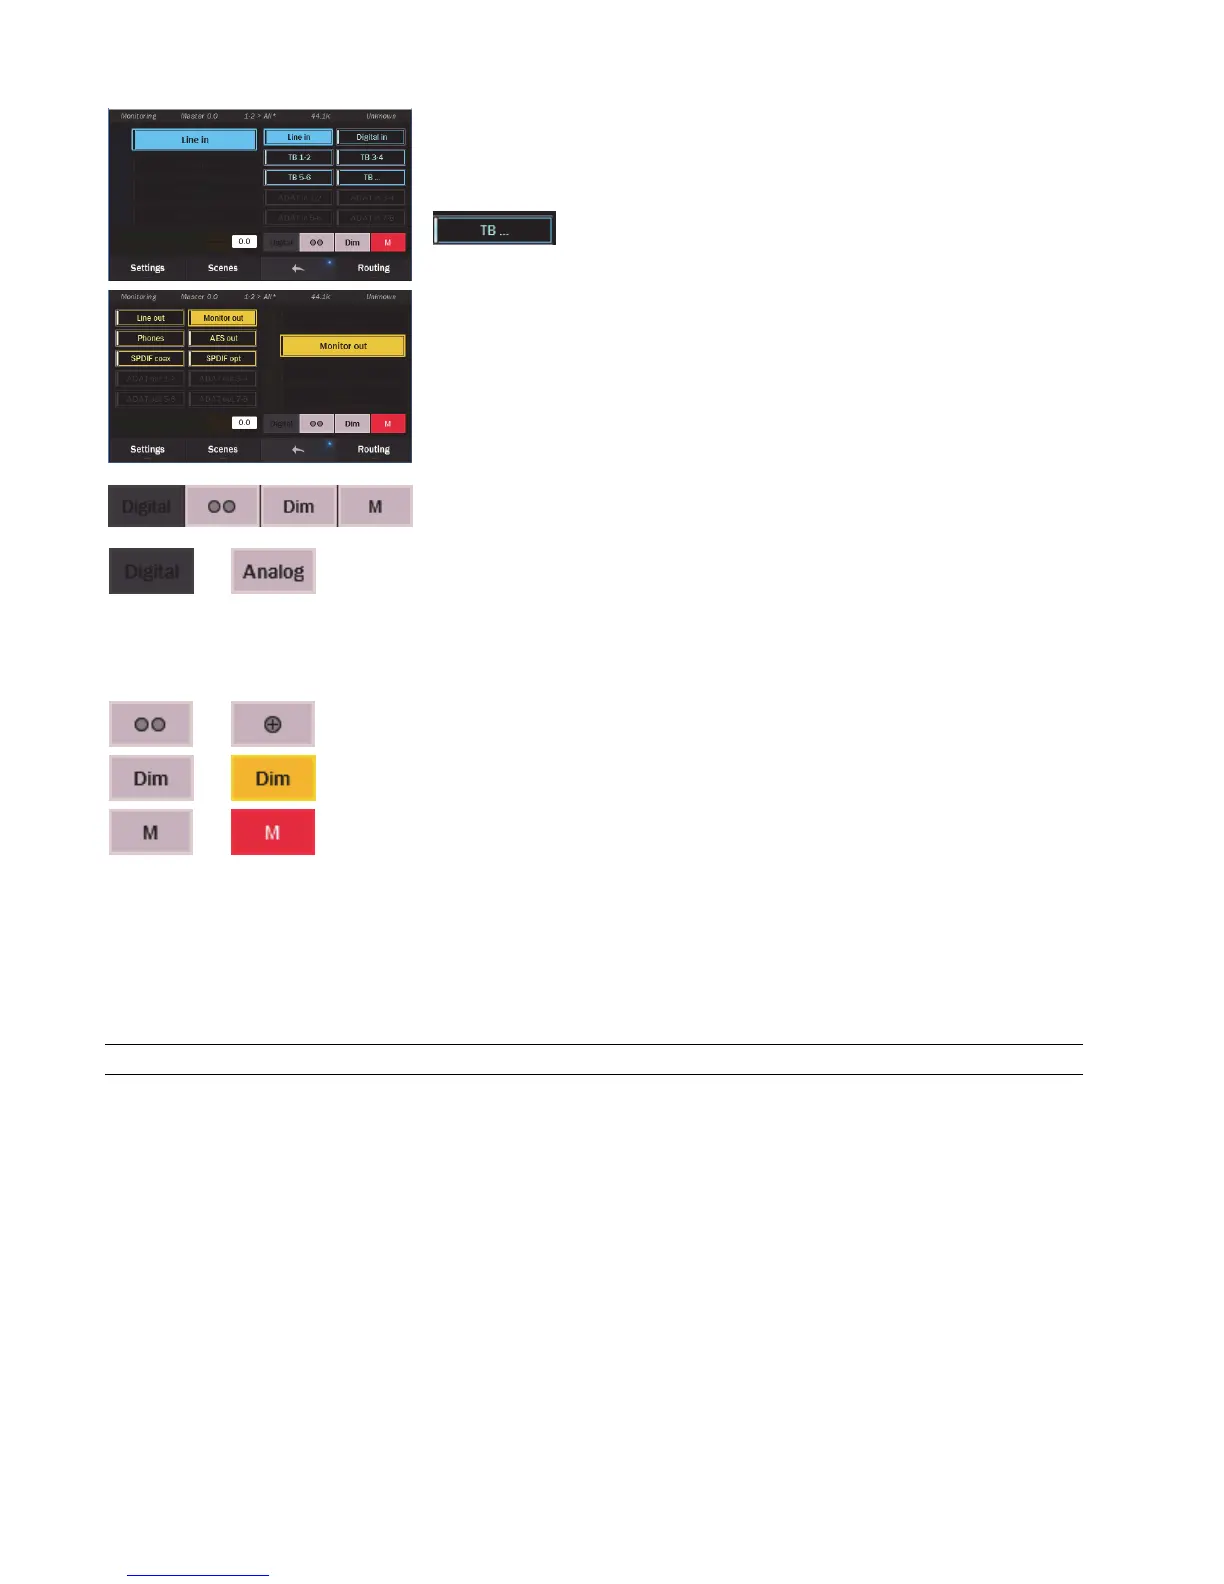
There are four slots for sources and for destinations. To select which sources are
displayed, simply press and hold the source selection button that you wish to change. A
menu of sources will appear. Simply select the source you want and it will become
active. For Record sources 7-16, click this button to reveal all of the available pairs
.
From this screen the fader will control the “Master Out” volume control.
Choosing destinations out is the same process as sources: press and hold a destination
button to reveal a menu of choices.
From this screen, the fader will control the relative level of the output selected. This is
extremely helpful if one needs to correct for a level discrepancy between two outputs.
For instance, the Line Out in its default state puts out a hotter signal than the Monitor
Out. From this screen you can attenuate the Line Out so that it matches the Monitor Out.
The amount of attenuation, in dB, will be displayed on the fader. Also the status strip at
the top of the page will indicate which output is being attenuated.
There are additional controls for the selected output (destination) devices accessible from
the Monitor page.
The Monitor and Phones out both allow analog volume control, as well as digital volume control. All
other outputs on Hilo only feature digital volume control. The default state for Monitor Out and
Phones out is “Analog”, as this is generally considered superior. There are cases though, where one
may wish to attenuate from the digital domain, for instance when the sum of signals feeding an output
is clipping digitally, and it would be best to attenuate before it hits the DA converter. This button
allows toggling between the analog and digital level control for Monitor out and Phones out. It is
disabled for all other outputs.
This controls the state of the selected output. The default state is stereo. Tapping this button allows
toggling to summed mono
The Dim control attenuates the selected output by 20dB. When active, the button will flash yellow.
Keep in mind that the DIM state will remain active even when you exit the Monitoring page.
The Mute button will mute the selected output. It is red when engaged, and gray when disengaged.
When you exit the Monitoring page, and open the Routing page, Hilo returns to its previous routing scheme. The levels that were
established in the Monitoring page remain, however, including the Master out setting. This was done so that there would not be an
unexpected jump in output level when exiting the Monitoring page, by disabling any Master Out attenuation that had been performed
there. If one wishes to discard the Master Out attenuation, or just wishes to not have Master Out control be active, switch to the
Settings > System page, open Rotary control Settings, and remove “Master Out” as one of the control options. Please note: if any
attenuation is active on the Master Out when this is done, there may be a sudden increase in output level as that attenuation gets
removed.
5.3.10 Routing
Although Hilo is, at first glance, a two channel AD/DA converter, it is really much more and this page gets down to the nitty gritty.
The Routing page is where any combination of Hilo’s inputs can be routed to any combination of Hilo’s outputs. The principle here
was to make the various I/O formats as independent as possible, very little is “hard-wired”. This is not point-to-point patching like on
the Monitoring page. Multiple sources can be merged to a single output. Levels can be set and adjusted for all input sources and
outputs. Sources can be mirrored to multiple outputs. Sources and outputs can be muted. This is why Hilo has an internal 32 x 32
channel mixer. This is where you get to use it.