Page 39
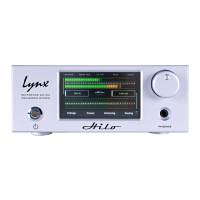
As you can see, the page is divided into input sources on the left and outputs on the right. What we are seeing here is which input
sources are assigned to the displayed output. We are not turning inputs On and Off, we are turning the connection between an input
and output On or Off. Think of it as a patch cables. Levels also can be managed here, both output levels and levels of monitor sources.
To understand signal flow on this page, it is important to get a grasp on what the appearance of the buttons mean. When a button is “in
focus”, that mean that the faders, meters and other controls apply to that input or output.
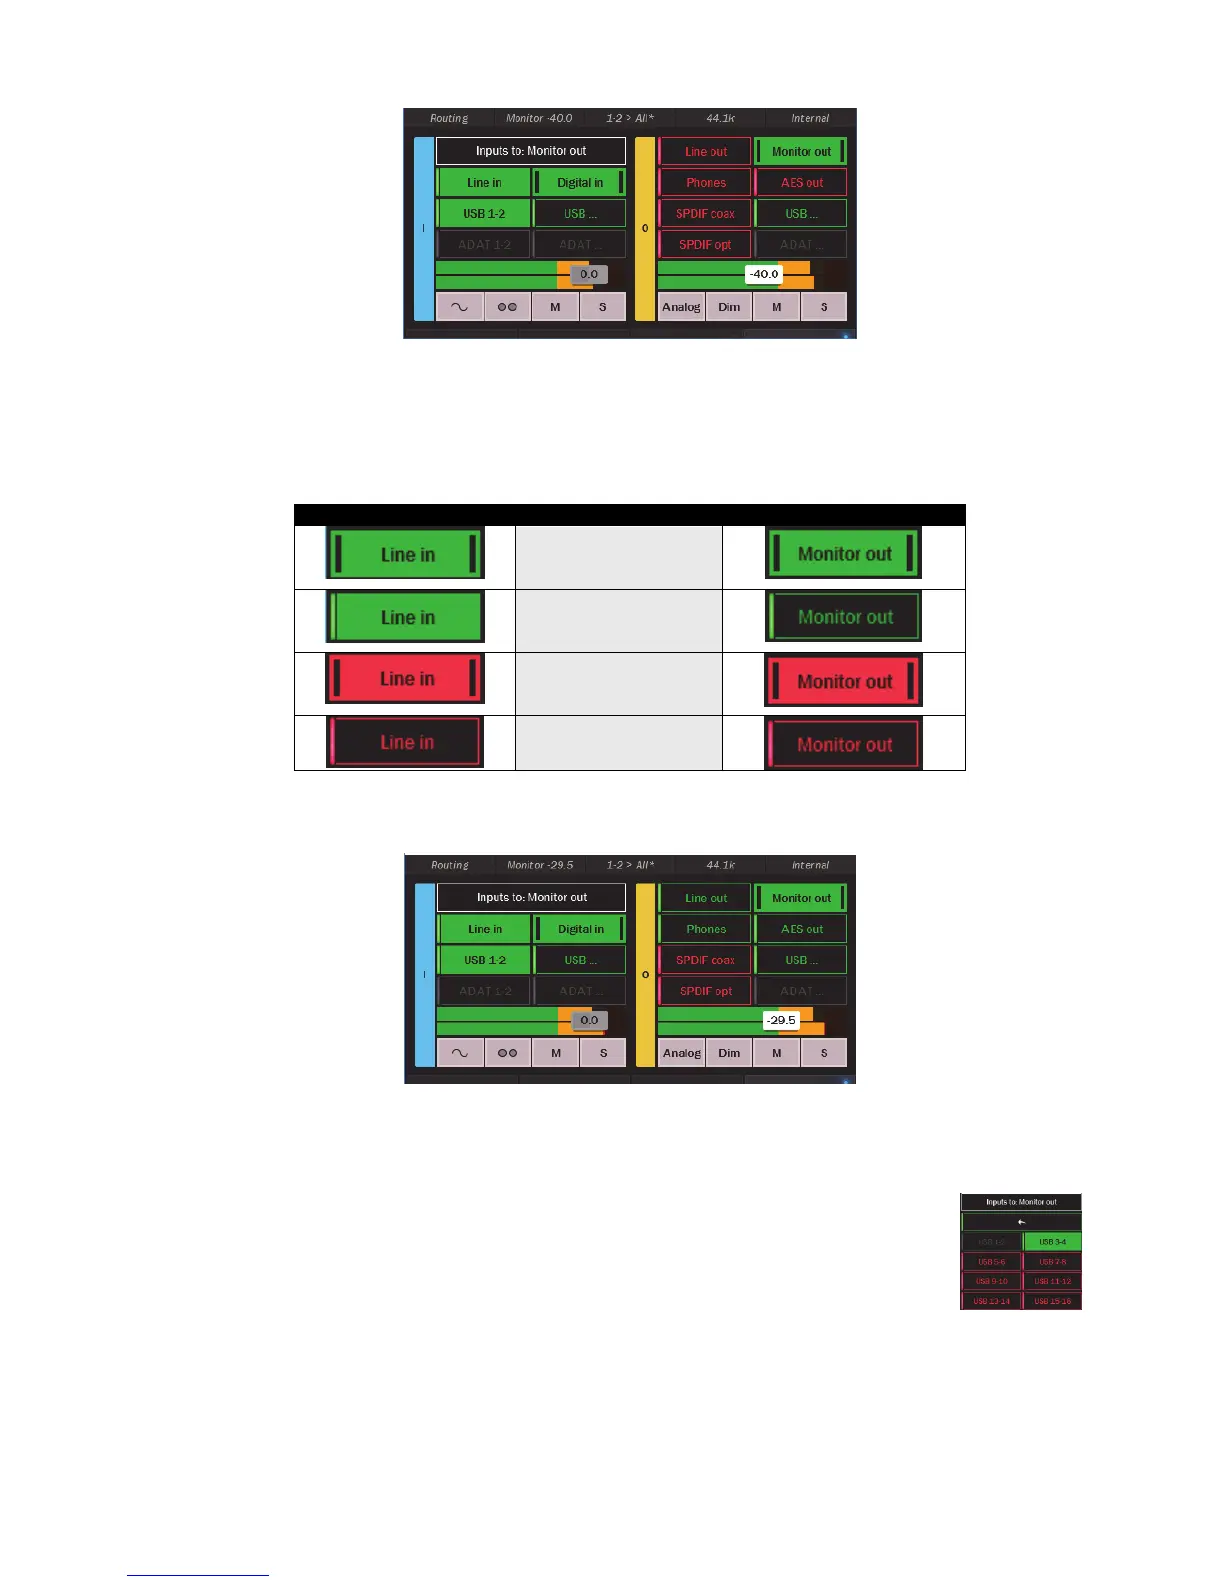
Inputs (left side of screen) Outputs (right side of screen)
Enabled and in focus
(Active)
Enabled and not in focus
Muted and in focus
Muted and not in focus
Now, let’s look at the elements on the Routing page to get a better grasp on what we are seeing here.
This section shows input sources
This label identifies which output these sources would be getting routed to
These buttons can be tapped to enable or mute input sources to the active output (Monitor Out in the graphic). Note: Digital In will
be whichever of the three choices; AES, SPDIF Coax, or SPDIF Optical, that have been selected in Settings > Audio.
There are up to 8 stereo Play devices available to use on your Hilo (depending on the configuration).
These correspond to the outputs available from within your computer audio software. Not all will fit on the
input side of the Routing page. Play 1+2 has its own button, but to access the other play devices click this
button and choose any of the other available Play devices. As with the main screen, devices in green are
enabled, in red are muted. Use the arrow at the top to close this page.
These buttons show the ADAT inputs as a source, but they are disabled. ADAT sources become available
when an ADAT source is detected at the optical input. With a USB Hilo, ADAT use requires the unit to be in 16-channel mode from
Settings > System.
This combined fader and meter shows the level of the input source that is In Focus. With the fader you can attenuate the amount of
signal from the In Focus input to the active output. Keep in mind that this does not affect the signal level of the input globally, only the
level of that signal passed to the active output. For instance, in the graphic pictured, if you attenuate the fader it will reduce the signal
level from the Digital in routed to the Monitor Out. It will have no effect on the Digital In routed elsewhere, the Line Out for instance.
The amount of attenuation appears numerically in dB on the fader. You can control the fader with the rotary encoder. Press in to