Page 3
1.7 Using this manual
To insure smooth sailing with your new product, we recommend reading through the entire manual before using Hilo. Thereafter, use
the manual as a reference as needed when questions arise.
The following typographic conventions are used in this manual:
ALL UPPER CASE TEXT refers to a specific parameter selection control (i.e. SYNC SOURCE) or a cable connection.
Text in quotation marks indicates a parameter selection value or menu option (i.e. “EXT”).
Phrases, such as: Start > Programs > Lynx Studio Technology use the greater than symbol (“>”) to indicate multiple menu
options or mouse selections within a software control context.
1.8 Registration
Lynx is committed to providing you with the best service possible. To help us serve you better, please be sure to register your Hilo.
Register on the web at: http://www.lynxstudio.com/register
Once you are registered you will automatically receive notifications of new products and upgrades.
2 Getting Started Hilo-USB
Hilo was designed to be a product that is so easy to use that this section of the manual would scarcely be necessary. However, it is
quicker to learn how the device works in one go, then to spend precious minutes figuring things out by randomly pressing buttons. We
recommend reading this section thoroughly, before putting Hilo to serious use, if you can manage it.
2.1 Unpacking
Before setting up Hilo for use, remove it from the box and verify that the box contents described in section 1.3 are all present.
If all items are present, connect the Hilo AC power cord to a grounded AC Outlet, or power
distribution unit. Switch on the power switch on the back of Hilo (note: the “|” position on the
power button is “On” and the “O” is “Off”.)
Hilo may power up automatically when AC is applied (this varies by firmware version). If not,
press the front panel standby switch and verify that Hilo powers up.
If it does not, verify that the selected AC power source is operational. If it is and the unit still will
not power up, please contact Lynx technical support.
If Hilo DOES power up, move on to Set up…
2.2 Set up
Hilo was designed to be adaptable to a variety of operational environments: on a desktop for Audiophile enthusiasts, in an equipment
rack for recording studios, over a mixing console for a mastering engineer, etc. If Hilo is to be used on a desktop or other flat surface,
it is best to leave the pre-installed rubber feet in place. These are designed to prevent scratching of Hilo or the surface that it is set
upon.
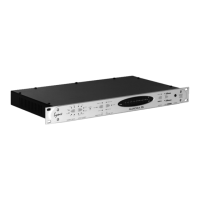
In a recording studio context, where space is at a premium, one may choose to rack mount Hilo. A rack kit for the Hilo is available
from Lynx dealers, or from www.lynxstudio.com.