214683 325 Revision A
Figure 4.35: Right Side of Auger
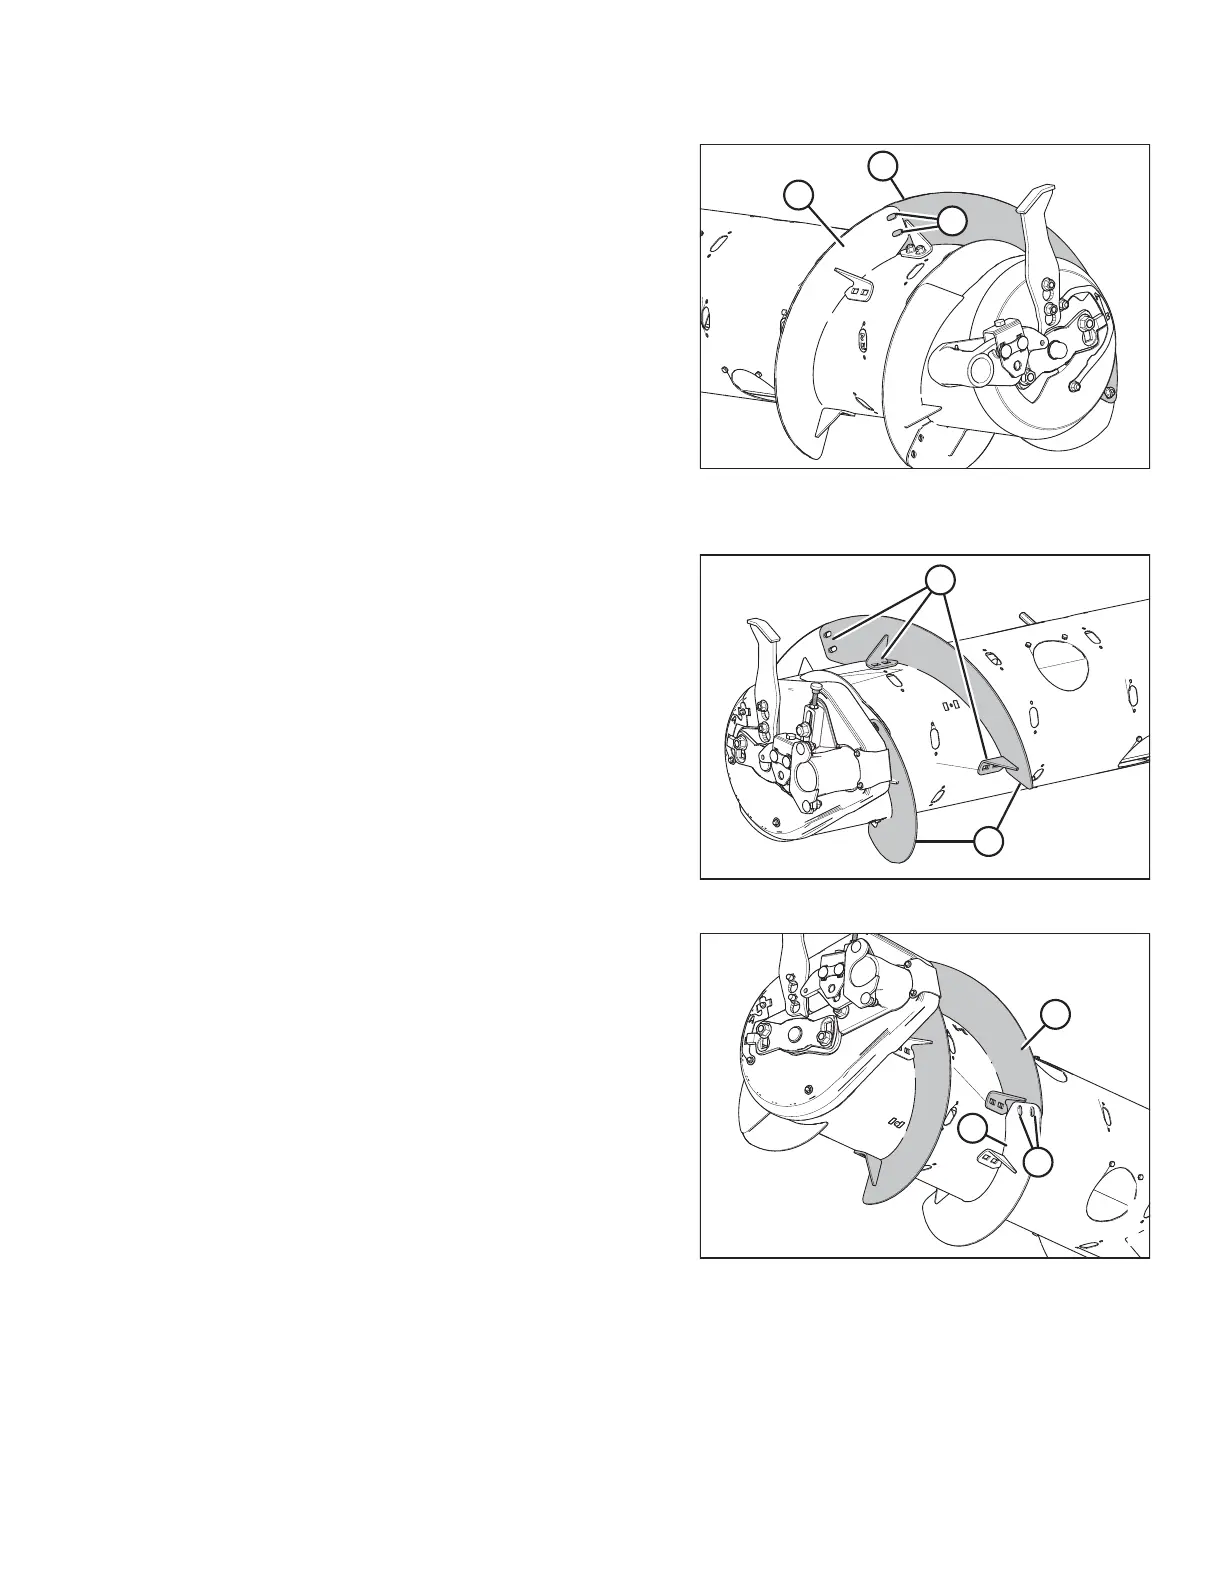
9. Position another bolt-on flighting (A) outboard of the
temporarily installed flighting (B). Mark hole
locations (C) of the bolt-on flighting onto the temporarily
installed bolt-on flighting (B).
10. Remove temporarily installed bolt-on flighting (B) from
the auger and drill two 11 mm (7/16 in.) holes at the
marked locations.
11. Install the bolt-on flighting (B) with newly drilled holes
using six carriage head bolts and nuts.
IMPORTANT:
Carriage bolt heads must be installed on inside of auger
to prevent damage to internal components.
12. Repeat Steps 9, page 325 to 11, page 325 to the
remaining bolt-on flighting on the right side of the auger.
Figure 4.36: Left Side of Auger
13. Position two bolt-on flightings (A) on the left side, as
shown. Temporarily secure flightings with two carriage
head bolts and nuts at each location (B).
Figure 4.37: Left Side of Auger
14. Position another bolt-on flighting (A) outboard of the
temporarily installed flighting (B). Mark hole
locations (C) of the bolt-on flighting onto the temporarily
installed bolt-on flighting.
15. Remove temporarily installed bolt-on flighting (B) from
the auger and drill two 11 mm (7/16 in.) holes at the
marked locations.
16. Install the bolt-on flighting (B) with newly drilled holes
using six carriage head bolts and nuts.
IMPORTANT:
Carriage bolt heads must be installed on inside of auger
to prevent damage to internal components.
17. Repeat Steps 14, page 325 to 16, page 325 to the
remaining bolt-on flighting on the left side of the auger.
HEADER ATTACHMENT/DETACHMENT