214633 14 Revision C
3.2 Installing Components
This section explains how to install the basic parts of the transport system.
3.2.1 Installing Latch Assembly
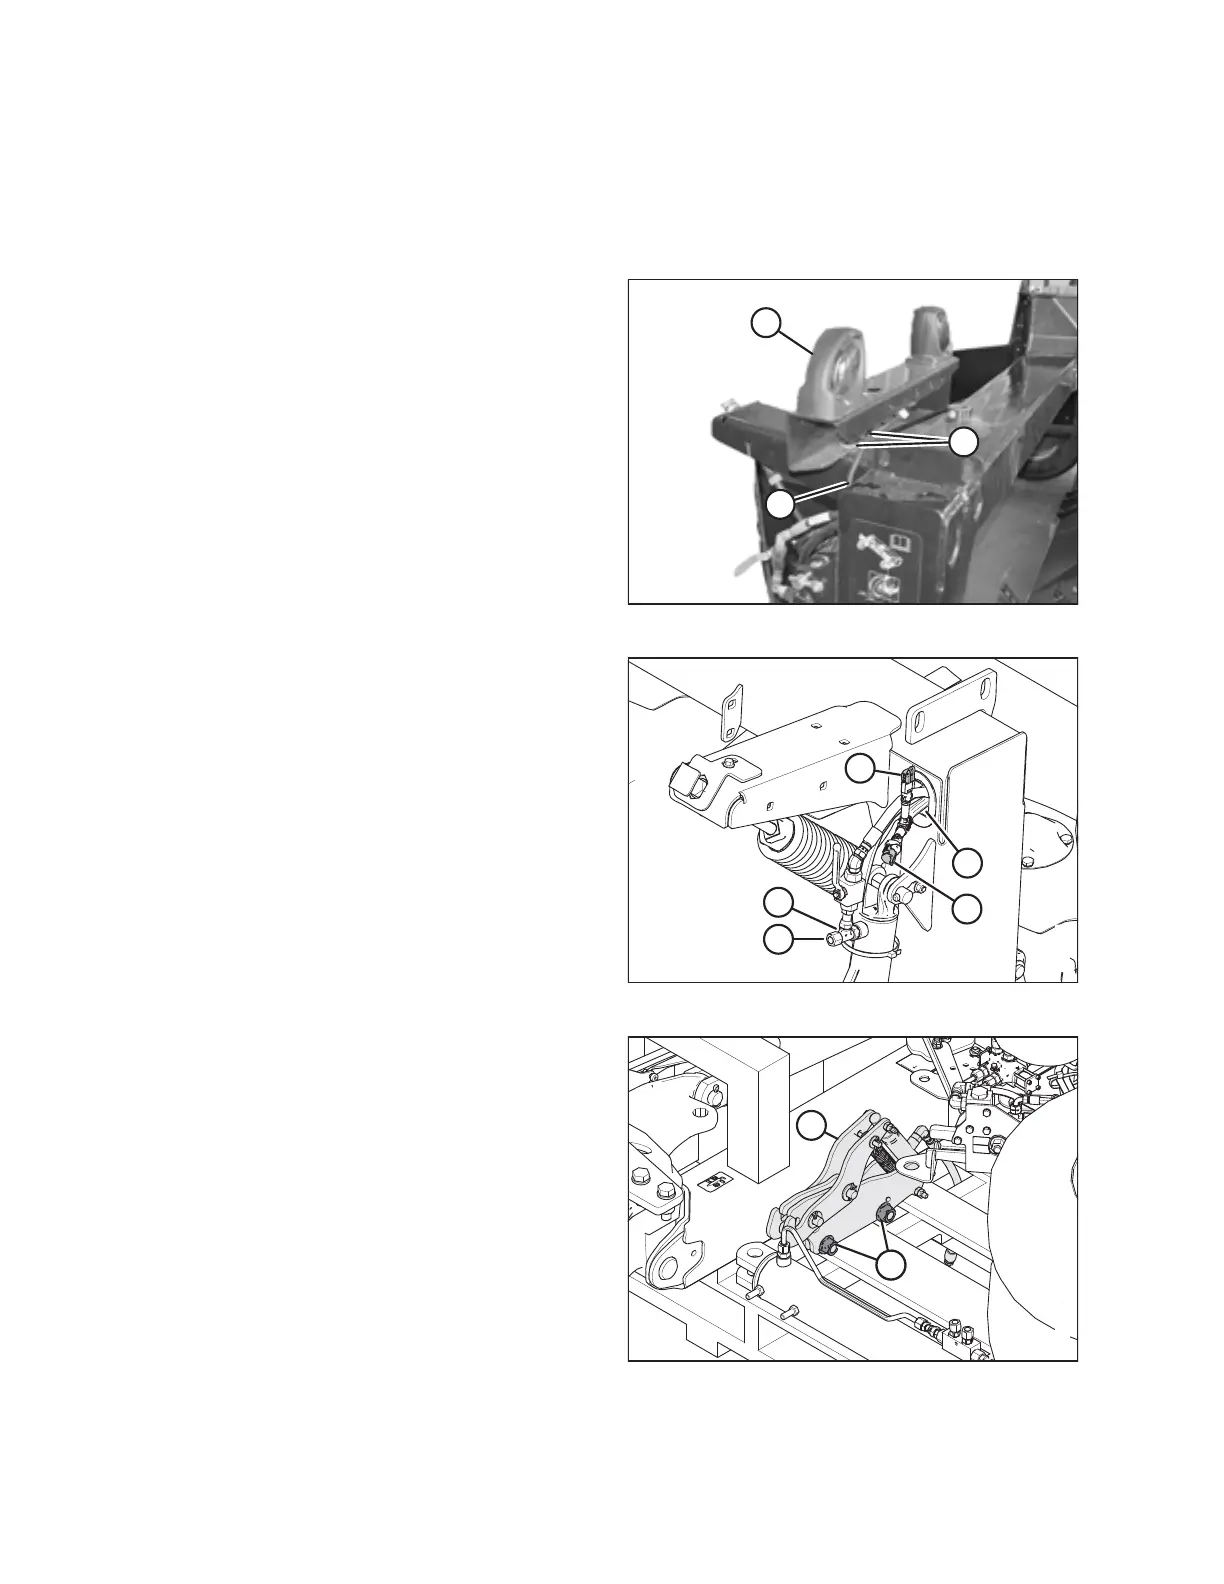
Figure 3.3: Light Bracket
1. Disconnect right light electrical connection (A).
2. Remove two bolts (B) that secure right light assembly (C) to
the carrier frame.
3. Remove light assembly (C). Retain the light assembly and
hardware for installation later.
Figure 3.4: Capped Connectors
4. Cap right light connector P406 with cap (A) (MD #134741).
5. Cap right light connector P403 with cap (B) (MD #134742).
6. Tuck connectors P406 and P403 into frame (C).
7. For model year 2018 and later: Remove cap (D) from tee
fitting (E).
8. For model year 2017 and prior: Install tee fitting (E)
(MD #136453) in place of the elbow fitting.
Figure 3.5: Latch Packing
9. On the transport pallet, remove the shipping banding and
packing material from latch assembly (A). Remove the latch
assembly.
10. Remove two M20 mounting bolts, washers, and nuts (B)
from the latch assembly, and retain for use later.
INSTALLATION INSTRUCTIONS