404 Data Integration (Flash Professional Only)
Adding a binding
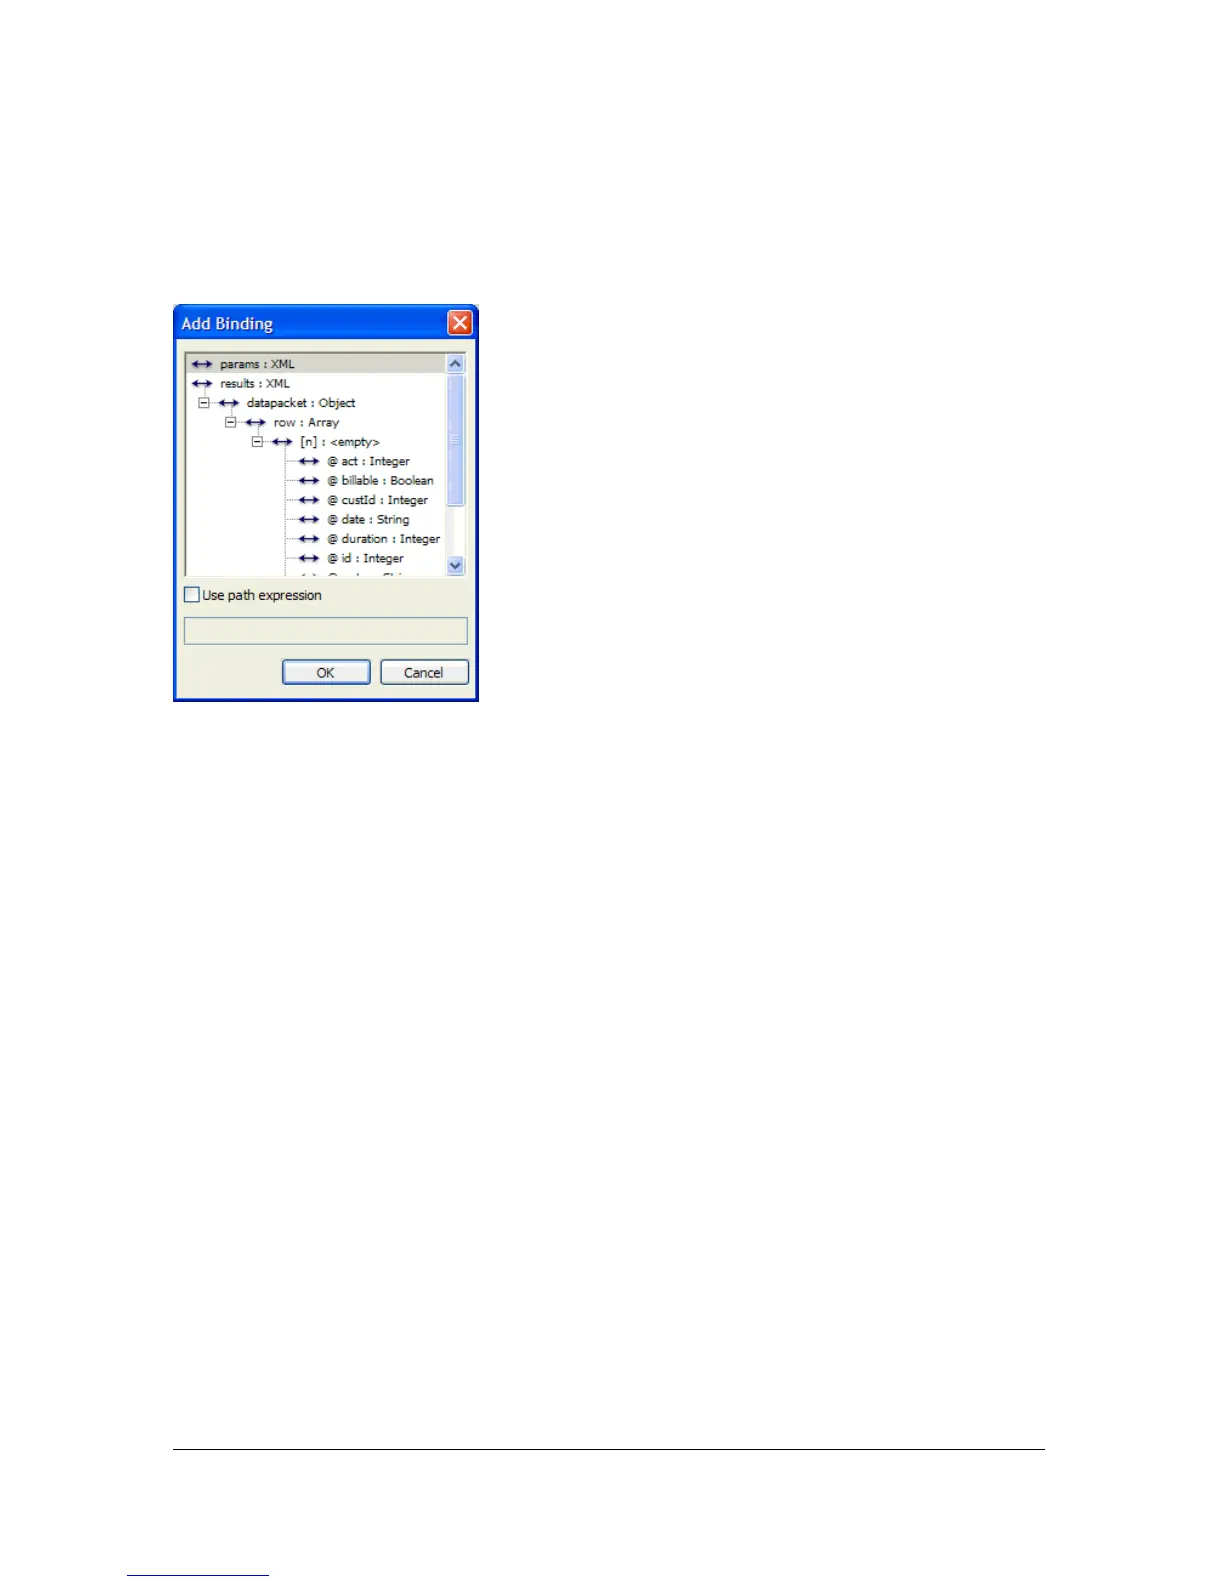
To add a binding, click the Add Binding (+) button on the Bindings tab. The Add Binding
dialog box appears.
This dialog box shows all the schema items (properties) for the selected component. You use
this dialog box to select which property you want to expose for binding. Component
properties appear as root nodes within the schema tree. An arrow icon represents whether a
schema item has read/write access, as follows: a right-pointing arrow represents a write-only
property, a left-pointing arrow represents a read-only property, and a bidirectional arrow
represents a read-write property. (See “Configuring bindings” on page 405.)
To walk through the steps of creating a binding, see “Creating a simple application”
on page 391, which creates a simple data application, or “A simple binding example”
on page 395, which demonstrates how bindings connect two UI components.
In general, follow these steps to add a binding:
1. Select the component on the Stage for which you want a binding.
2. In the Component inspector, click the Bindings tab.
3. Click the Add Binding button. The Add Binding dialog box opens.
4. Select the property for which you want to add a binding.
5. In the bottom pane of the Bindings tab, click Bound To. The value field becomes editable.
6. Click the magnifying glass icon in the field and select the component path and schema
location to bind to. See “Defining what to bind to” on page 406.