26
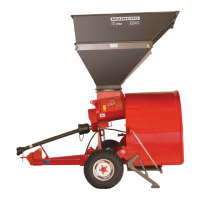
21. Mount the rope “A” Fig. 40 over the
bag and in front of the folds, and hook
it under the rack, passing it by the co-
rresponding holes then put the rope
“B” (six in total) that are the ones that
prevent that the rope “A”, get moved
together with the bag, as this goes out.
This rope is attached by one end to
the chassis, in the rings “C” and by the
other end to the rope “A”. The length
wiull be the one that allows sticking the
rope “A” very close to the folds.
22. Locate the machine in the place were
the bag is going to be made, “See bag
Clousure”
BEGIN TO FILL THE BAG
To begin the llin process you have to:
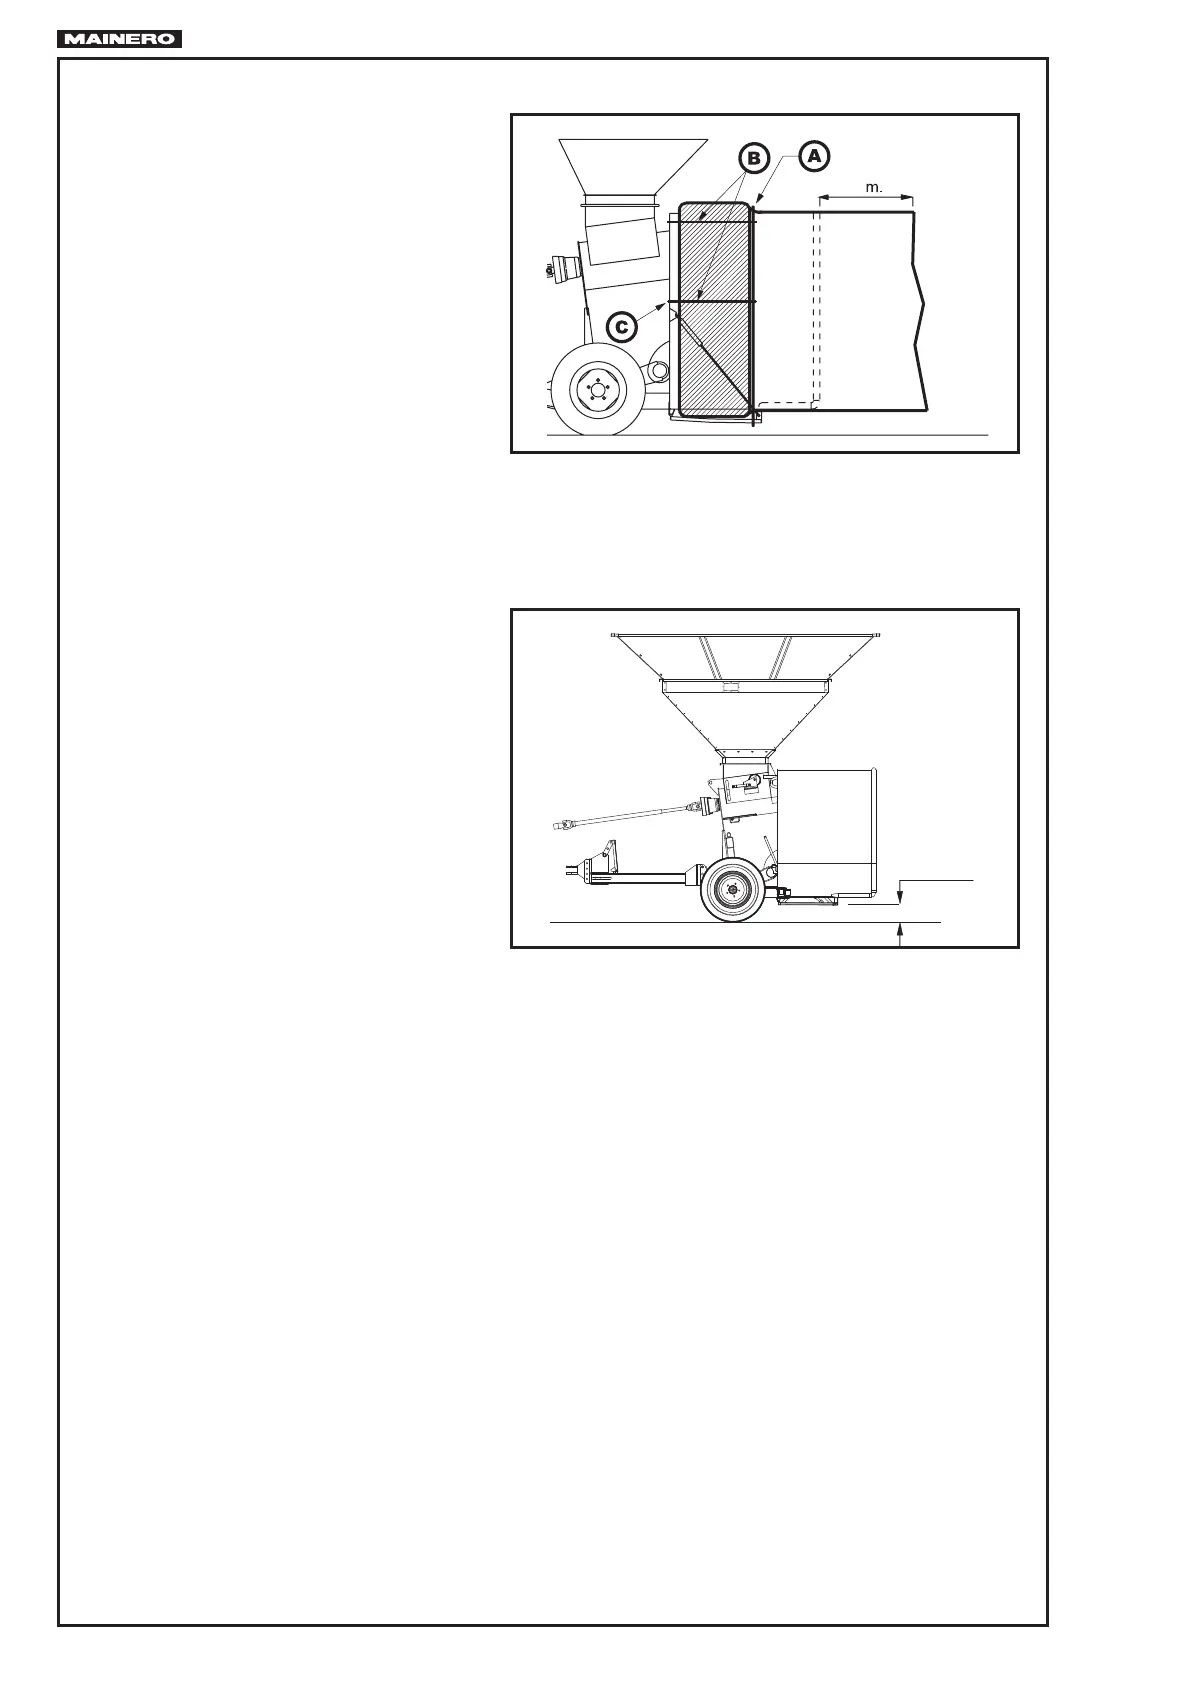
1. Locate the machine in the work place it
is foresee to start the bag.
2. Set the machine at a height H : 10 cm
(4 in) Fig. 41 from the rack.
3. Pull out from the end of the tunnel 3 m
(10 ft.) of bag.
4. Do the bag closure (see bag clousu-
re).
1
H: 10 cm
FIG.40
FIG.41