BOOM RT540E SERVICE MANUAL
4-16 Published 4-20-2015, Control # 502-01
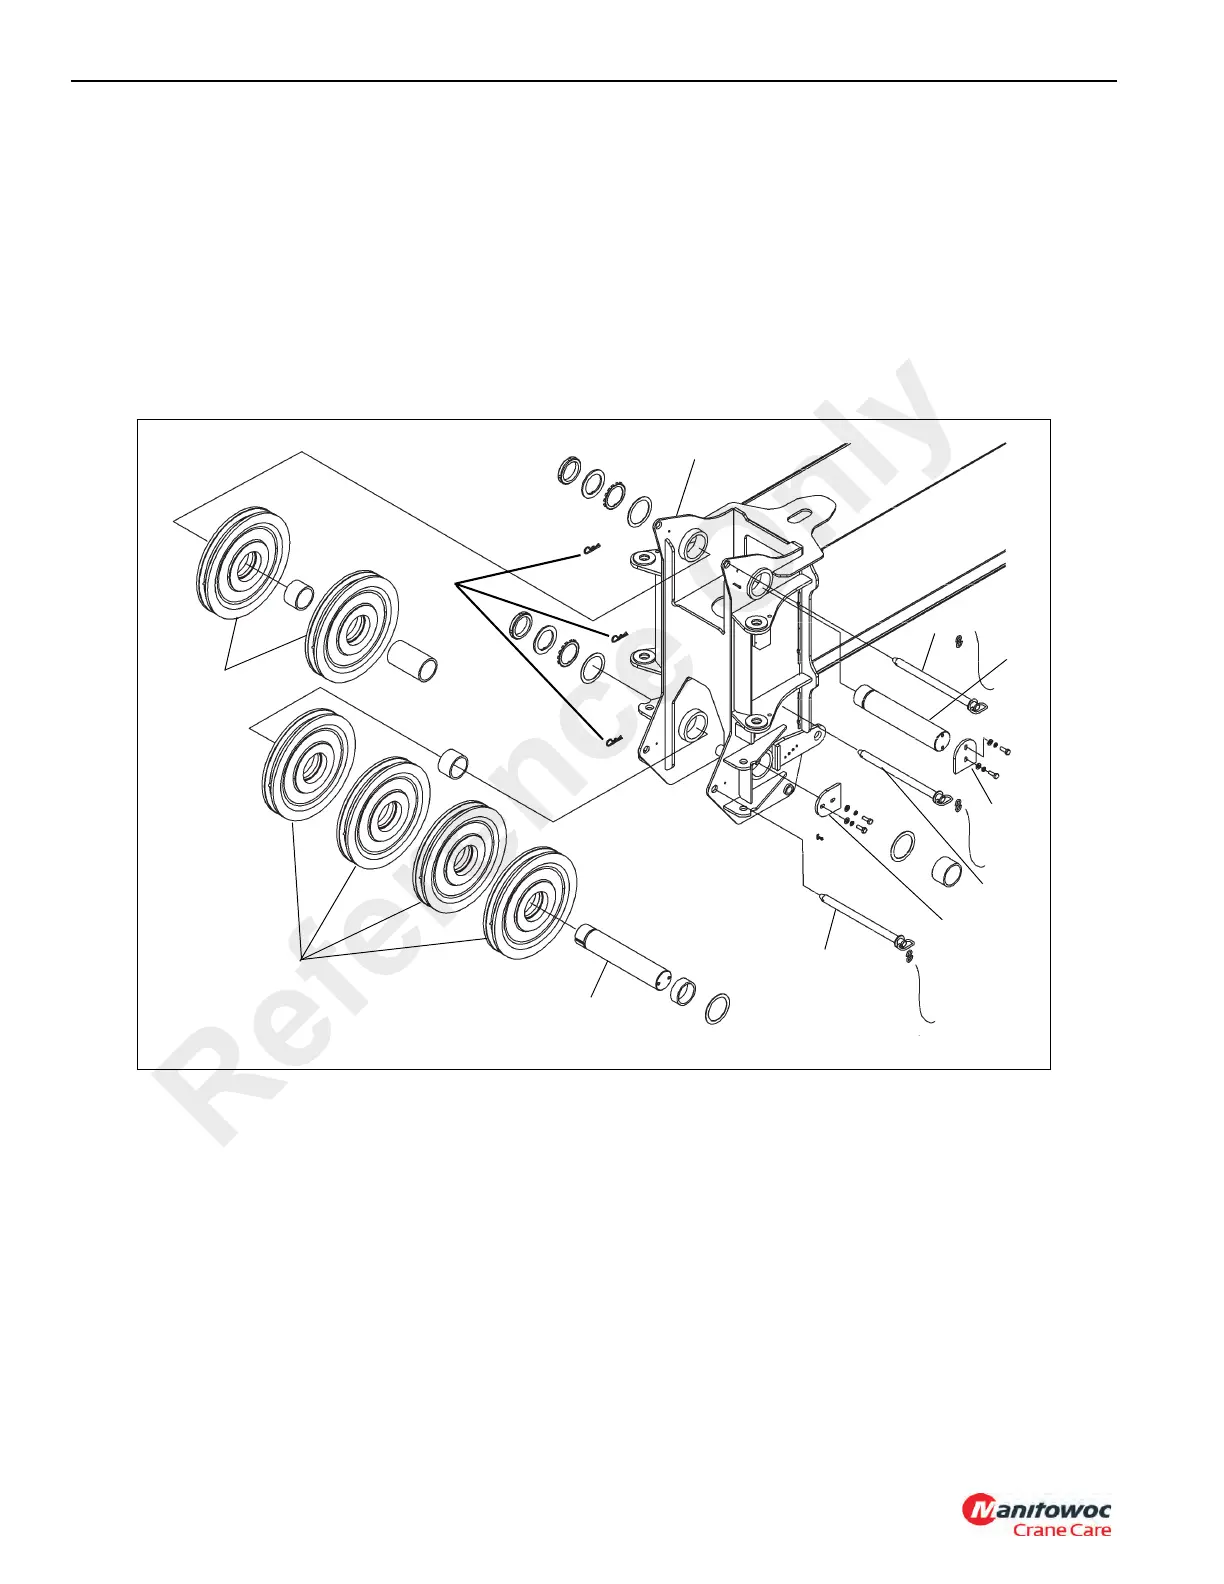
Boom Nose Sheaves Removal
1. Remove the clip pins from the cable retainer pins
(Figure 4-35, 7) and remove the cable retainer pins
(Figure 4-35, 3) from the upper and lower part of the
boom nose.
2. Remove the two bolts securing the end cap
(Figure 4-35, 2) to the upper boom nose sheave shaft
(Figure 4-35, 6). Remove the end cap.
NOTE: The boom nose sheave shafts weigh
approximately 12.5 kg (27.5 lb) each. The boom
nose sheaves weigh approximately 17.4 kg (38 lb)
each.
3. Carefully pull the upper boom nose sheave shaft
(Figure 4-35, 6) from the boom nose, removing the
spacers, and boom nose sheaves (Figure 4-35, 4). Note
the quantity of the spacers for installation.
4. Repeat steps 2 and 3 and remove the lower boom nose
sheave shaft.
5. Remove the shim, washer, keyed washer and locknut
from both sheave shafts.
Boom Nose Sheaves Installation
NOTE: The boom nose sheave weighs approximately 17.4
kg (38 lb).
1. Install the spacers and sheaves (Figure 4-35, 4) onto the
sheave shaft while installing the sheave shafts into the
lower boom nose (Figure 4-35, 5).
NOTE: The lockwasher can be used more than once but
must be replaced if not in good condition.
2. Install the lockwasher onto the sheave shaft with the
tabs facing out.
3. Install the locknut, washer, keyed washer, and shims (if
necessary) onto the boom nose sheave shaft with the
chamfer side out. Install the end cap (Figure 4-35, 2)
onto the opposite end of the sheave shafts and secure in
place with the two bolts.
4. Tighten the locknut until the play in the bearings is
eliminated. Bend the lockwasher tabs to secure the
locknut in place.
5. Repeat steps 1 through 4 for the upper boom nose
sheaves and sheave shaft.
6. Install the cable retainer pins (Figure 4-35, 3) into the
upper and lower part of the boom nose and secure in
place with the clip pins (Figure 4-35, 7).
Reference Only

 Loading...


