4A-1790-13645--2 495 POWERHEAD
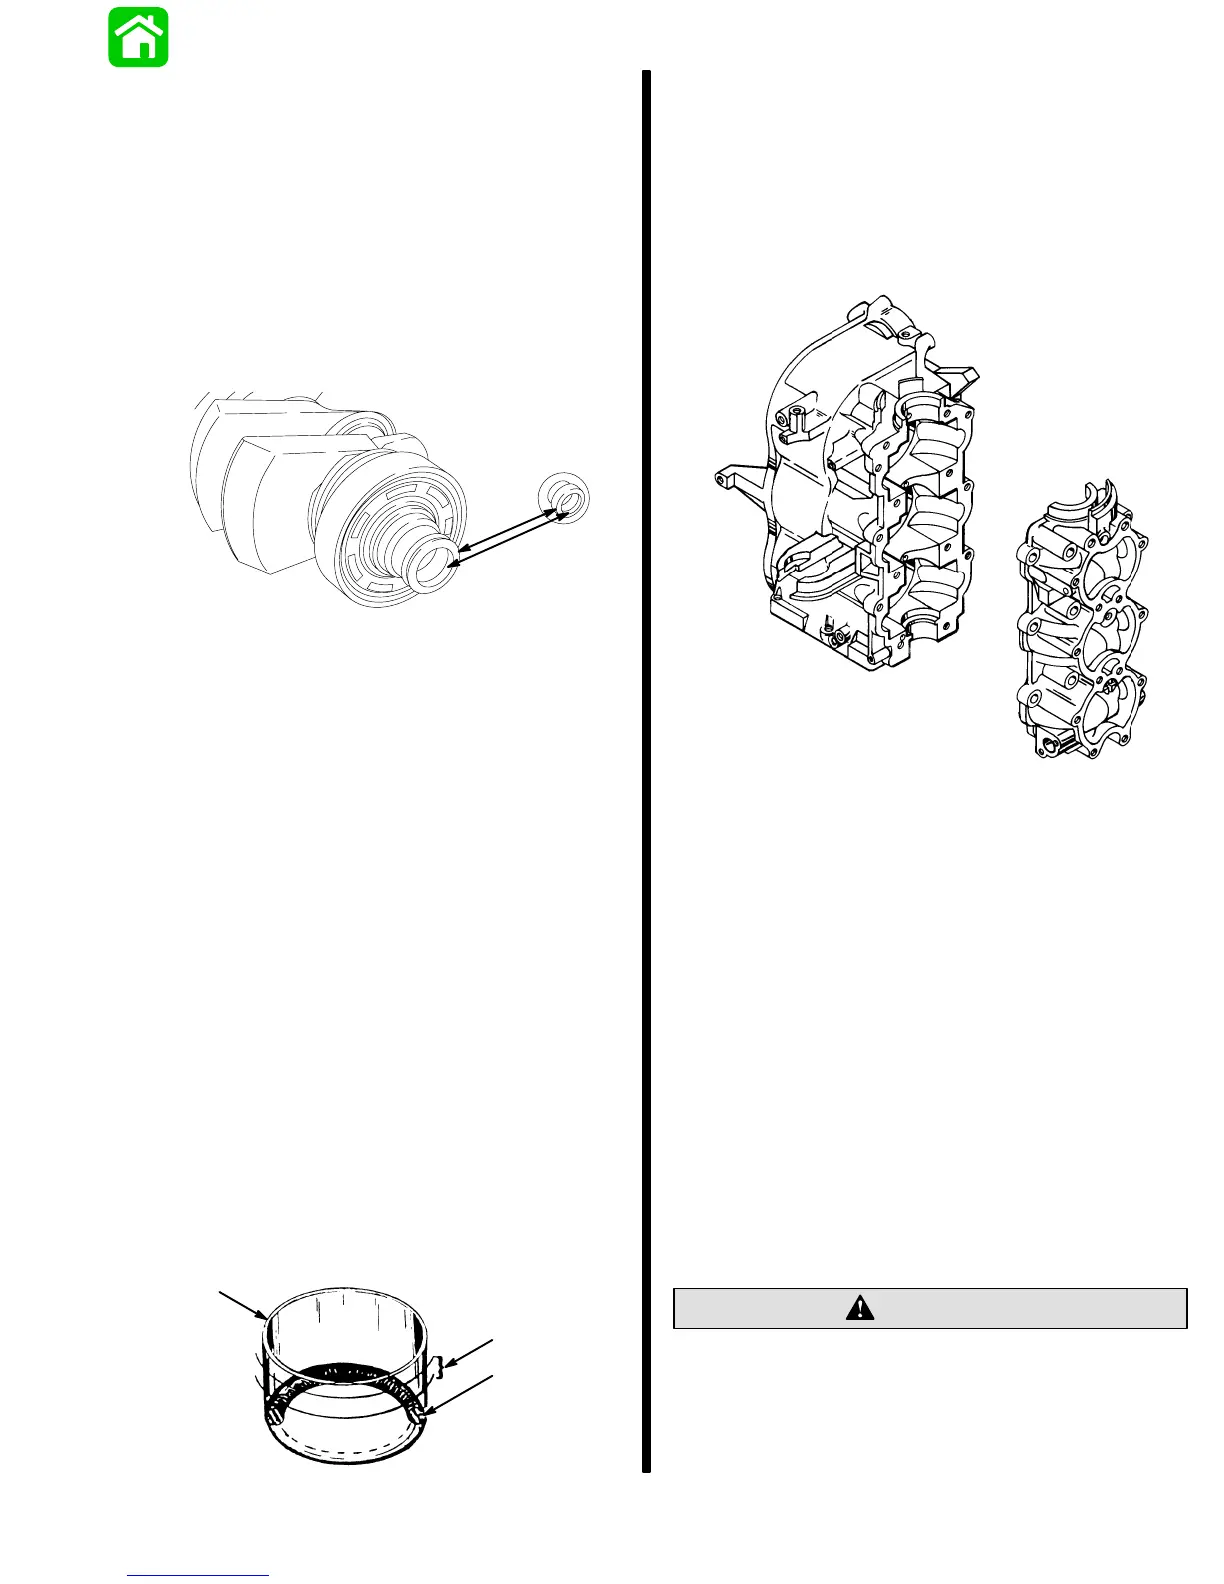
Seal carrier is press-fitted into the spline end of crank-
shaft.
NOTE:
Seal should be replaced as a routine proce-
dure without regard to appearance, to prevent water
leakage into crankshaft/driveshaft splines.
1. Remove seal by prying out of carrier, using an awl.
2. Inspect seal carrier for damage or looseness.
3. If replacement of carrier is necessary, use a pliers
to pull carrier from crankshaft, or tap gently off with
screwdriver and mallet.
20037
a
b
a - Seal Carrier
b - Seal
- OR -
Some models may be equipped with the following
sleeve (b), which retains an O-ring seal (c). The sleeve
is pushed over the crankshaft end until it bottoms-out
on a crank flange, leaving space for the O-ring between
the sleeve lip and the end of the crankshaft. Pop out the
O-ring with an awl - replace the O-ring seal.
IMPORTANT: The End Cap (lower) inside seal
rides on the “wear sleeve” (area “a”). If the outer
surface of the sleeve (in area “a”) is grooved or
corroded/pitted, replace by pulling off the sleeve
with pliers--it may be necessary to heat the sleeve
to release the Loctite sealant. Replace O-ring
AFTER wear-sleeve is installed on crankshaft.
To install the sleeve, apply Loctite 271 to the crank-
shaft; align sleeve squarely with crankshaft, place a
block of wood over end of sleeve, and tap lightly until
it bottoms-out. Wipe off excess sealant. The sleeve is
lightweight (31-gauge) stainless steel - DO NOT col-
lapse the end contour or otherwise distort its shape.
Align squarely - Tap gently!
a
b
c
Cleaning and Inspection
Cylinder Block and Crankcase Cover
IMPORTANT: Crankcase cover and cylinder block
are a matched, line-bored assembly and never
should be mismatched by using a different crank-
case cover or cylinder block.
1. Inspect cylinder block and crankcase cover for
cracks or fractures.
2. Check gasket surfaces for nicks, deep grooves,
cracks and distortions that could cause compres-
sion leakages.
3. Check that all water passages in cylinder block
are not obstructed. Check locating pins in cylinder
block that they are tight.
4. Check crankcase cover fuel/bleed passages that
they are not obstructed. Verify that check valves
in crankcase cover are not damaged.
5. Thoroughly clean cylinder block and crankcase
cover. Verify that all sealant and old gaskets are
removed from matching surfaces. Clean all car-
bon deposits from exhaust ports.
6. Inspect spark plug holes for stripped or damaged
threads.
If crankcase cover and cylinder block is to be
submerged in a very strong cleaning solution, it
will be necessary to remove the crankcase cover
cylinder block bleed system from cover/cylinder
block to prevent damage to hoses and chec
valves.
CAUTION