6C-790-13645--2 495 POWER-TRIM
Hydraulic System Troubleshooting
Support outboard with tilt lock lever when servicing
power trim system.
After debris or failed components have been
found (during troubleshooting procedures) dis-
assemble unit completely and replace all O-rings.
Check ball valve components and castings must
be cleaned using engine cleaner and compressed
air or replaced prior to reassembly.
Power trim system is pressurized. Outboard must
be in the full ‘‘UP” position (cylinder fully ex-
tended) prior to fill screw or manual release valve
removal.
Refer to instructions following if disassembly is
required.
Follow preliminary checks before proceeding to trou-
bleshooting flow diagrams (following).
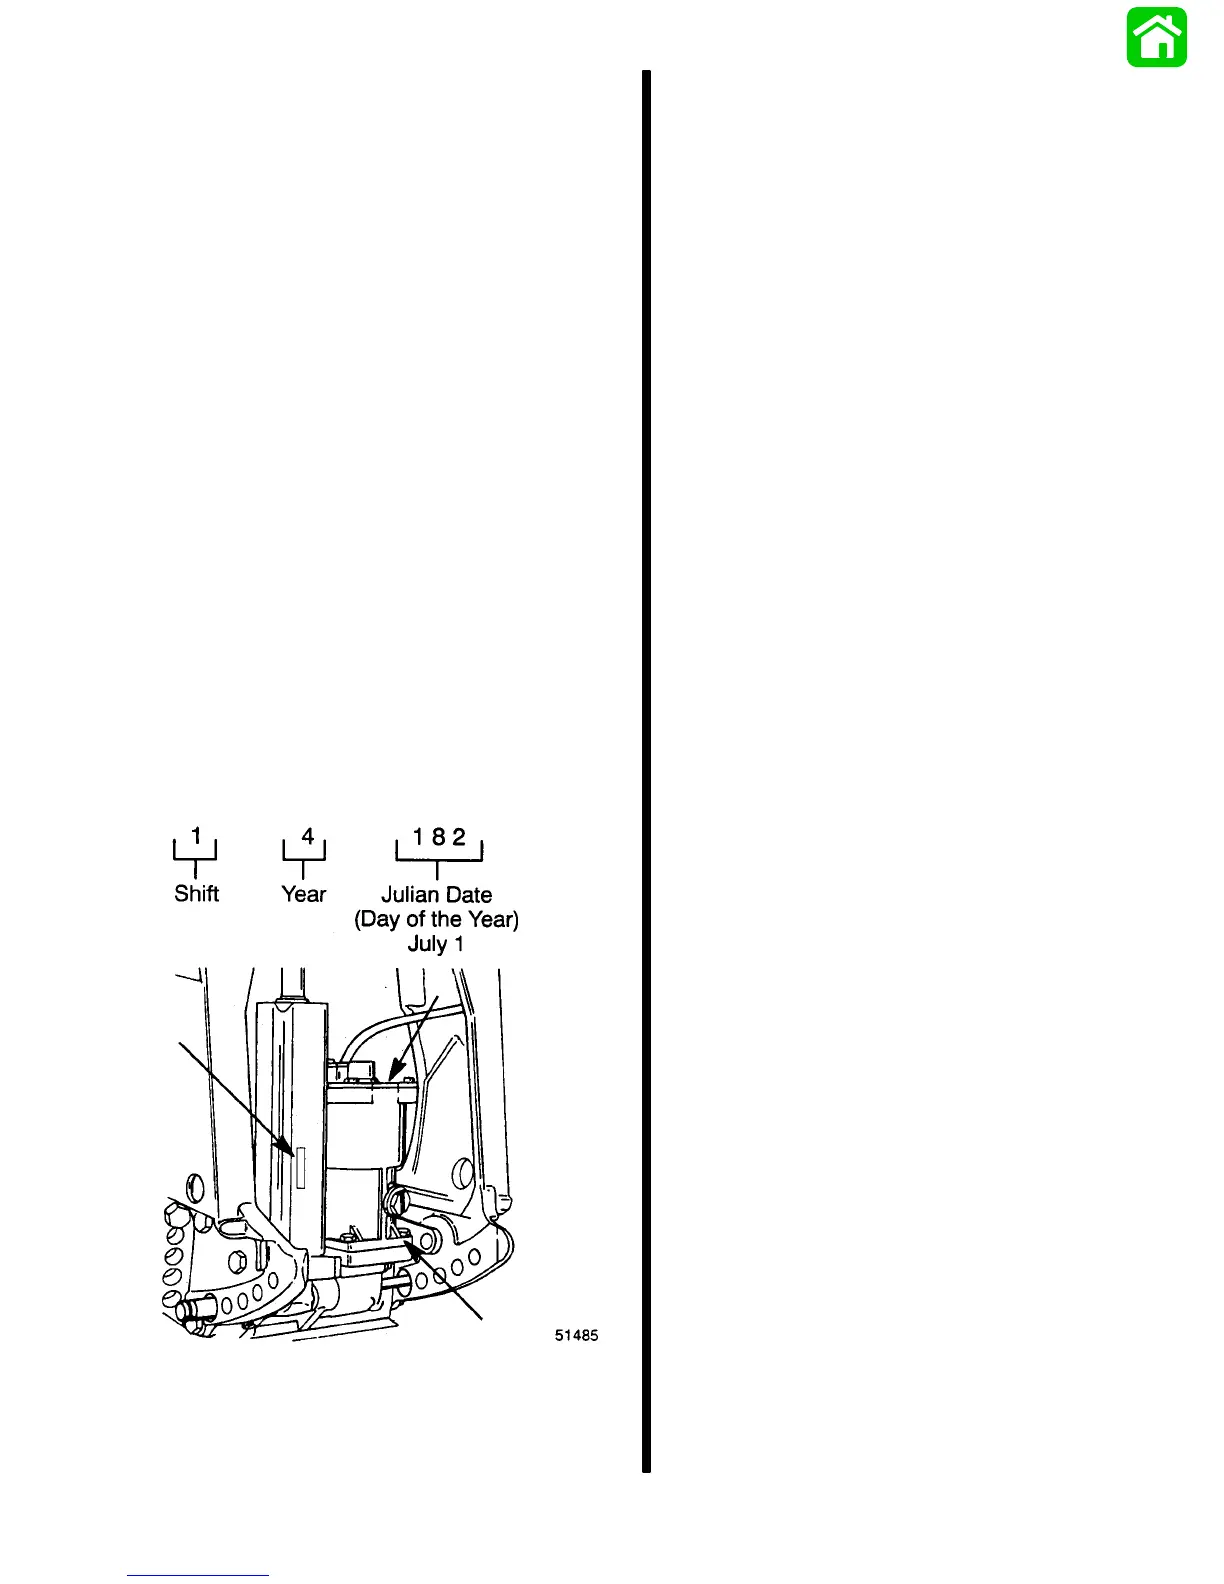
Date Code Location
Date codes are placed on power trim assemblies at
date of manufacture. These date codes are designed
to quickly identify assemblies which may be affected
by service bulletins pertaining to specific problems.
Note date code on trim assembly and compare to
date code listed on service bulletins before making re-
pairs.
a
b
c
a - Label on Top Cover of Motor
b - Motor Reservoir Flange
c - Embossed into the CAUTION Decal on Trim/Tilt Cylinder
Preliminary Checks
Operate Power Trim System after each check to
see if problem is corrected. If not, proceed with
the next check.
1. Check that manual release valve is tightened to
full right (clockwise) position.
2. Check trim pump fluid level with outboard in full
“UP” position and fill if necessary. Refer to “Fill and
Purge the Power Trim System.”
3. Check for external leaks in Power Trim system.
Replace defective part(s) if leak is found.
4. Outboard not holding tilted position (falls to trim in
position) indicates debris or defective compo-
nents in trim valve assembly. Clean or replace
components as required.
5. Check manual release valve for broken stem and
one O-ring remaining in the release valve pas-
sage. (Separate the manifold assembly from the
cylinder to dislodge broken stem.) Install new re-
lease valve and test system.
6. Check for nicked, deteriorated, or misplaced
O-rings throughout trim system.