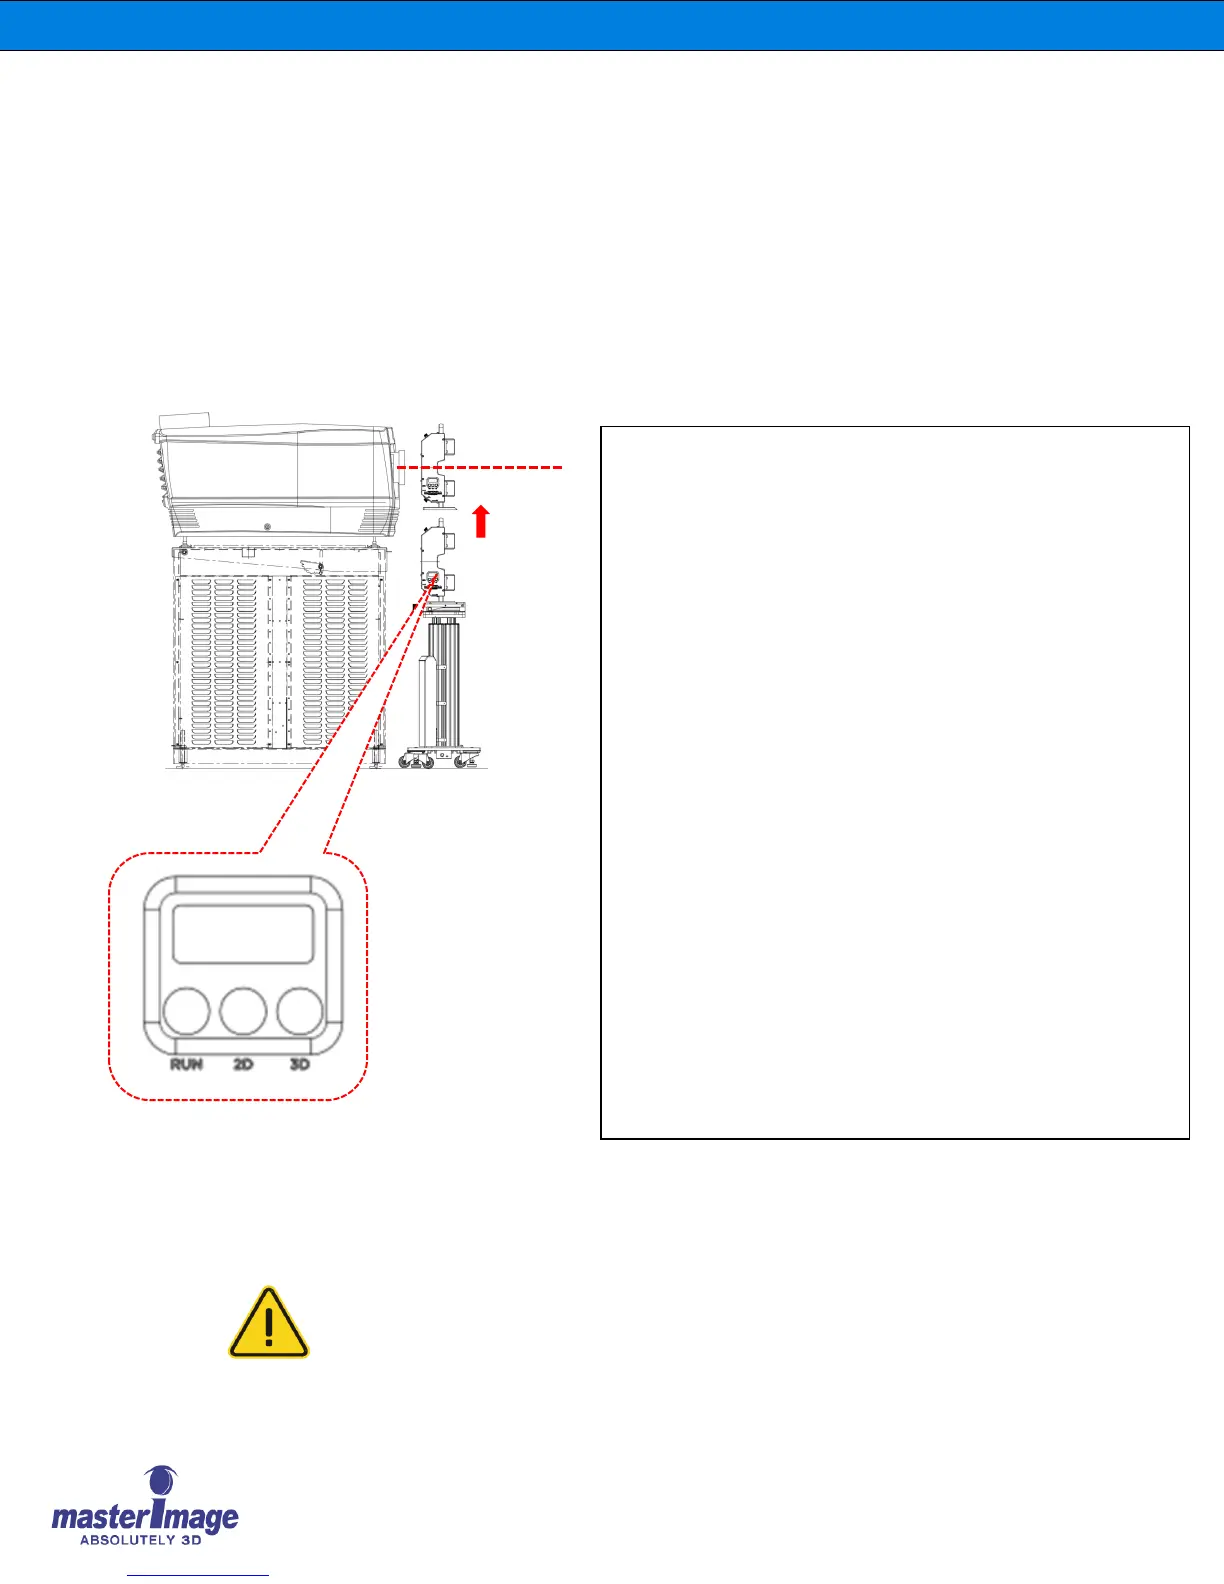
6.1.4. Setting 3D Position
1. With the System Power ‘On’ the 7-segment display will show
“00” on the Control Panel.
If the GPIO SYNC cable is connected with the DLP projector,
then the display will show the sync frequency being output.
(For example, sync frequency is 24, 36, 72, 96Hz etc…)
2. At first installation this position is the Zero Position (factory
state).
3. To enter 3D & 2D position setting mode, press the 3D & 2D
button at the same time and hold for more than 1second then
release.
4. Press the 3D button to activate the Lift Column Actuator and
move the position upwards.
5. When the Optical Head is at the position you want it to be, release
the 3D button.
6. For fine-tuning of accurate 3D position of the Optical Head, short
press 3D or 2D button.
7. To save the 3D position, press RUN & 3D button at the same time
and hold for more than 1 second then release.
Note: If you want to exit 3D or 2D position setting mode, press the
3D & 2D button at the same time and hold for more than
1second then release.