Page 83 Speed Level Series - Service & Parts Manual
January 2019Section 7 - Mechanical System
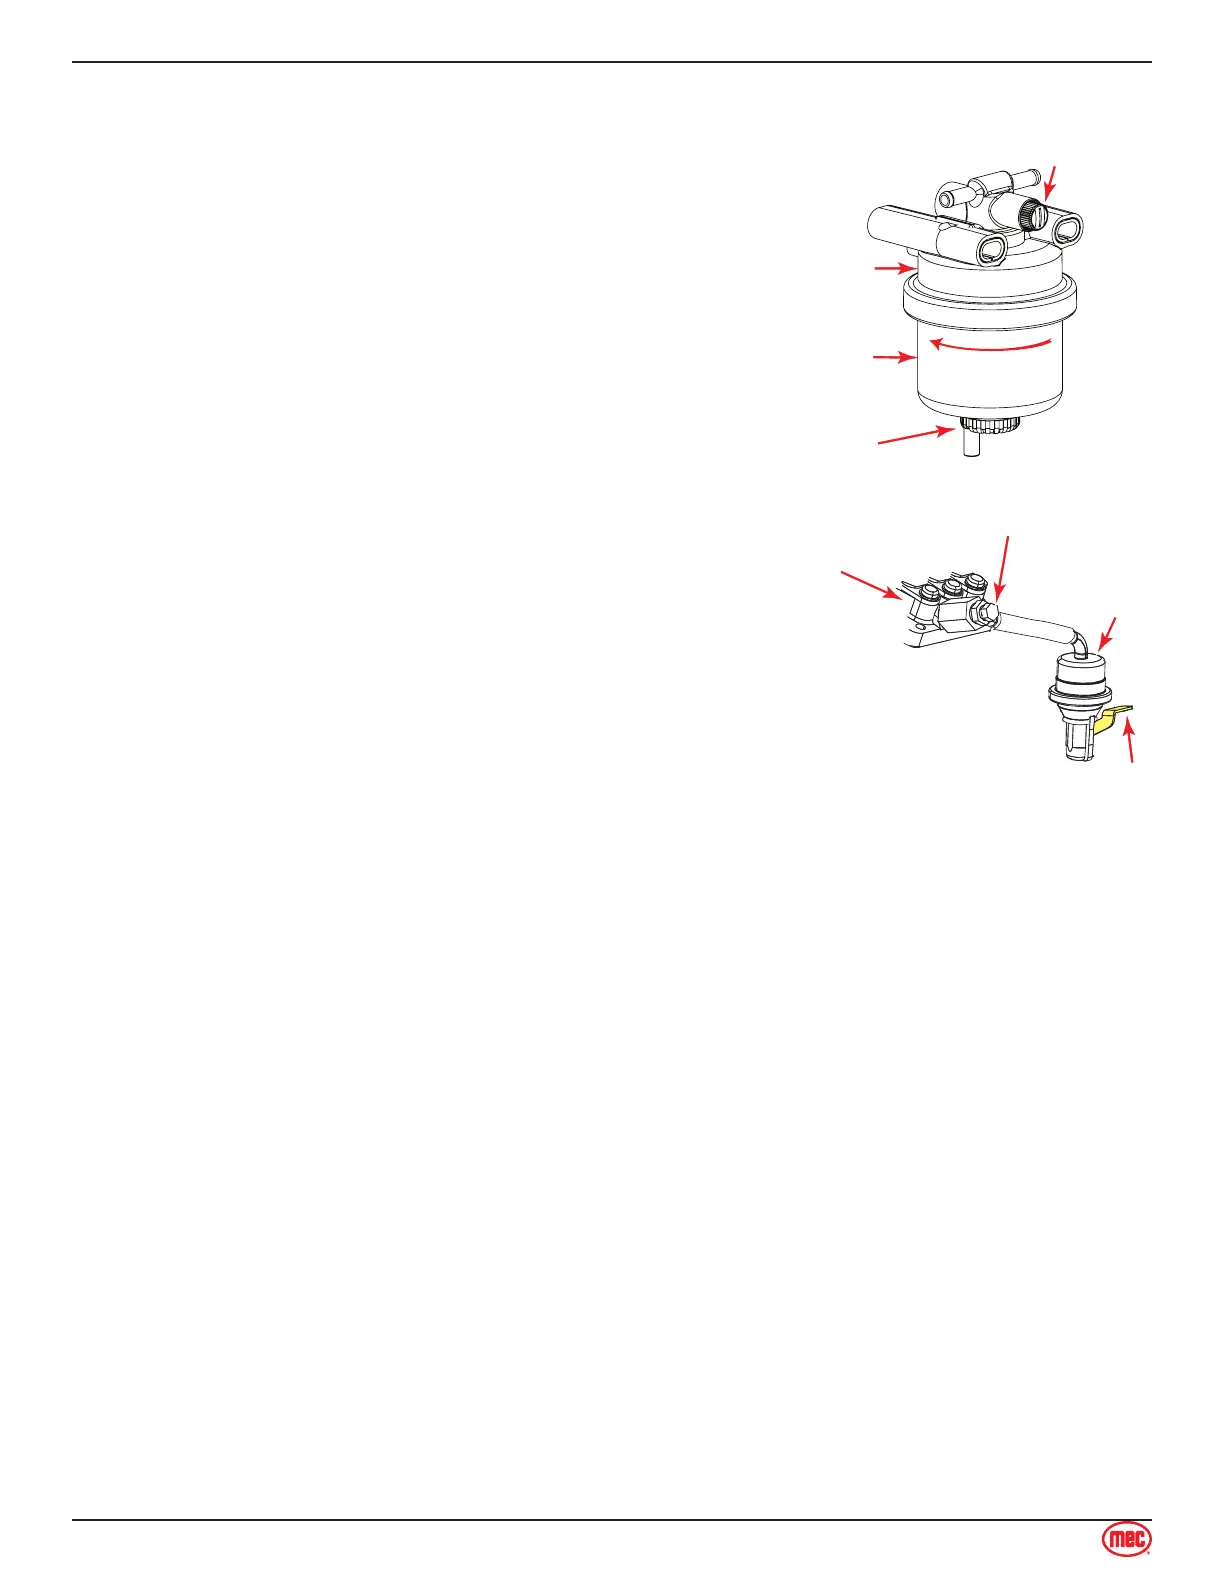
Fuel Filter, Diesel
Turn OFF valve on bottom of fuel tank.
Place a suitable container beneath the fuel filter assembly
to catch spilled fuel. Clean the filter area.
Turn filter cartridge ¼ counterclockwise remove. Wipe the
filter seal contact surface with a clean towel and install a
new filter.
Open valve at fuel tank and check for leaks.
Purge the air from the fuel system as follows;
Fill fuel tank to the fullest extent. Open valve on bottom
of fuel tank.
Loosen bleed screw on top of fuel filter housing a few
turns.
Close the bleed screw when there are no more
bubbles.
Open the bleed screw on the fuel injector pump. Use
the lift pump hand lever to pump fuel to the injectors.
Close the bleed screw when there are no more
bubbles.
Note:Do not attempt to start the engine until Step 5 has been
performed.
If fuel becomes contaminated with water, use the Water
Separator Valve at the bottom of the fuel cartridge to drain
water.
1.
2.
3.
4.
5.
•
•
•
•
6.
Hand Lever
Fuel Injector
Bleed Screw
Fuel Injector
Pump
Fuel Filter Bleed Screw
Lift
Pump
Fuel Filter
Housing
Fuel Filter
Cartridge
Water
Seperator
¼ Turn
to Remove
ART_2782
Idle Speed Adjustment, Diesel
Bring engine to operating temperature.
Slow engine to complete idle.
Adjust the Idle Stop Screw until the RPM is 950. Adjust slightly up or down to avoid vibrations.
Hold the Idle Stop Screw while tightening the jam nut to prevent change in adjustment.
High Speed Adjustment, Diesel
IMPORTANT: In order to prevent electrical system damage, check the Throttle Solenoid Adjustment
after this procedure.
Bring engine to operating temperature.
Disconnect the Throttle Solenoid linkage at the clevis.
Manually pull the Throttle Lever until it contacts the High Speed Stop Screw.
Adjust the High Speed Stop Screw until the RPM is 3000 with the Throttle Lever against the
High Speed Stop Screw.
Turn off the engine and reconnect the Throttle Solenoid linkage at the clevis.
Hold the High Speed Stop Screw while tightening the jam nut to prevent change in adjustment.
1.
2.
3.
4.
1.
2.
3.
4.
5.
6.