26 MOM2 ZP-BD03E BD0333FE
5 OPERATING INSTRUCTIONS
5.4 Measurement using P/F
– pass/fail
1] Make the desired settings in the SET options
Select P/F and enter desired limit value.
In this example LOG is set to OFF
2] Turn the function selector to one of the test
positions.
3] Press the TEST button on MOM2 or the pull
the trigger on the probe.
A continuous audio signal tells that the
measurement is in progress.
Another signal tells that the measurement is
complete, pass or fail.
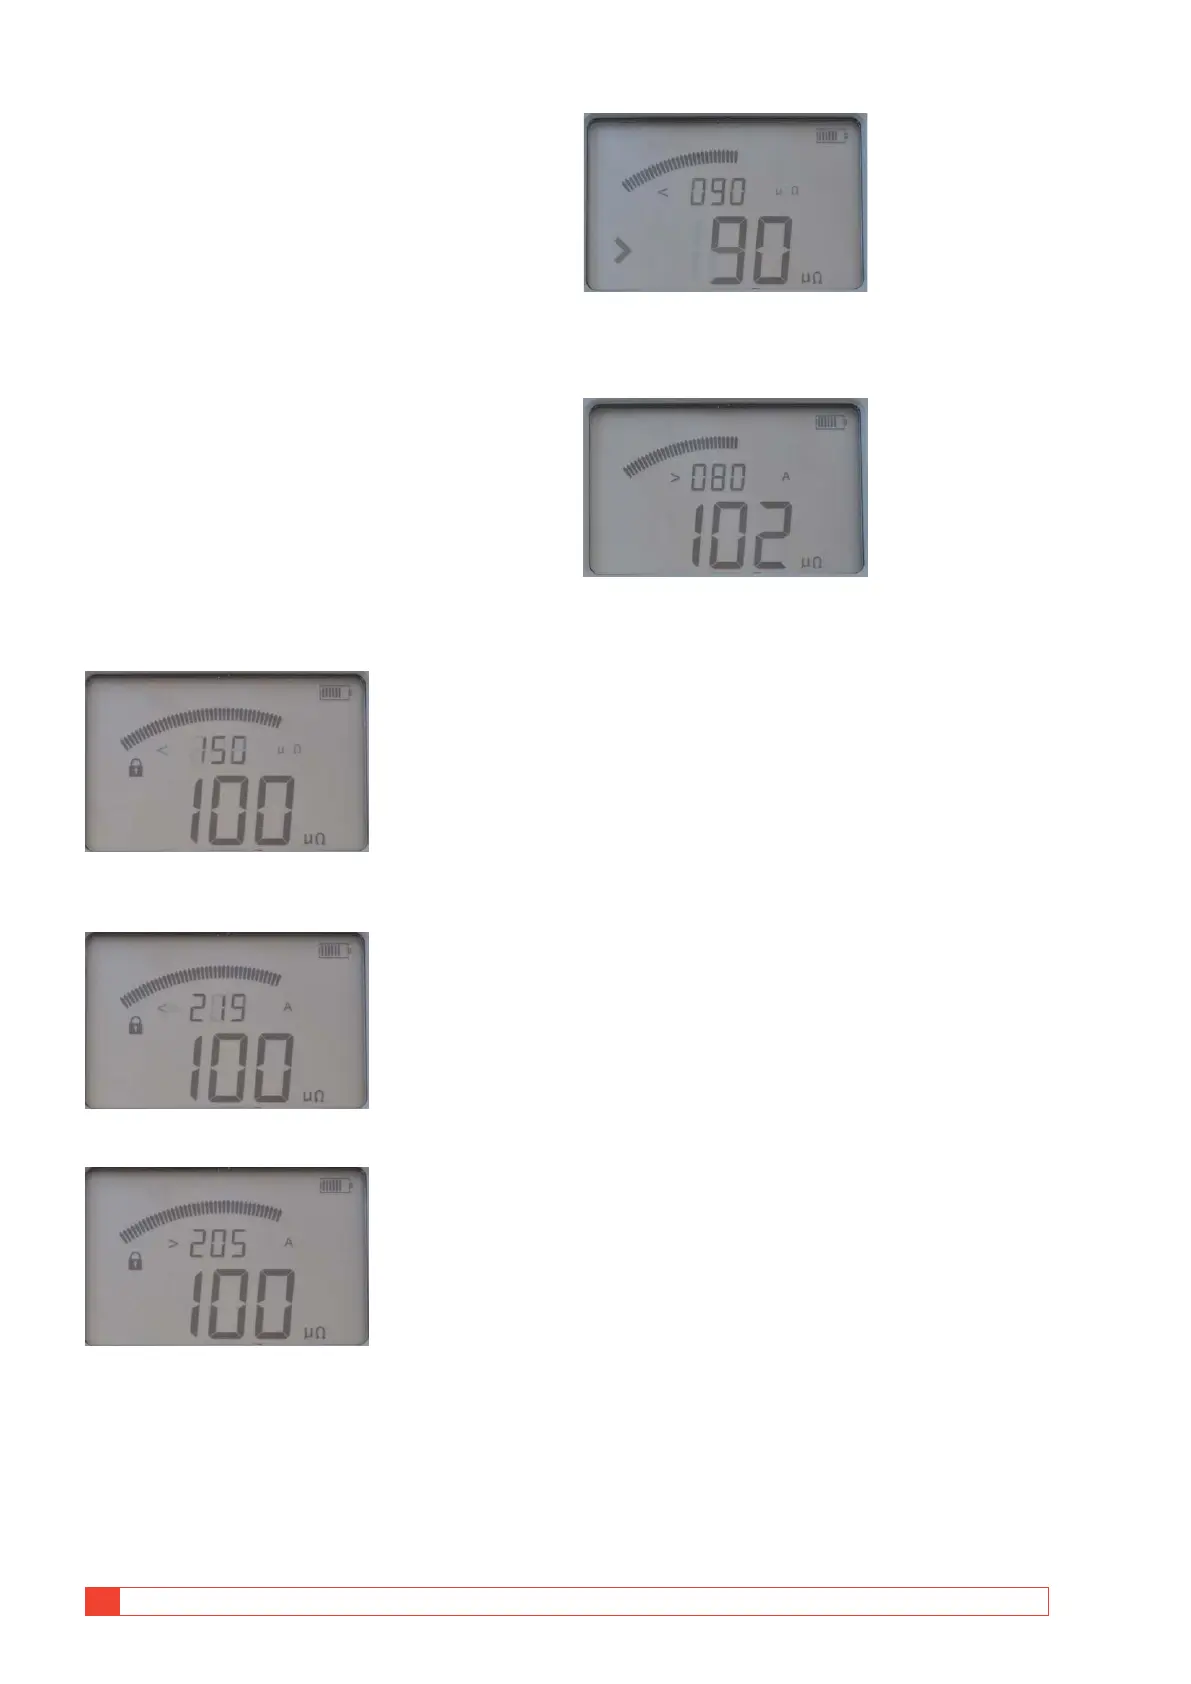
A] If the resistance value is below the P/F limit.
The result will be shown on the display with
big digits.
The small digits toggle between the P/F limit
and the max, min current values.
Here P/F limit was set to 150 µΩ and the measured resist-
ance value is 100 μΩ.
Max current during test was 219 A.
Min current during test was 205 A
B] If the resistance value is over the P/F limit
there is the fail signal and the > character is
displayed to the left of the set P/F value.
The small digits show the set P/F value (< 90 μΩ).
The character ">" to the left of the big digits indicates that
the P/F value was exceeded.
The minimum current was 80 A and the resistance value is
102 μΩ.