1 – RACK MOUNT KIT
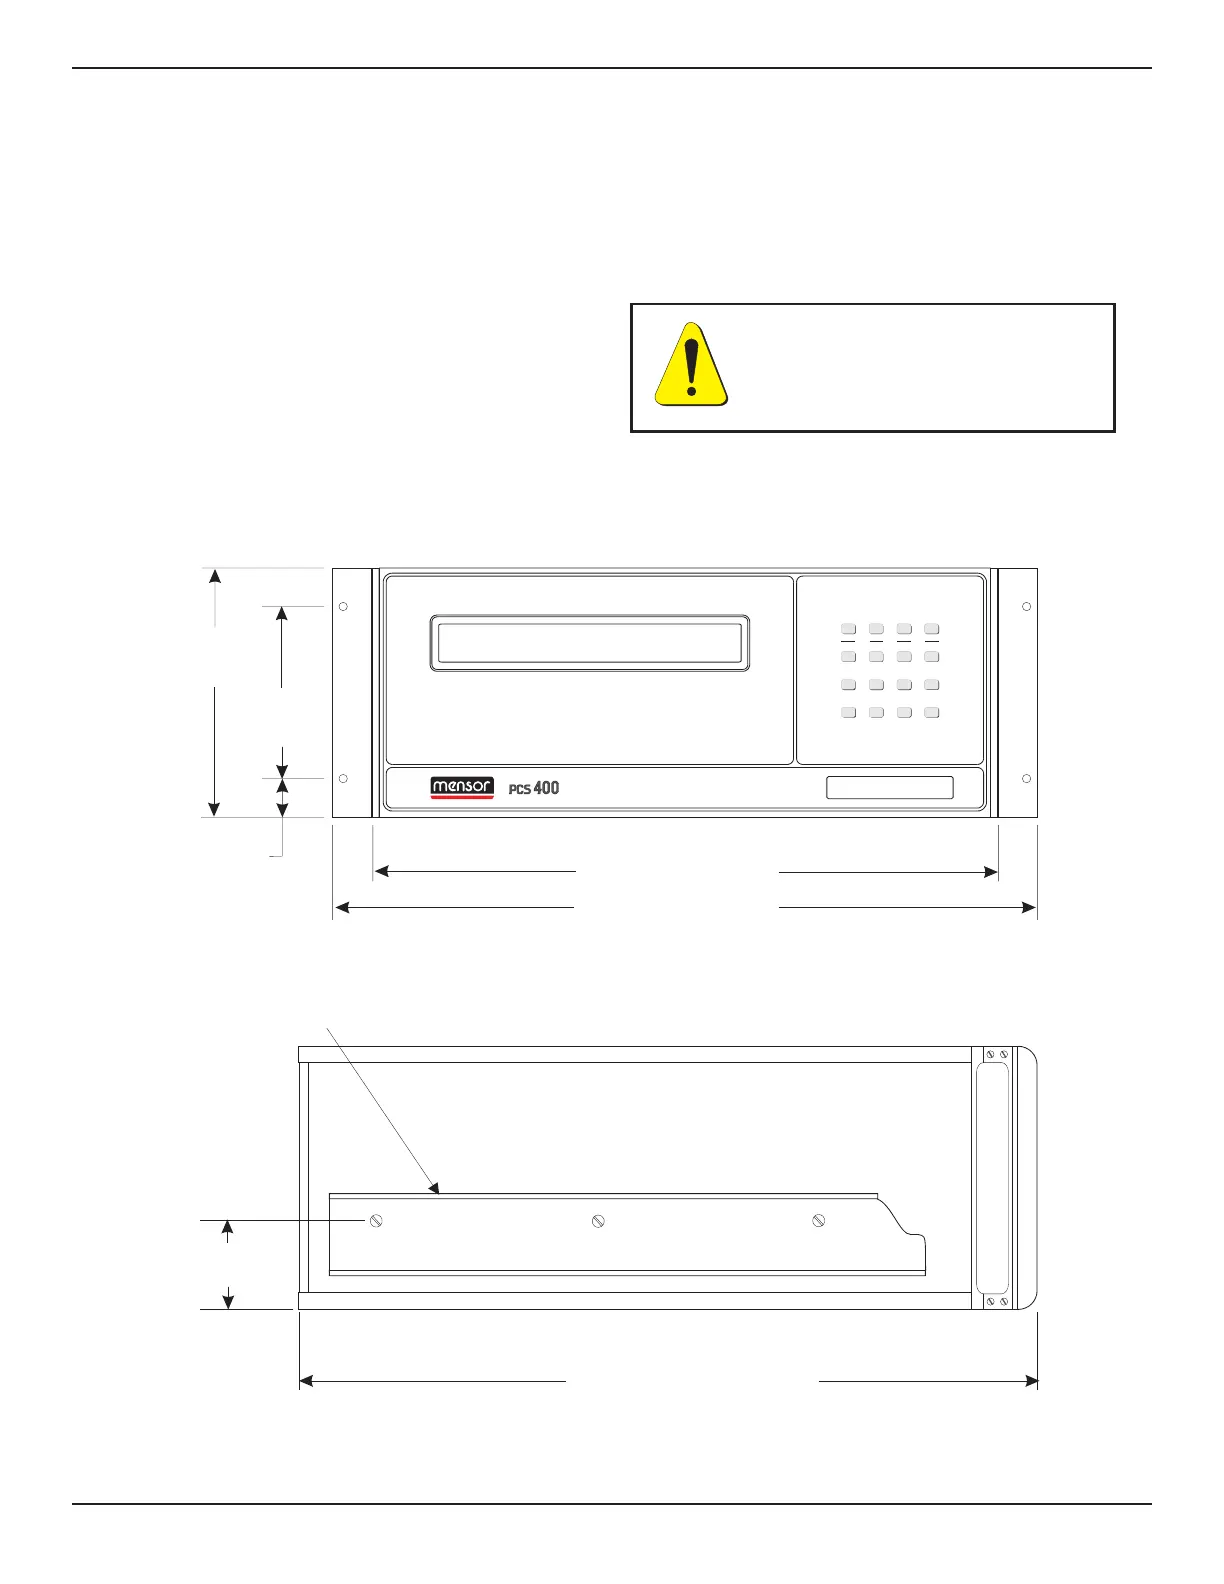
The PCS 400 is easily mounted into a 7 inch opening
of a 19 inch wide rack. The rack used should satisfy
the dimensional requirements shown below. It
should be free of vibration and excessive heat, as
noted below.
Install the chassis slide, being sure to allow the
proper spacing above and below the PCS 400. A PCS
400 with the rack mount option is then installed
from the front of the rack. Before installing the PCS
400, remove the four feet from the bottom of the
instrument. Slide the PCS 400 all the way into
position and secure the instrument to the rack
before connecting power and pneumatic lines to the
rear panel.
After all equipment is installed, check to see that
the temperature inside the rack does not exceed
38°C. If it does, additional rack spacing and/or
ventilation must be considered.
5.25"
(12.34 cm)
.86"
(2.18 cm)
17.05" (43.31 cm)
19.00" (48.26 cm)
6.97"
(17.70 cm)
Side View
20.00" (50.80 cm)
Instrument
Slide Member
2.30"
(5.84 cm)
Front View
0-600 PS
I
A
2nd
F1
F2 F3
1
0
=
5
_
3
.
7
2
9
6
4
+
8CE
METRIC ENG GPIB SERIAL
CAL TEST LIMITS HELP
STBY CONT VENTMEAS
UNITS
COMM
PRESSURE CALIBRATION SYSTEM
Figure 8.1 - Rack Mount Dimensions
CAUTION: Motors or vibrating
devices should be mounted so as
to minimize the vibrations at the
PCS 400.
OPTIONS PCS 400
8-2 www.mensor.com