2. Pull the slide until the slide stops moving.
NOTE:Once the slide has cleared the probe assembly the outboard will be
lifted up by the quick release spring. Or, if not installed yet, the transom
bracket will be moved down and can be removed from the outboard for
mounting.
Remote Control Steering Cable Connections
STEERING BRACKET, STEERING CABLE INSTALLATION
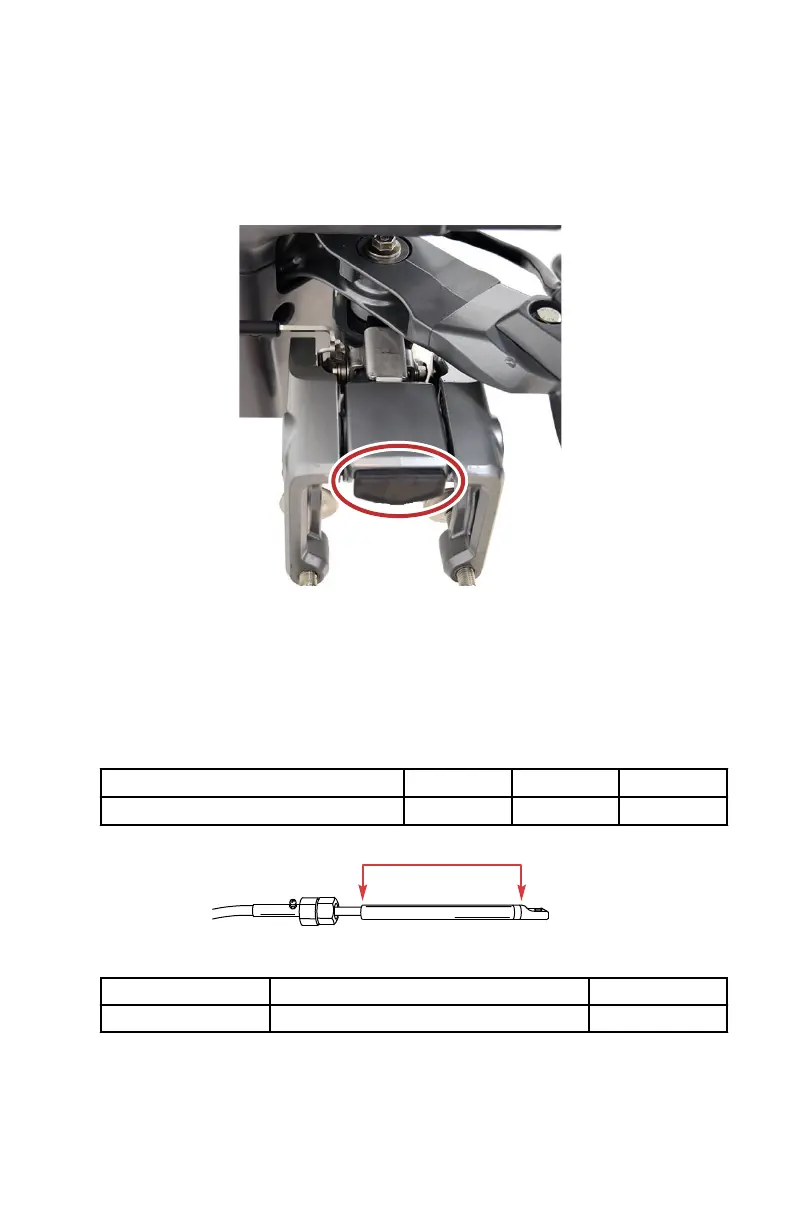
1. Remove the shipping bracket from the steering bracket arm.
2. Install the steering arm on the steering bracket with two washers and two
30 x 80 mm screws. Tighten the screws to the specified torque.
Description
Nm lb‑in. lb‑ft
Screws 30 – 22
3. Lubricate the entire steering cable end with 2‑4‑C with PTFE.
Description
Where Used Part No.
2-4-C with PTFE Steering cable end 92-802859A 1
4. Install the steering cable seal onto the end of the steering assembly.
5. Insert the steering cable into the steering tube and secure with the
steering cable nut.
6.
Tighten the steering cable nut to the specified torque.
INSTALLATION
eng 43
 Loading...