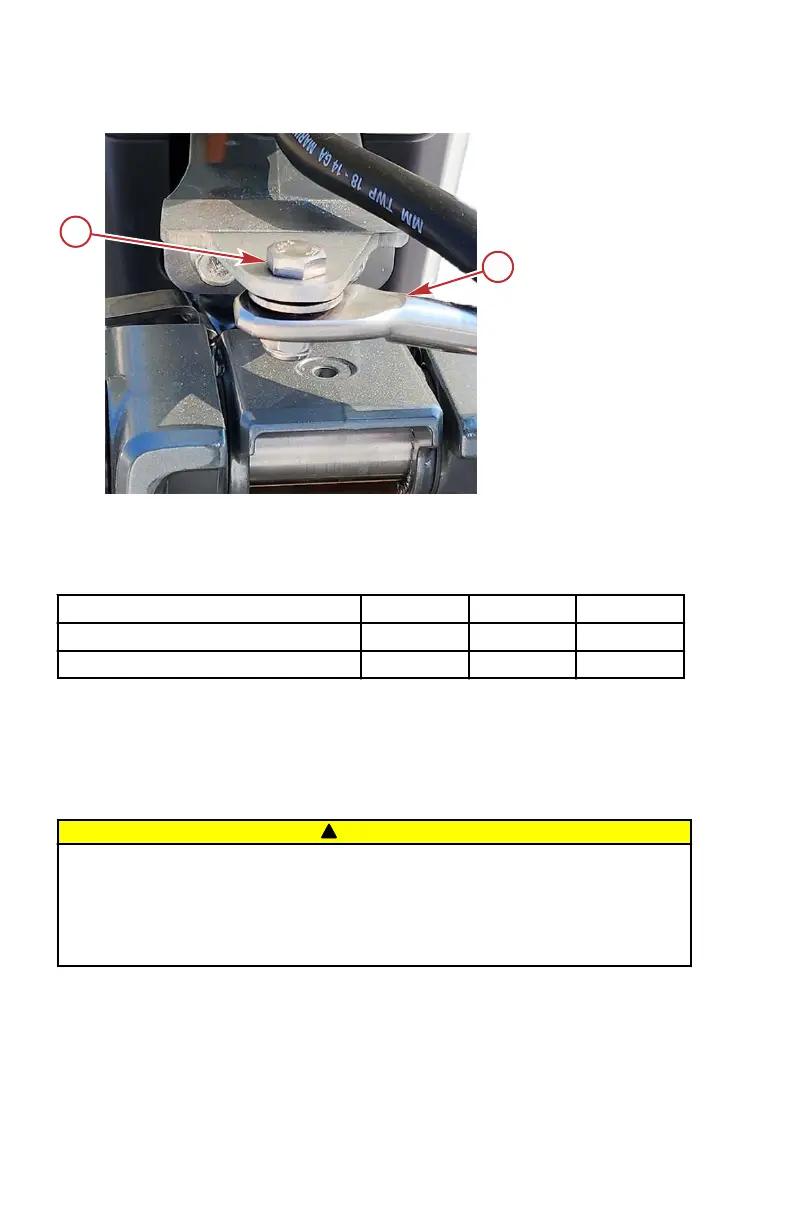
3. Tighten the link rod screw to the specified torque.
a - Screw
b - Steering link rod
Description Nm lb‑in. lb‑ft
Link rod screw 27.1 – 20
Locknut 27.1 – 20
Cowl Replacement
COWL REMOVAL AND INSTALLATION PREREQUISITES
IMPORTANT:The battery must be removed before any cowl panels are
removed or installed.
!
CAUTION
Electrical shorted circuits can cause severe physical injuries or death from
burns or electrical shock. Always put down tools and metal objects, and
remove any metal jewelry or wristwatches before removing cowls. Electrical
wiring connections should not be removed except by an Authorized Mercury
Marine Dealer.
The cowl panels must be removed in the following sequence: (The port and
rear cowl panels may not need to be removed for some procedures).
1. Front cowl upper panel
2. Front cowl lower panel
3. Starboard cowl panel
4. Port cowl panel
INSTALLATION
46 eng
 Loading...