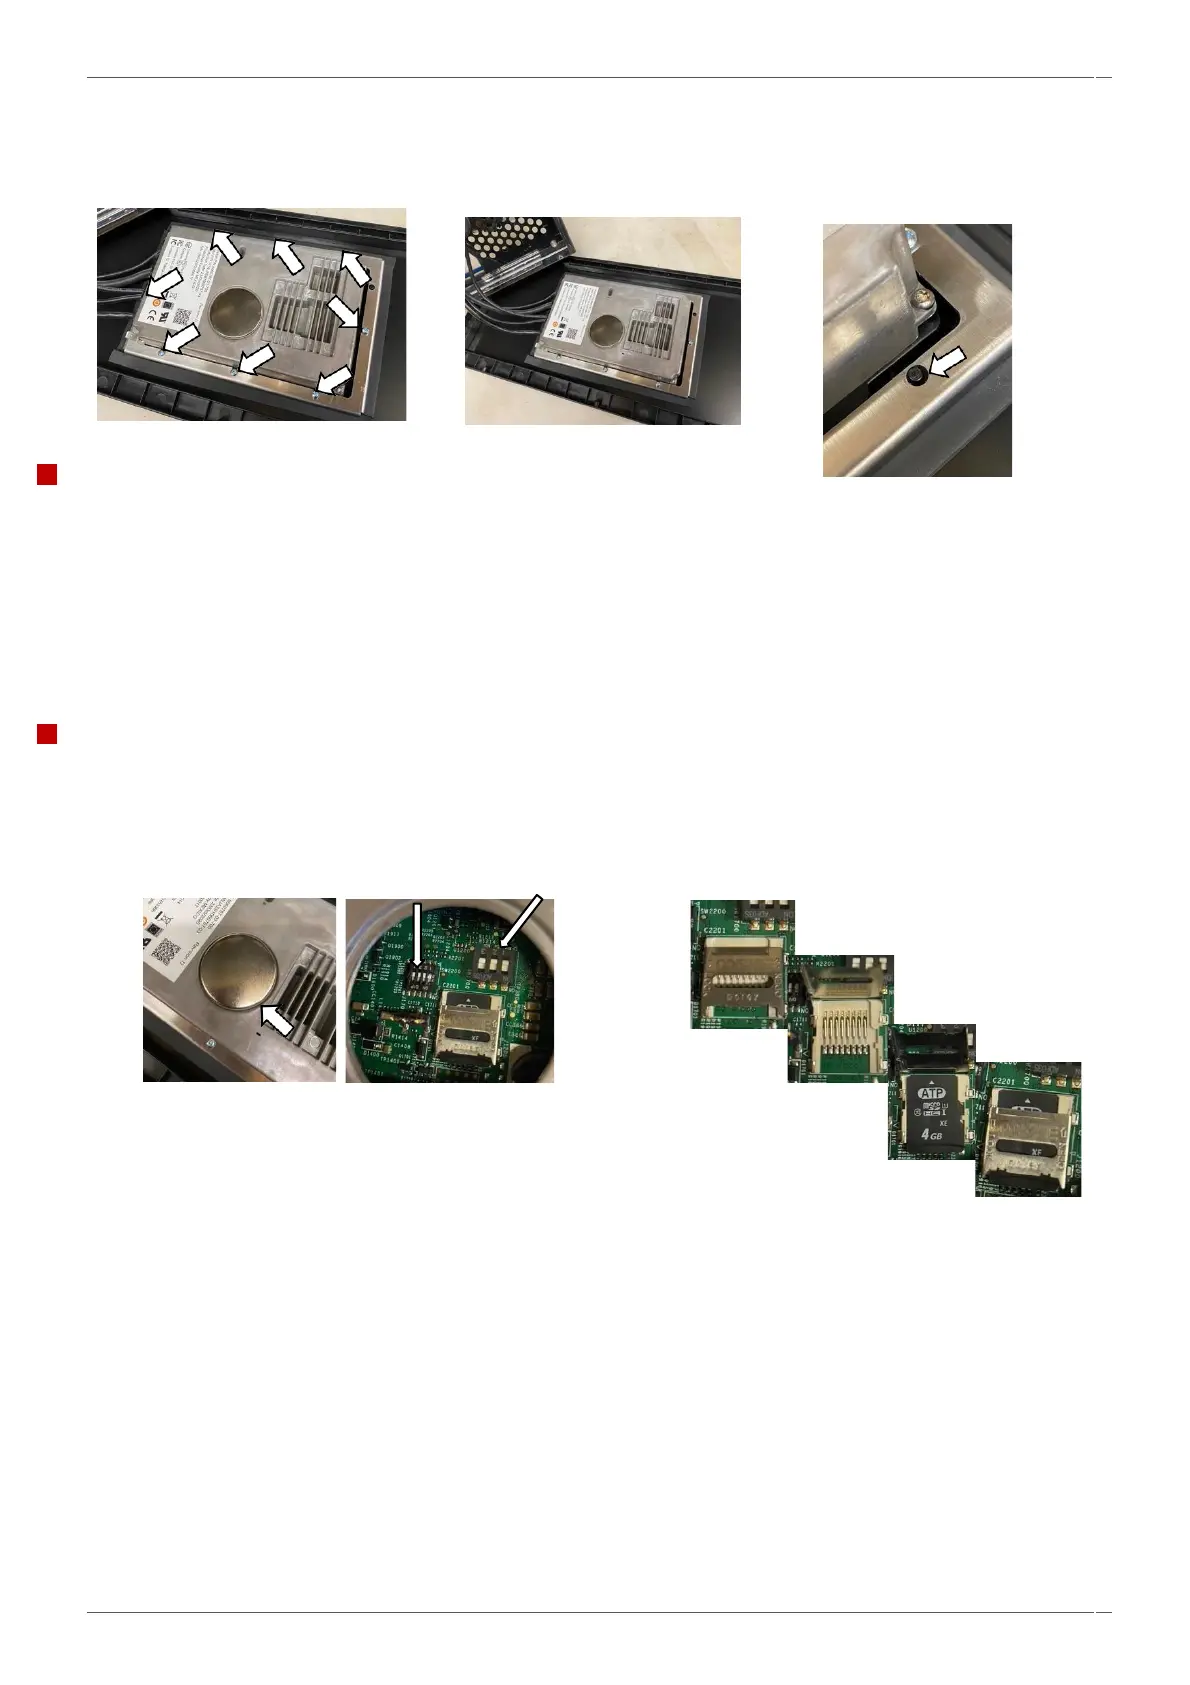
4. Unfasten the three Posidrive screws at the bottom of the removed front panel and un-slot from the top of the panel
to separate from the metalwork.
5. Unfasten the eight posidrive screws from the UI clamp to separate the UI from the glass panel.
Fitting the UI assembly.
Follow the steps in the reverse order to replace the UI assembly.
▪ Ensure the UI is square in the facia panel and refit the clamp using the location pin as
a guide.
▪ Do not overtighten the eight posidrive screws clamping the UI to the glass panel (0.7
Nm).
▪ Ensure the cables are not trapped when refitting the panel to the oven and reclip the
loom to the underside of the IO board.
Replacing the UI assembly for new.
1. Ensure that the Micro-SD card is removed from the old UI and fitted to the new assembly. Check that the dip
switches are in the off (0) position. Access the switches by prizing off the protective cap on the back of the UI
assembly before fitting to the oven.
2. Refit all oven panels, plug in the oven, and switch on.
NOTE- If the oven is to be connected to an external WIFI box then switch 4 should be switched over to the on position.