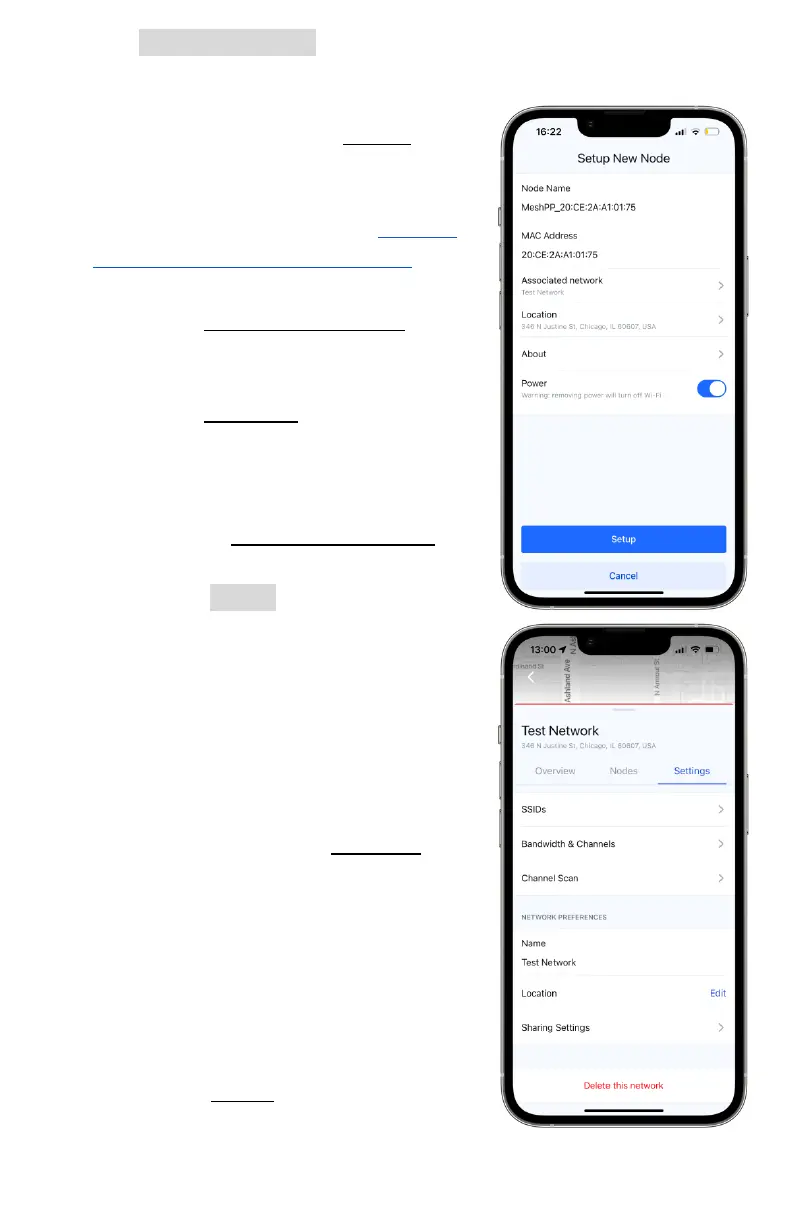
v. Tap Setup this Node to navigate to the node’s main options
list. Here, you are able to change its name, view its MAC
address , power status, add it to a
network, and view the About page
for additional information about
the node, such as diagnostics and
Bluetooth firmware - visit section
11.b - Mobile App Diagnostics , for a
guide of this page.
1. On the Associate network page,
add your node to your newly
created network.
2. On the Location page, add the
location that the node will be at.
This does not have to be entirely
accurate, but can help when
using the Network Overview tab
or dashboard site.
3. Tap the Setup button and the
app will confirm with a message
that the node was successfully
adopted to the network.
4. You will then be able to return
to the network or add more
nodes directly from there.
vi. Return to your newly created
network and visit the Settings tab.
Here, you are able to create Service
Set IDs (SSIDs) for users to connect
their devices to,, change the
network’s bandwidth or channels,
change its display name on the
app, change its general location,
and sharing settings.
vii. Under the SSIDs page, you will find
various settings to create a usable
SSID for your network.