14
OPERATION
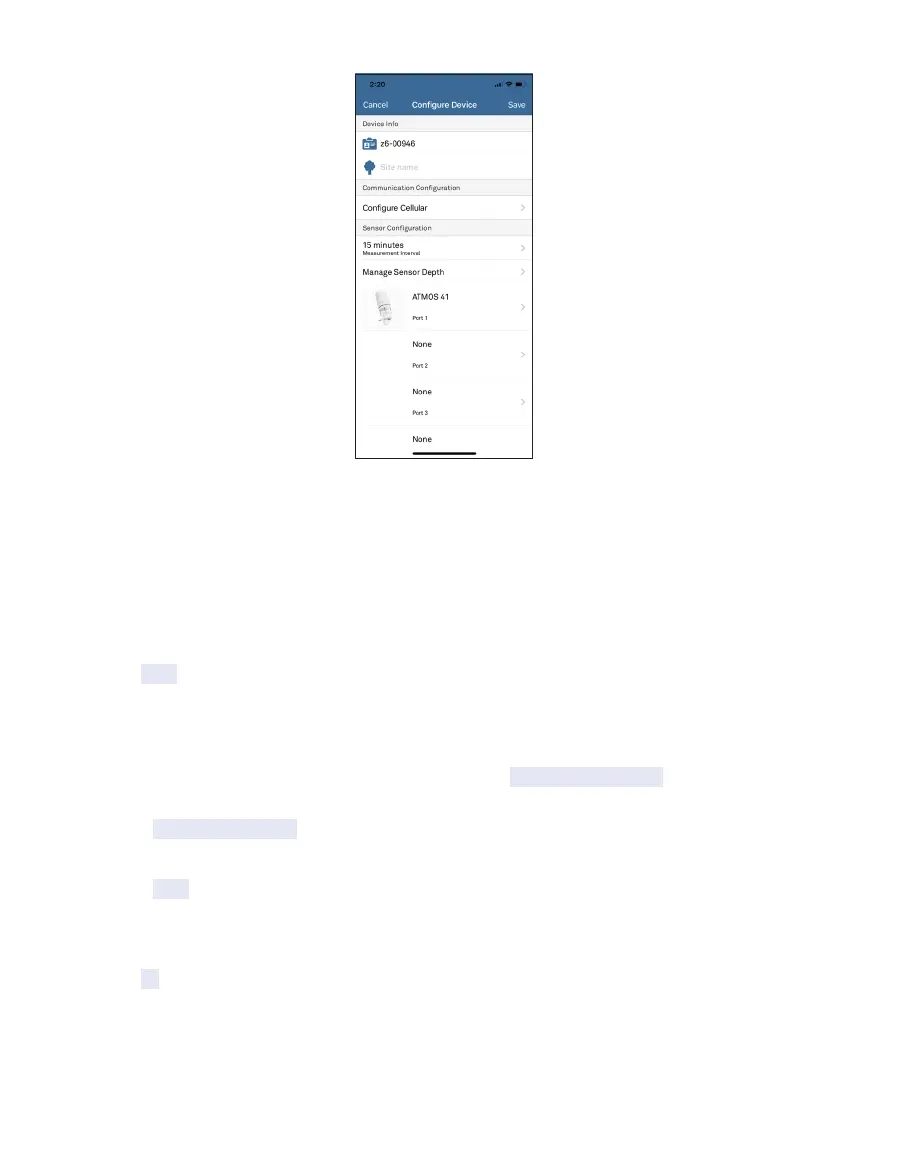
Figure11 Configure Device screen
5. Enter a device name (Figure11).
This value is prepopulated with the device serial number. Consider changing the name to
the field or plot where the ZL6 is installed.
6. Enter a site name if desired.
7. In the Sensor Configuration panel verify the Measurement Interval is set to store data.
8. Verify each logger port is configured correctly for the installed sensor.
9. Click Save to send the updated parameters to the logger.
ZL6 Basic logger configuration is complete at this point. ZL6 and ZL6 Pro logger
configuration will need to continue to step10 through step15 to set up the desired data
upload times.
10. In the Communication Configuration panel, select Configure Cellular. See section
(Section4.1) for Wi-Fi communication commication configuration.
11. Select Upload Frequency to open the selection menu.
12. Choose upload fequency.
13. Select Done.
14. Select the time segments by clicking the arc segments for the hour intervals.
The ZL6 will upload data during the selected intervals (Section4.2.5.1).
15. Click OK.