69D0023 31
CDV Series Gas Fireplace
CHECK GAS PRESSURE and ELECTRICAL INSTALLATION
1. Check gas type. The gas supply must be the
same as stated on the appliance’s rating decal.
If the gas supply is different from the replace,
STOP! Do not install the appliance. Contact your
dealer immediately.
2. To ease installation, a 30" (mm) ex line with
manual shut-off valve has been provided with
this appliance. Install and attach
1
/2" gas line onto
shut-off valve.
3. After completing gas line connection, purge air
from gas line and test all gas joints from the gas
meter to the replace for leaks. Use a solution of
50/40 water and soap or a gas sniffer.
4. To adjust ame height, turn HI/LO knob to HI to
get maximum pressure to burner. Turn HI/LO knob
to LO to get minimum pressure.
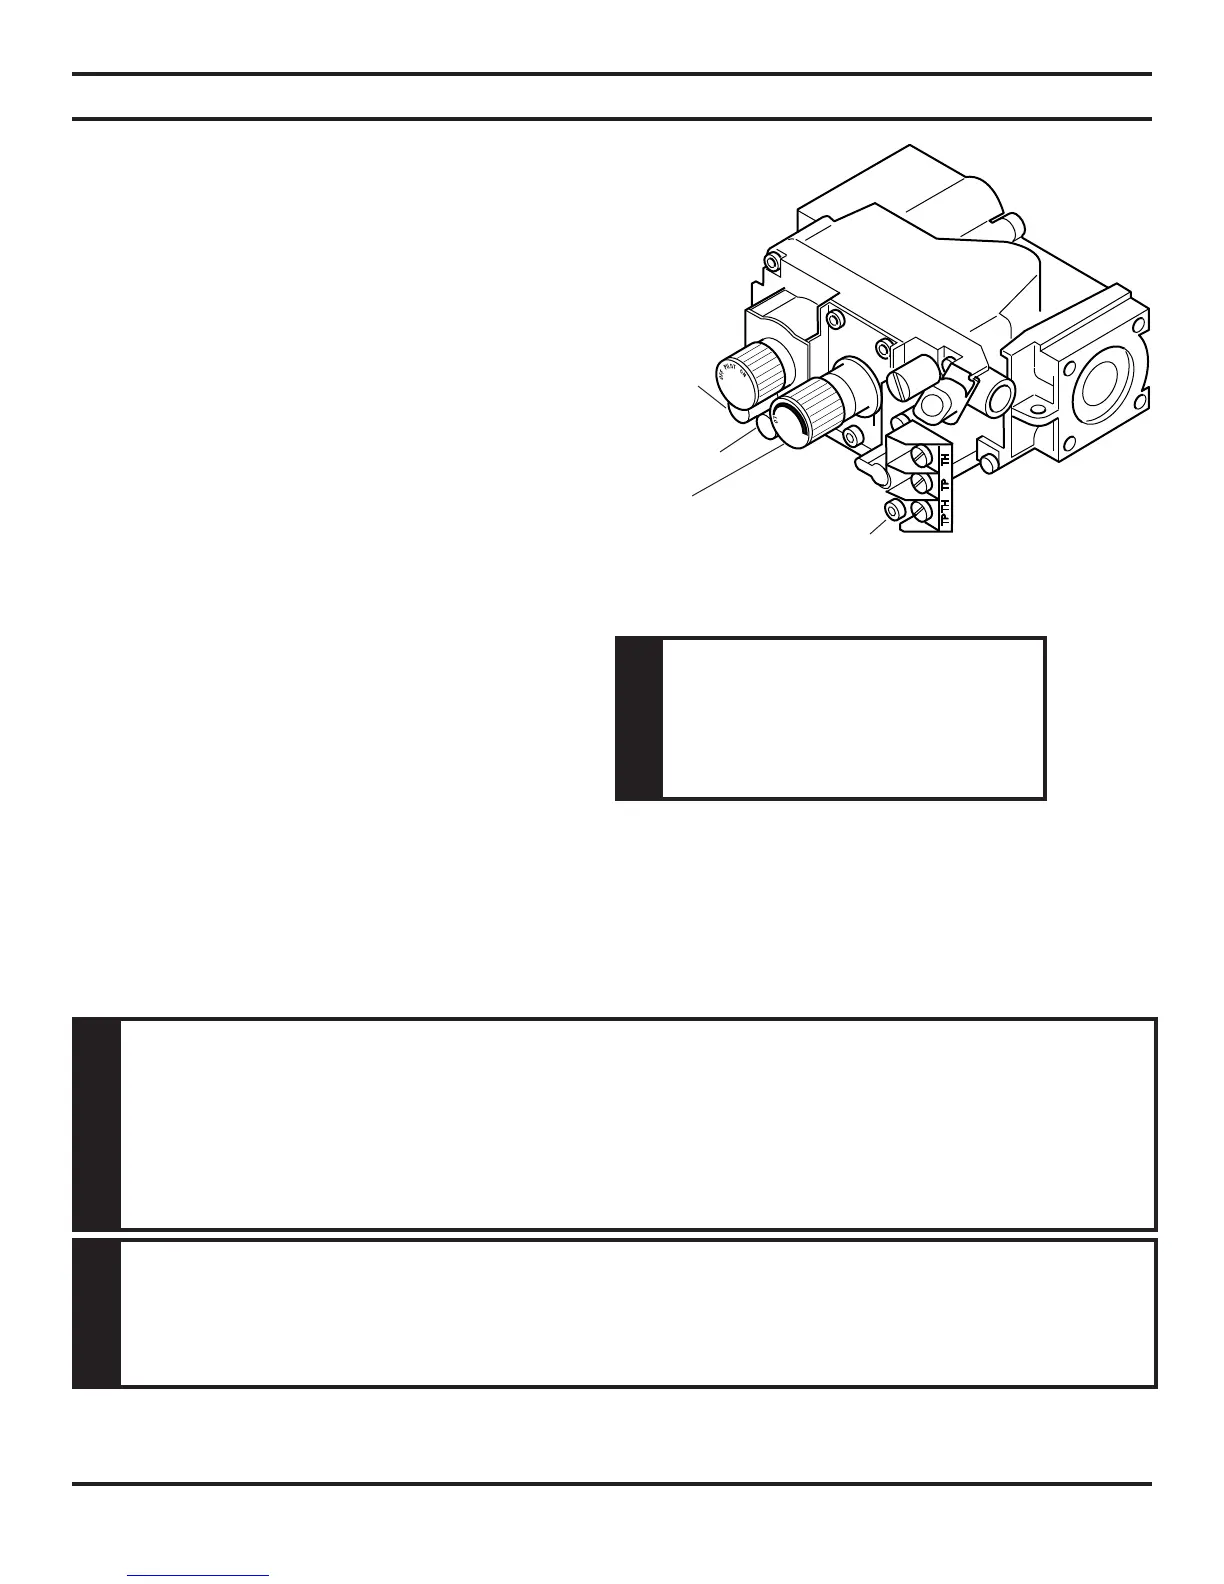
5. To check gas pressures at valve, turn captured
screw counter clockwise 2 or 3 turns and then
place tubing to pressure gauge over test point.
Turn unit to high. Figure 42. After taking pressure
reading, be sure and turn captured screw clock-
wise rmly to reseal. Do not over torque. Check
test points for gas leaks.
Figure 42 - Gas Pressure Check at Gas Valve
Pressure
Test “IN”
Pressure
Test “OUT”
HI/LO
Knob
Pilot Adjustment
Screw
ELECTRICAL WIRING
Verify proper operation after servicing.
This replace will work without any electrical supply. Electricity is only needed to operate blower.
NOTE: If installed in mobile home, replace must be bolted securely to oor.
WARNING
National Electrical Code ANSI/ NFPA
70 (latest edition) and Canadian Electrical Code, CSA C22.1.
CAUTION
WARNING