Installation
117
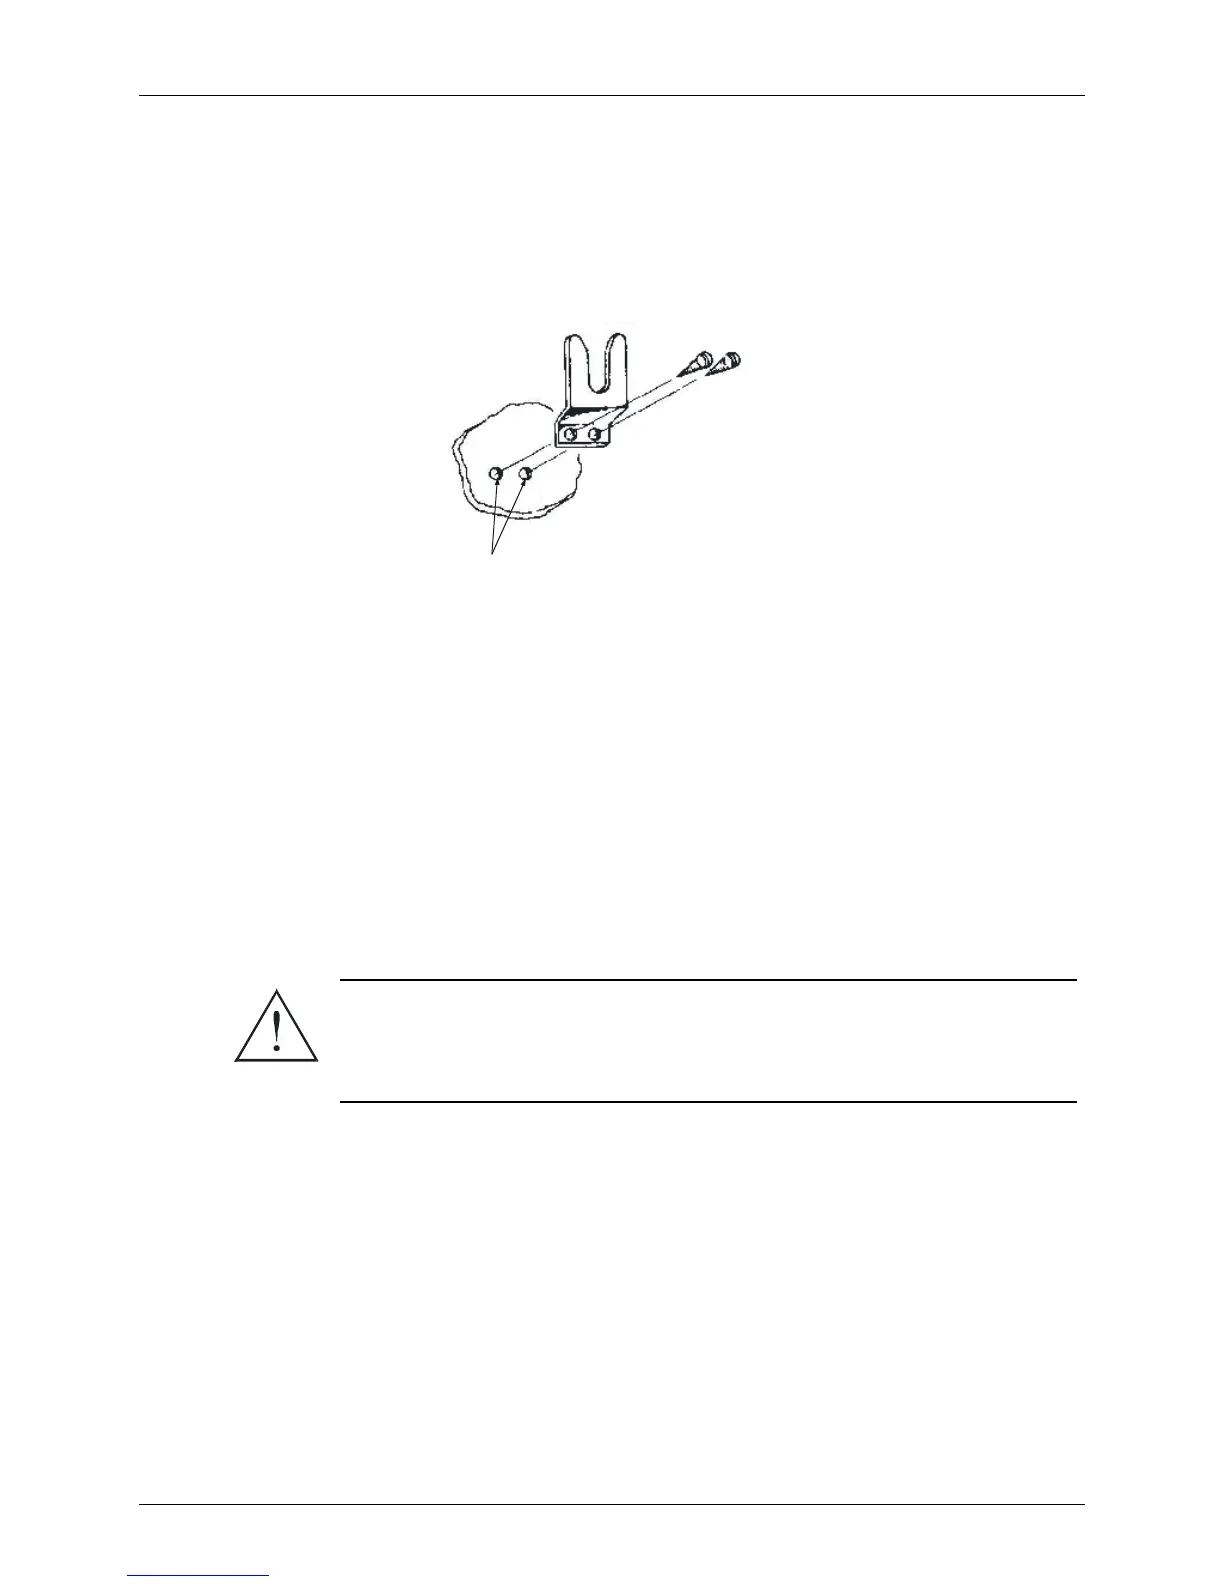
Microphone Clip
The microphone cable enables placing the microphone clip in any convenient location up to five feet
from the radio. To install the clip, use it as a template to drill two holes to receive self-threading
sheet-metal screws. Mount the clip using the supplied screws.
Drill 1/8” Holes
in Dashboard
Tapping S cre ws
35122830
AEPO - 1488-A
Bracket
64A85596
Figure 20. Microphone Clip
Mounting the MICOM-3T Control Head
1. Using the trunnion mounting plate as a template, mark the position of the holes on the
mounting surface.
2. Secure the trunnion mounting bracket to the surface with the four (10-16 × 1”) self drilling
screws, or drill a 6 mm φ hole at each location.
3. Mount the control head onto the bracket and secure it with the two wing screws provided.
MICOM-3F/3R Final Connections
Warning
Ensure that the radio is off before making these connections.
Step 1.
Connect the power cable to the DC power connector J4 and connect the antenna RF
cable to the antenna connector.
If an antenna tuner is used, connect the antenna to the tuner, connect the tuner RF
cable to connector J3, located on the radio rear panel.
Step 2.
If the mounting tray is used, slide the radio into the tray and fasten the tray bracket
with the supplied screw.