Technical Information
76
CVA 610/CVA 615 Coffee Systems
5.50 Brew Unit Drive – Home Positioning
1. Remove the brew unit from the appliance; see Section 5.26.
2. Re-install the waste container.
3. Close the door.
4. Turn the selector switch to one of the operating settings.
5. Allow the drives to reset into the home position.
5.51 Water Path/Flow Meter Check
Caution!
Hot water will flow from the water spout during this procedure!
1. Fill the water reservoir completely.
2. Access service mode.
3. Quickly turn the selector switch left to the “Programming” position.
4. Press and hold all three coffee buttons. The display will show the following:
5678
34
5. Does a pulsing/flickering "8" appear in the first line of the display?
a. No. Proceed to Step 6.
b. Yes. The flow meter and the electronic are detecting the pulses from the
water moving through the water path (normal operating conditions). Proceed
to Step 7.
6. Does water flow from the hot-water nozzle during the test?
a. No. Water is not flowing through the water path. Check for mechanical flow
problems (obstructions) and make sure that the pump is operating.
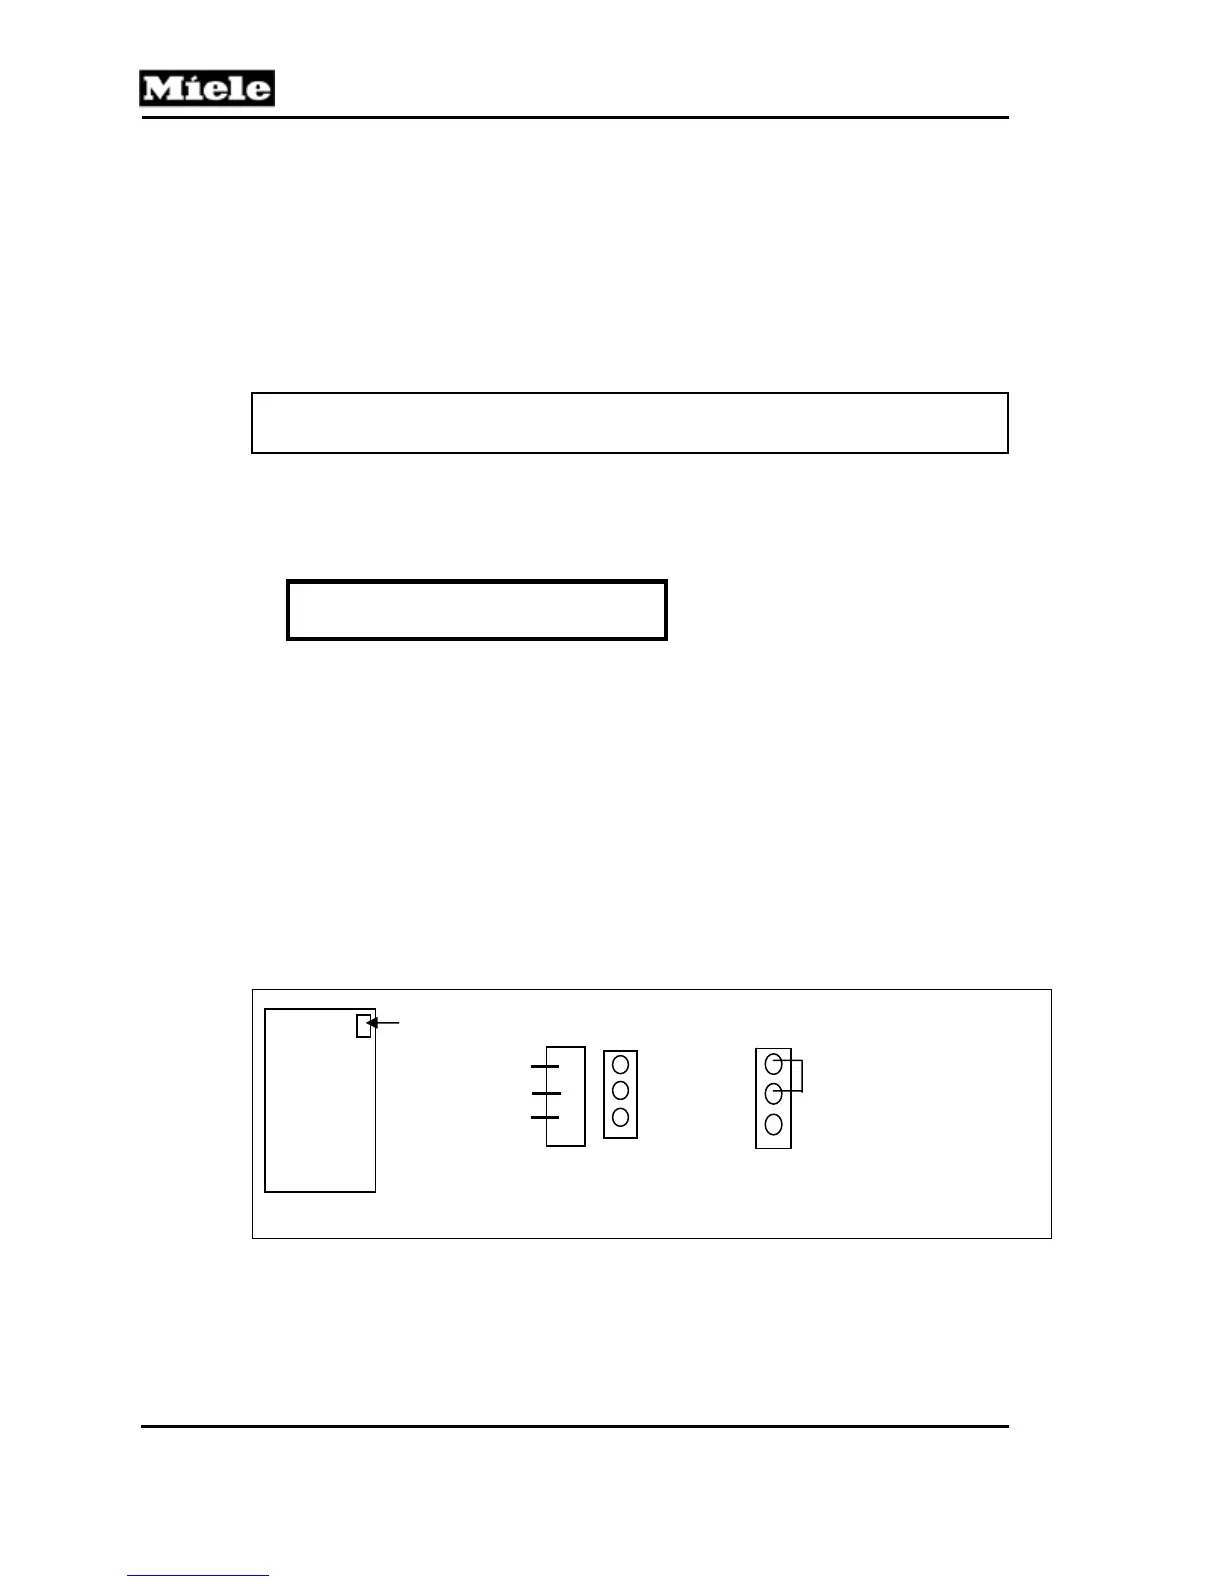
b. Yes. Unplug the connector at JP5 on the electronic. Place a jumper at JP5 (CVA
610) or JP25 (CVA 615) between the rear and center pins on the electronic (see
Figure 5-53). Access service mode. Check if a solid "8" is shown in the first line
in the display. If so, replace the flow meter (Section 5.55). If not, replace the
power electronic (Section 5.4).
Figure 5-53: Location of JP5/JP25 and Placement of Jumper
7. Release the three coffee buttons and reconnect JP5 or JP25 if disconnected earlier.
If water flowed from the hot-water nozzle in Step 6, proceed to Step 8. If water did
not flow from the hot-water nozzle, correct the problem before proceeding to Step 8.
8. Press the three coffee buttons again and observe the number displayed in the
Electronic
Board
JP5
Brown
Yellow
Green
Jumper
Front of A
liance JP5, as
onnected at Board Plu
Removed/Jum
er Installed

 Loading...