OM-272384 Page 22
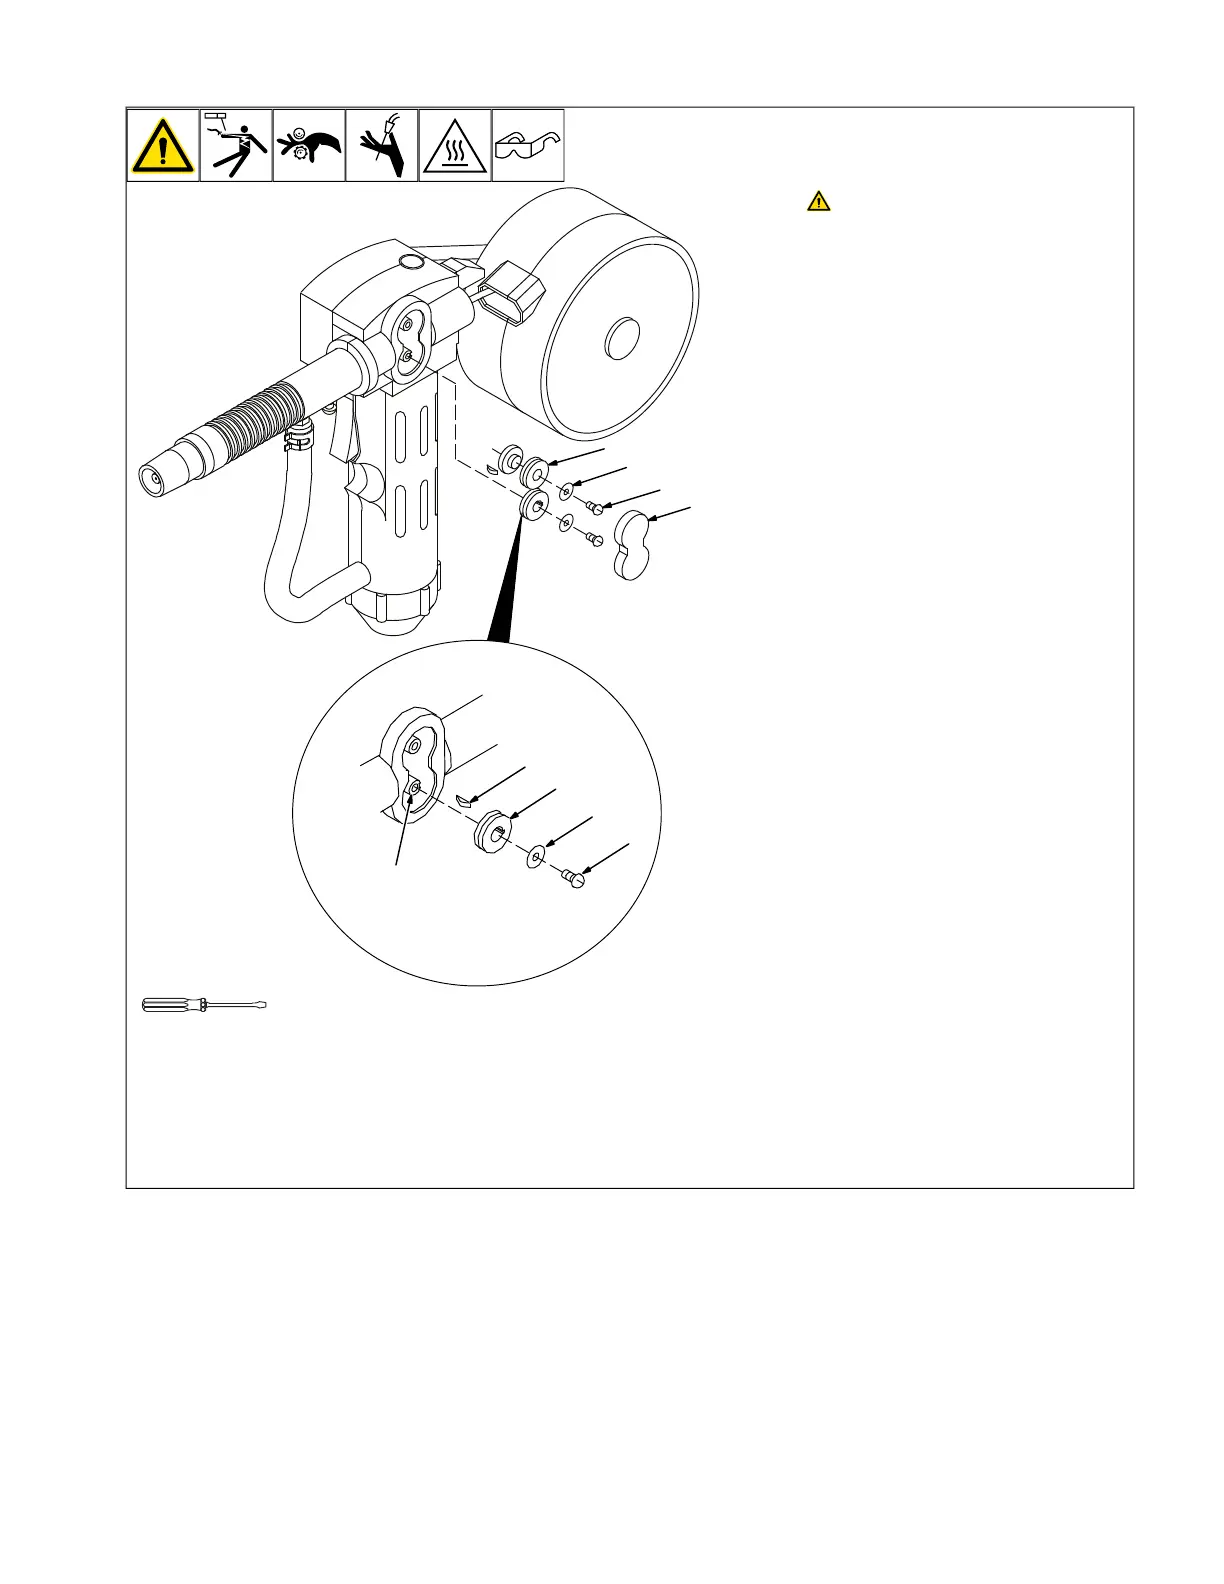
6-2. Changing Drive Rolls
OM-222 Page 1
allen_wrench
NGO’s
tools/
flathead philips head wrench
pliers
knife
heavy-duty workclamp light-duty workclamp wirecutter frontcutter
allen_set
needlenose
steelbrush nutdriver
chippinghammer
solderiron
stripcrimp
drill
torque wrench
socket wrench
hammer awl file
crimper
paintbrush
feelergauge flashlight ruler
toothbrush
greasegun
qtip (swab)
vicegrip
handream
punch
filterwrench
strapwrench
airgun
solvent pinextractor eprompuller pipewrench
torque screwdriver
cr
escent wrench
Turn Off power at welding power
source first.
1 Drive Roll Cover
Remove cover.
Changing Push Roll:
To remove push roll:
2 Push Roll Screw
3 Washer
4 Push Roll
Remove screw and washer, and lift out drive
roll.
To install drive roll:
Slide drive roll onto shaft and secure with
washer and screw.
Changing Lower Drive Roll:
To remove drive roll:
5 Lower Drive Roll Screw
6 Washer
7 Lower Drive Roll
8 Drive Roll Key
9 Drive Roll Shaft
Remove screw and washer, and lift out drive
roll. Note: drive roll key will come out with
drive roll.
F
It may be necessary to remove drive
roll side of gun case to change lower
drive roll.
To install drive roll:
Place drive roll key in slot in drive roll shaft.
Line slot in drive roll up with drive roll key,
and slide drive roll onto shaft.
Secure drive roll with washer and screw.
Reinstall gun case, if applicable.
Reinstall drive roll cover.