OM-272384 Page 23
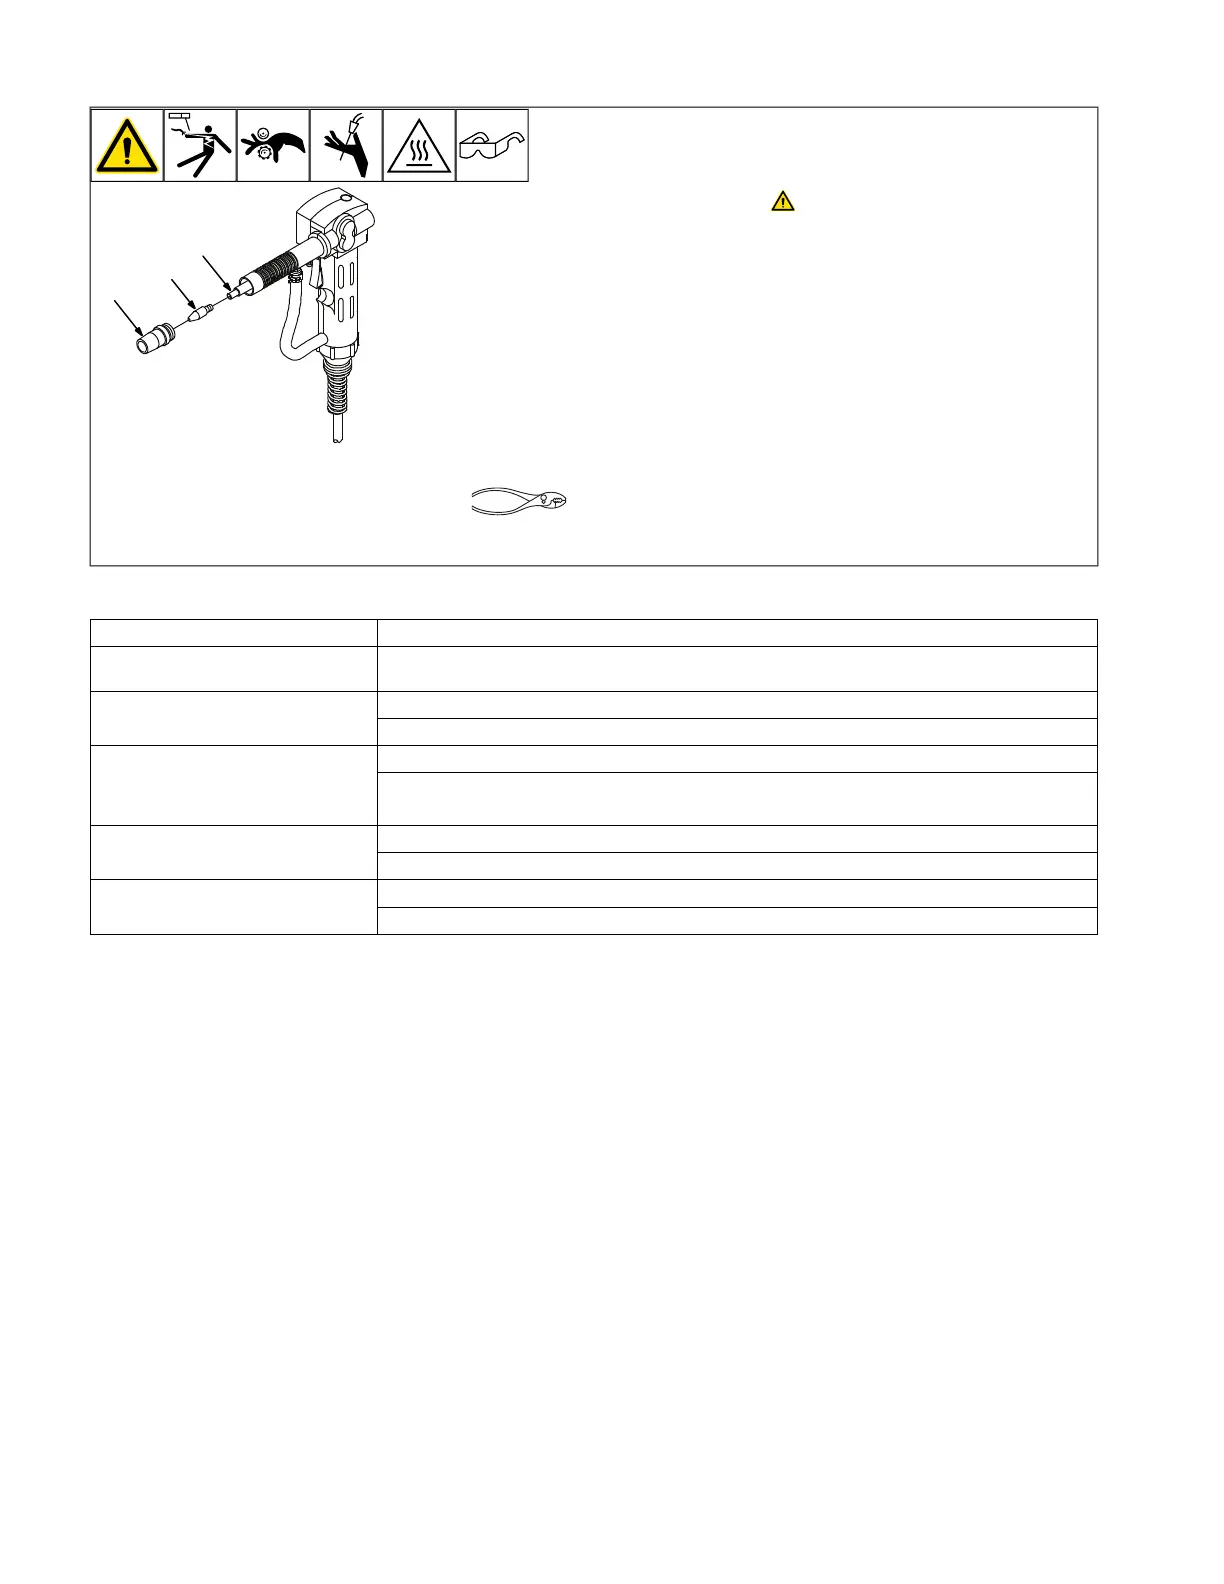
6-3. Changing Liner
OM-222 Page 1
allen_wrench
NGO’s
tools/
flathead philips head wrench
pliers
knife
heavy-duty workclamp light-duty workclamp wirecutter frontcutter
allen_set
needlenose
steelbrush nutdriver
chippinghammer
solderiron
stripcrimp
drill
torque wrench
socket wrench
hammer awl file
crimper
paintbrush
feelergauge flashlight ruler
toothbrush
greasegun
qtip (swab)
vicegrip
handream
punch
filterwrench
strapwrench
airgun
solvent pinextractor eprompuller pipewrench
torque screwdriver
crescent wrench
Turn Off power at welding power
source first.
1 Nozzle
2 Contact Tip
3 Liner
Remove and replace liner.
Reinstall parts as shown.
6-4. Troubleshooting
Trouble Remedy
No weld output; gun/feeder does not
work.
Place Power switch on welding power source in the On position (see welding power source Owner’s
Manual). Check Spool Gun/MIG Gun switch for correct position.
Erratic weld output. Tighten and clean all connections.
Check for proper weld output polarity connections.
Pressing gun/feeder trigger does not
energize welding power source; weld-
ing wire is not energized; shielding
gas does not flow.
Secure plug from gun/feeder trigger cord into 4-socket receptacle on welding power source
Place Spool Gun/MIG Gun switch in Spool Gun position.
Wire feeds, shielding gas flows, but
welding wire is not energized.
Secure spool gun cable connector to wire drive assembly inside welding power source.
See Troubleshooting section in welding power source Owner’s Manual.
Wire feeds erratically. Check and correct drive roll pressure (see Section 4-6).
Clean or replace drive roll; clean or replace liner (see Sections 6-2 and 6-3).
6-5. GMAW (MIG) Aluminum Welding Hints
Here are several hints to help you be more successful with your new aluminum feed system.
MIG welding aluminum requires different techniques than MIG welding mild steel.
A. Before You Start Welding
l The removal of lubricants from the aluminum base material may be necessary. Consult with your local welding distributor for their recom-
mendation on aluminum cleaners.
l Oxide removal should be done after degreasing. This should be done with a stainless steel wire brush. This can be done with a hand wire
brush or with a cup wire brush. If a power wire brush is used, keep the RPM’s and pressures low to reduce smearing the surface of the mate-
rial, which could entrap oxides and impurities under the surface. Always use a wire brush that is used only on aluminum to keep from con-
taminating the base material.
l Contact you local welding distributor or aluminum filler metal representative for recommendations on wire alloys that fit your application.
Know the alloy of your base aluminum and what conditions the finished part will be subjected to. The two most readily available aluminum
filler wires are ER4043 and ER5356.