3-39
1
1
3
Useful Function
5
6
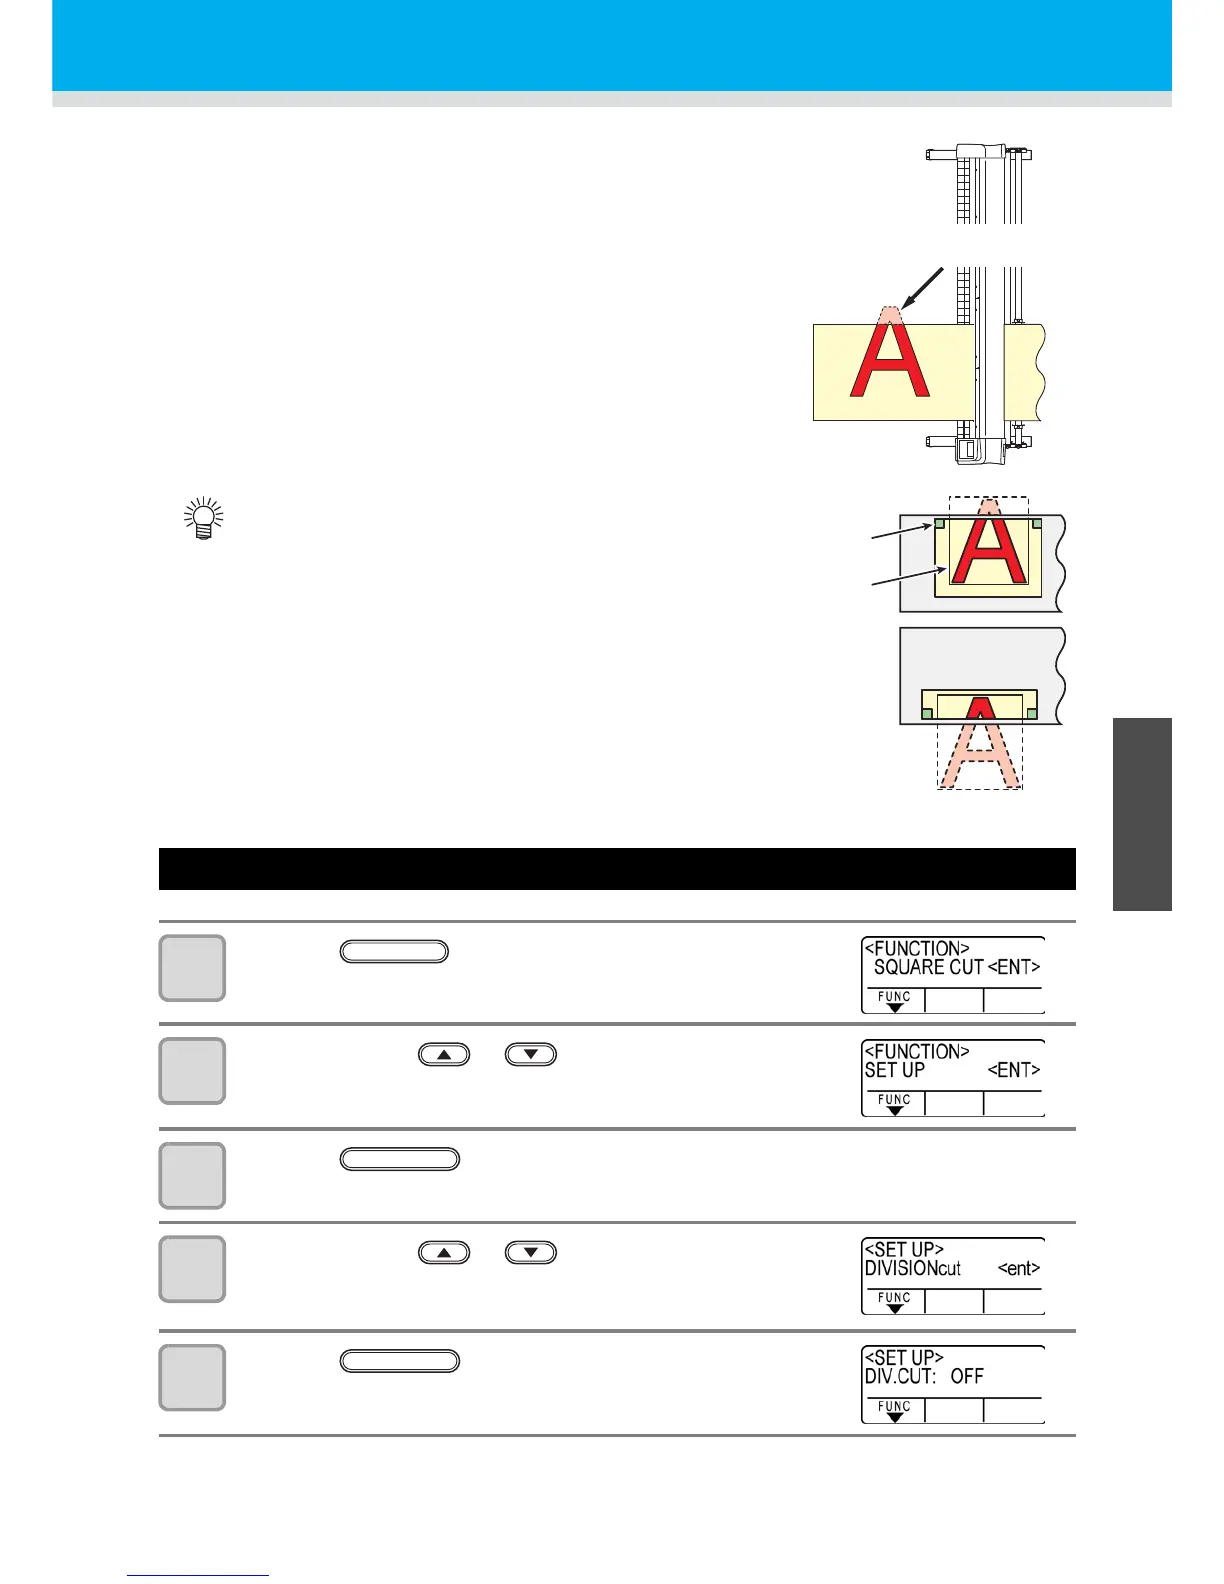
Perform DIVISION cut
When you set division cut for the width direction (Y), you can cut the
data bigger than the sheet width by dividing it (DIVISION cut
function).
In addition, when you set division cut for the feeding direction (X),
you can cut the long data by dividing it and you can prevent cutting
misalignment due to sheet meandering.
Set the Y direction (width direction) DIVISION cut
1
Press the key in the local mode.
2
Press the jog key or to select [SET UP] .
3
Press the key.
4
Press the jog key or to select [DIVISION
CUT].
5
Press the key.
• With the DVISION CUT function, you can use the following
convenient functions too.
• Perform a frame cut:
Together with the cut data, the plotter automatically cuts
out the frame fitted to the size of the cut data.
• Put a mark for leaving a margin for gluing:
You can put a “mark” for showing the point for gluing
together the division cut sheets.

 Loading...


