EasyManua.ls Logo

MIMAKI CJV150-107 User Manual

MIMAKI CJV150-107
142 pages
To Next Page IconTo Next Page
Page #1 background imageLoading...
Page #1 background image
MIMAKI ENGINEERING CO., LTD.
URL: http://eng.mimaki.co.jp/
You can also download the latest manual from our website.
D202770-13
Original instructions

Table of Contents

Other manuals for MIMAKI CJV150-107

Question and Answer IconNeed help?

Do you have a question about the MIMAKI CJV150-107 and is the answer not in the manual?

MIMAKI CJV150-107 Specifications

General IconGeneral
BrandMIMAKI
ModelCJV150-107
CategoryPrinter
LanguageEnglish

Summary

Introduction and Compliance Information

Disclaimer of Warranty

Outlines the limited warranty terms and conditions.

Requests and FCC Statement

Covers user requests, FCC statement, and interference warnings.

Foreword and Manual Guide

Welcomes users and explains the manual's purpose and content.

Safety Precautions

Symbols and Meanings

Explains warning symbols and their meanings for safe operation.

Hazardous Moving Parts Warnings

Advises on keeping body parts away from moving components.

Power Cable Handling Safety

Instructions for safe handling of the power cable.

Ink Handling and Cartridge Safety

Precautions for handling ink and ink cartridges safely.

Cutter Safety Advice

Safety advice regarding the cutter blade and handling.

Precautions in Use

General Usage Safety Guidelines

Covers power supply, heater, maintenance notes, clump lever, and dust protection.

Movable Parts and Cutter Safety

Warnings about moving parts and precautions with cutters.

Cautions on Installation

Parts Replacement, Disposal, and Media Handling

Covers replacement parts, disposal, dust protection, and media handling.

Unsuitable Installation Environments

Details unsuitable installation environments for the machine.

Warning Labels

EC Declaration of Conformity

Chapter 1: Machine Installation and Moving

Machine Installation Requirements

Secure a suitable installation space and consider environmental temperature.

Moving the Machine Safely

Step-by-step guide for moving the machine on a step-free floor.

Chapter 1: Machine Parts Identification

Front Side Components Overview

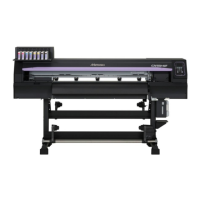
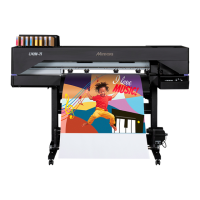
Identifies and describes the front-side components of the machine.

Chapter 1: Rear and Right Side Components

Chapter 1: Operation Panel Overview

Display and Status Indicators

Explains the display, status lamp, and ink status icons.

Chapter 1: Operation Panel Function Keys

FUNC1 to FUNC3 Key Assignments

Details the functions assigned to the FUNC1, FUNC2, and FUNC3 keys.

Chapter 1: Key Machine Components

Media Sensor, Carriage, Cutter, Capping Station, Rollers

Describes essential components like media sensor, carriage, cutter, capping station, and rollers.

Chapter 1: Connecting Cables and Power

USB2.0 Interface Cable Connection

Connects the PC and the machine using a USB2.0 interface cable.

Power Cable Connection

Instructions for connecting the power cable to the machine and outlet.

Chapter 1: Ink Cartridge Installation

Ink Status Indicators and Expiration Info

Indicates ink status via lamps and provides expiration date information.

Chapter 1: Ink Handling Precautions

Chapter 1: Media Information

Usable Media Sizes and Types

Lists usable media sizes and specifications for different models.

Media Handling Precautions

Provides precautions for handling printing media.

Chapter 1: Machine Operation Modes

NOT-READY, LOCAL, MENU, and REMOTE Modes

Explains the different operation modes: Not-Ready, Local, Menu, and Remote.

Chapter 2: Printing Workflow

Chapter 2: Power Management

Chapter 2: Media Setup - Head Height

Adjusting the Head Height

Adjust the head height according to the thickness of the media you use.

Chapter 2: Pinch Roller Adjustment

How to Adjust Pinch Roller Position

Move the pinch roller unit to adjust the position of the pinch roller.

Chapter 2: Media Size and Grit Rollers (CJV150-160)

Chapter 2: Media Size and Grit Rollers (CJV150-130)

Chapter 2: Media Size and Grit Rollers (CJV150-107)

Chapter 2: Media Size and Grit Rollers (CJV150-75)

Chapter 2: Print and Cut Area Limits

Chapter 2: Media Holder Usage

Setting Media Position

Set the media so that the right end of the media will be inside the area shown below.

Chapter 2: Setting a Roll Media

Chapter 2: Pinch Roller Pressure Settings

Chapter 2: Manual Media Width Setting

Chapter 2: Take-up Device and Torque Limiter

Take-up Device Operation

Set the operation method for the take-up unit and tension bar.

Torque Limiter Adjustment

Adjust the take-up torque with the torque limiter for different media types.

Chapter 2: Setting Leaf Media

Chapter 2: Printing Origin and Heater Settings

Changing the Printing Origin

Move the LED pointer to the changing position and decide the position.

Changing Heater Temperatures

Change and save temperature settings for the heaters.

Chapter 2: Test Printing Procedures

Test Pattern Types and Relationship

Describes the two types of test patterns and their relation to the head.

Chapter 2: Performing Test Prints

Normal Test Pattern Printing

How to perform test printing with the normal test pattern.

White Ink Test Pattern Printing

How to perform test printing for checking white ink.

Chapter 2: Head Cleaning

Head Cleaning Types and Procedures

Select and perform head cleaning based on test print results.

Chapter 2: Media Correction

Correcting Media Feed Amount

Correct the media feed amount to match the media type for better print quality.

Chapter 2: Correcting Dot Position Shifts

Chapter 2: Starting a Print Job

Chapter 2: Stopping Print Jobs

Stopping Printing Operation

Perform operation to stop printing halfway.

Deleting Received Data (Data Clear)

Delete already received data when you want to stop printing.

Chapter 2: Manual Media Cutting

Chapter 2: Cutting Workflow

Chapter 2: Installing Cutting Tools

Installing a Cutter Blade

Procedure for removing and installing the cutter holder and blade.

Adjusting Cutter Blade Protrusion

Adjust the cutter blade protrusion for optimal cutting quality.

Chapter 2: Tool Installation Details

Installing the Cutter Holder

Step-by-step guide to install the cutter holder into the carriage.

Installing a Ballpoint Pen

Instructions for installing a ballpoint pen for test printing.

Chapter 2: Tool Installation Details (Continued)

Installing the Pen Adapter

Procedure for inserting the pen adapter with the pen into the tool holder.

Chapter 2: Setting Cutting Conditions

Understanding Cut Conditions

Lists the parameters that can be set for cutting conditions.

Selecting the Tool Condition

How to select the appropriate tool condition for cutting.

Chapter 2: Configuring Cut Settings

Chapter 2: Test Cutting

Test Cutting Procedure and Results

Execute test cutting, check results, and troubleshoot issues.

Chapter 2: Cutting Data Management

Setting the Origin Point

Set the origin as a reference point for cutting data.

Starting a Cutting Job

Transmit data from PC and start the cutting process.

Chapter 2: Stopping Cutting Operations

Stopping Cutting and Clearing Data

Stop cutting operations and clear received data.

Chapter 2: Cutter Unit Handling

Chapter 2: Manual Media Cutting

Chapter 3 Setup Menu Configuration

SETUP MENU Functions

Configure print conditions for media using the SETUP MENU.

MACHINE SETUP MENU Options

Adjust common settings for easy machine operation via MACHINE SETUP MENU.

Nozzle Check and Recovery Setup

Configure nozzle checking, recovery, and judgment conditions.

Machine Information Display

View machine information such as usage, version, and error history.

Chapter 3: Registering Optimal Print Conditions

Registering Conditions to SETUP 1-4

Register print conditions individually to match media usage.

Using Temporary Settings

Temporary settings for single use or partial changes, reflecting to SETUP 1-4.

Chapter 3: Resetting Registered Contents

Chapter 3: Setting of Media Correction

Correcting Media Feed Rate

Correct media feed amount to match media type for accurate printing.

Chapter 3: Correcting Dot Position Shifts

Chapter 3: Setting the HEATER

Chapter 3: Setting of Logical Seek

Chapter 3: Setting of Drying Time

Chapter 3: Setting Margins

Left and Right Margins

Set a non-printing area along the left and right edges of the media.

Chapter 3: Setting Vacuum Fan

Chapter 3: Setting Feed Speed

Chapter 3: Setting Auto Cleaning

Chapter 3: Setting Interval Wiping

Chapter 3: MACHINE SETUP MENU Overview

Chapter 3: MACHINE SETUP MENU Table

Chapter 3: Setting AUTO Power-off

Chapter 3: Setting Take-up Unit

Chapter 3: Setting Media Display Options

Media Residual Display Setting

Set whether the screen displays the remaining amount of media.

Media Detection Settings

Set media detection method and pinch roller query.

Chapter 3: Setting Language

Chapter 3: Time and Unit Settings

Setting Time and Time Difference

Set the country's time and time difference.

Setting Units (Temp/Length)

Set the units for temperature and length display.

Chapter 3: Setting Keyboard Buzzer

Chapter 3: Setting Feed Confirmation

Chapter 3: Setting Space Feed Mode

Chapter 3: Network Configuration

Checking IP and MAC Addresses

Displays current IP and MAC addresses of the machine.

DHCP and AutoIP Settings

Configure DHCP and AutoIP for automatic IP address assignment.

Manual IP Address Settings

Manually set IP address, gateway, DNS, and subnet mask.

Chapter 3: Event Mail Function Setup

Chapter 3: Event Mail Function Configuration

Enabling Event Mail

Enable the function to send e-mails for machine events.

Setting Event Triggers

Select specific events to trigger e-mail notifications.

Setting Email Address and Subject

Configure recipient email address and message subject for event notifications.

Chapter 3: Server Configuration for Event Mail

Chapter 3: Sending a Test Email

Test Email Sending Procedure and Errors

Procedure to send a test email and troubleshoot errors.

Email Sending Error Code Reference

Lists error codes and their causes/solutions for email sending failures.

Chapter 3: Initializing Machine Settings

Chapter 3: Nozzle Check Menu Overview

Chapter 3: Printing Check Flow

Chapter 3: Nozzle Missing Judgment and Error Handling

Chapter 3: Setting the Printing Check

Chapter 3: Setting the Nozzle Recovery

Chapter 3: Setting the Judgement Condition

Chapter 3: Information Menu Overview

Chapter 3: Information Menu Table

Chapter 3: Displaying Machine Information

Chapter 4: Cutting Function Overview

Cutting Data with Registration Marks

Create registration marks on output for precise cutting.

Cutting Workflow Procedures

Steps for adding marks, setting media, and sending cut data.

Registration Mark Input Precautions

Limitations and guidelines for preparing data with registration marks.

Registration Mark Size Guidelines

Recommendations for registration mark size and distance between marks.

Chapter 4: Cutting Function - Mark Detection

Setting Mark Detection Parameters

Configure mark detection, type, size, and fill up settings.

Chapter 4: CUTTING MENU Overview

Chapter 4: Cutting MENU Table

TP DETECT Settings

Settings for detecting registration marks without fail.

CUT MODE and COPY Function

Set cutting quality and perform multiple cuttings.

SETUP SUB MENU Options

Convenient functions for cutting like division, dummy cut, and offset.

MAINTENANCE and ORIGIN OFFSET

Functions for mark sensor maintenance and origin offset adjustment.

Chapter 4: Setting the CUT MODE

Chapter 4: Perform Multiple Cuttings (Copy Function)

Chapter 4: SETUP SUB MENU Options

Setting the DIVISION CUT (Y-direction)

Cut data bigger than media width by dividing it by Y-direction.

Chapter 4: Setting the DIVISION CUT (X-direction)

Chapter 4: Making Media Without Uncut Area (OVER CUT)

Chapter 4: Other SETUP SUB MENU Settings

List of Settings Overview

Provides an overview of other setup options like UP SPEED and DUMMY CUT.

Chapter 4: SETUP RESET

Chapter 4: Maintenance Function

Maintenance of Mark Sensor

Check and adjust the cutting accuracy when cutting does not go normally.

Chapter 4: Detect Operation

Chapter 4: Correct the Light Pointer Position

Chapter 4: Perform SAMPLE CUT

Chapter 4: Cutting Media into Multiple Pieces

Chapter 4: Cutting Data Without Register Marks

PC ORIGIN OFFSET for Print & Cut

Adjust misalignment between printing and cutting using PC origin offset.

Chapter 4: Print & Cut with Registration Marks

TP OFFSET Adjustment

Adjust misalignment between printing and cutting using TP offset.

Chapter 4: Setting the Scale Adjust

Chapter 5 Maintenance Overview

Maintenance Precautions

Pay attention to safety items when performing machine maintenance.

Cleaning Exterior Surfaces and Platen

Procedures for cleaning the machine's exterior surfaces and platen.

Cleaning Media Sensor and Press

Steps for cleaning the media sensors and the media press.

MAINTENANCE MENU Functions

Provides various settings for machine maintenance.

Chapter 5: Maintenance Menu Summary

STATION MAINTENANCE Details

Carrying out maintenance on carriage and station periphery.

NOZZLE RECOVERY and AUTO MAINTENANCE

Functions for nozzle recovery and automatic maintenance scheduling.

INK FILLING and WHITE/SILVER MAINTENANCE

Procedures for ink filling and white/silver ink maintenance.

Chapter 5: Maintaining the Capping Station

Cleaning the Wiper and Cap

Recommended procedure for cleaning the wiper and cap frequently.

Chapter 5: Washing the Head Nozzle

Chapter 5: Washing the Ink Discharge Passage

Chapter 5: Machine Storage Procedures

When Not Used for a Long Time

Custody cleaning for head nozzles and ink passage when machine is idle.

Chapter 5: Cleaning the Ink Head Area

Chapter 5: Nozzle Recovery Function

Nozzle Recovery Selection and Registration

Select nozzles for recovery when missing cannot be improved.

Chapter 5: Resetting Set Values

Chapter 5: Automatic Maintenance Function

Setting Refreshing and Tube Wash Intervals

Set intervals for refreshing operations and tube washing.

Setting Cleaning Intervals and Type

Set the cleaning type and interval for each cleaning operation.

Chapter 5: Fill Up Ink

Chapter 5: White Ink Maintenance

Chapter 5: Replacing Consumables

Replacing the Wiper

Procedure for replacing the wiper when it is worn or damaged.

Waste Ink Tank Confirmation

Handle "Check waste ink" warning messages and replace tank.

Chapter 5: Replacing Waste Ink Tank Before Confirmation

Chapter 5: Replacing the Cutter Blade

Chapter 5: Replacing and Adjusting the Cutter Blade

Adjusting the Cutter Blade

Adjust the blade edge, set cut conditions, and perform test cut.

Replacing Cutters Other Than Supplied

Procedures for replacing cutters not supplied with the unit.

Chapter 5: Adjusting Cutter Blade Edge

Chapter 6 Troubleshooting Overview

Power Does Not Turn On

Troubleshooting steps for when the machine does not power on.

Machine Does Not Start Printing

Troubleshooting steps for when printing does not start.

Media Jamming or Soiling Issues

Troubleshooting steps for media jamming or soiled media.

Poor Image Quality Troubleshooting

Corrective actions for unsatisfactory image quality.

Chapter 6: Troubleshooting Specific Issues

Heater Temperature Not Reaching Set Level

Troubleshooting steps for heater temperature issues.

Nozzle Clogging Resolution

Operations to resolve nozzle clogging after head cleaning.

Chapter 6: Ink Cartridge Warnings

Ink Cartridge Warning Display

Handling cartridge errors and replacing cartridges.

Chapter 6: Warning and Error Messages

Errors During Operations

Troubleshooting for invalid operations and cover open errors.

Messages Displayed in LOCAL Mode

Troubleshooting for local mode messages like ink, media, and temperature.

Chapter 6: Troubleshooting Various Warnings

White Ink and Spout Rubber Warnings

Addresses warnings for white ink settling and spout rubber replacement.

NCU Sensor and Connection Errors

Troubleshooting for NCU sensor issues and connection errors.

Chapter 6: Ink Error Messages

Ink Cartridge Compatibility and Status Errors

Troubleshooting for wrong ink type, color, cartridge, and ink levels.

Ink Expiration Date Errors

Handling errors related to ink cartridge expiration dates.

Chapter 6: PCB and Hardware Error Messages

PCB and Internal Clock Errors

Troubleshooting for errors related to main PCB, SDRAM, and battery life.

Head and Motor Control Errors

Troubleshooting for errors related to head data transfer and motor control.

Chapter 6: System and Communication Error Messages

PCB, COM, and SLIDER Errors

Troubleshooting for errors related to various PCBs and SLIDER.

Command, Parameter, and USB Errors

Troubleshooting for command, parameter, and USB communication errors.

Chapter 6: Specific Operational Error Messages

Print Area, Parameter, and Command Errors

Troubleshooting for print area, parameter, and command related errors.

Media and Registration Mark Errors

Troubleshooting for media width, position, and registration mark detection errors.

Chapter 6: System Halt Errors

System Halt: General Message

Troubleshooting for general system halt errors.

System Halt: Wiper Error

Troubleshooting for system halt errors related to wiper operation.

Chapter 7 Appendix Overview

Printer Section Specifications

Detailed specifications for the printer section of the machine.

Cutter Section Specifications

Detailed specifications for the cutter section of the machine.

Common Specifications

General specifications applicable to all machine models.

Ink Specifications

Details ink specifications for sublimation dye and solvent inks.

Chapter 7: Setting Orders Depending on Ink Type

Chapter 7: Sheet for Inquiry

Related product manuals