THE MINELAB EXPLORER
75
ADVANCED USE
6
easy reference
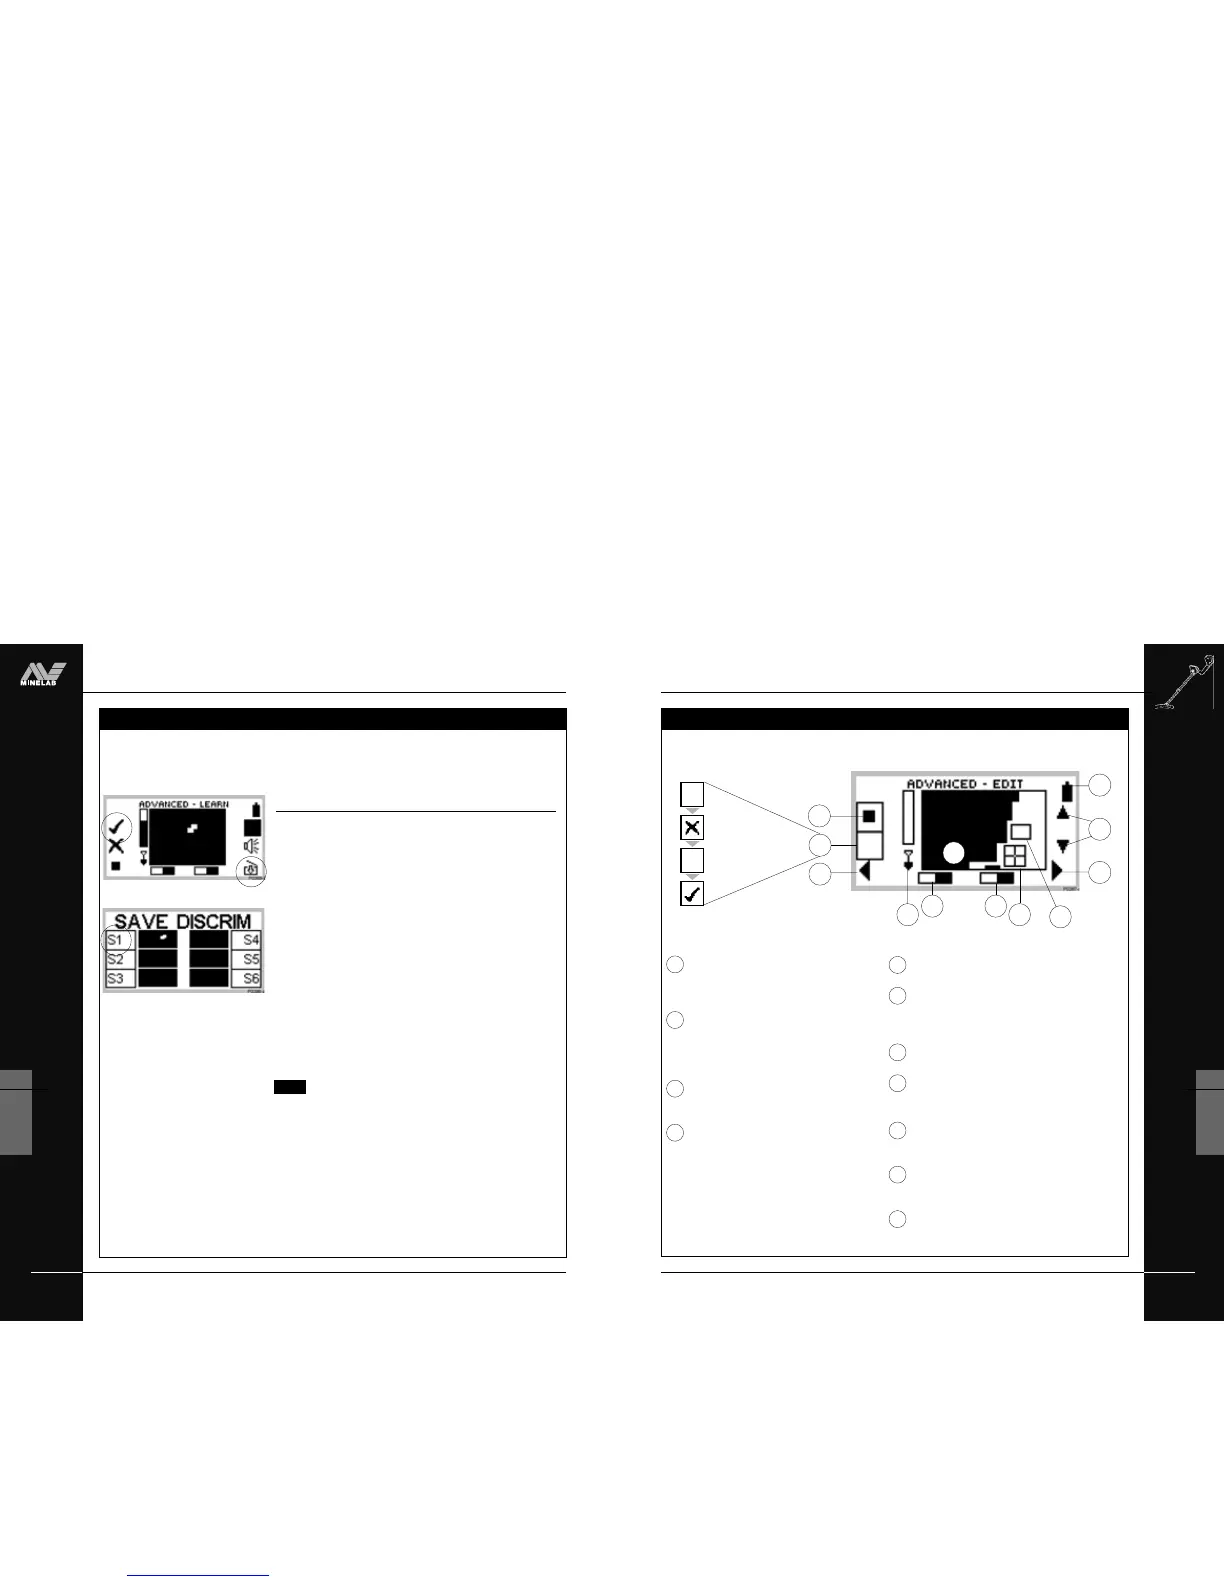
ADVANCED MODE’S EDIT DISPLAY
Target frame size. This allows you to select the
size of the framed area you wish to accept or reject
from the displayed discrimination pattern. There is
a choice of three sizes. See pages 77-78.
Reject or accept framed area. Instructs Explorer
to accept the framed area on selection of the tick
icon. Selection of the cross icon will reject the
framed area. This edits the current pattern. See
page 78.
Horizontal navigation. Pressing the shift button
adjacent to these arrows moves the target frame
to the left or right of screen.
Depth indicator. The clear portion of the depth
indicator represents the approximate distance of a
target below the coil. The top of the indicator
represents the position of the coil and the bottom
represents 12 inches (300mm) from the coil. The bar
will be clear if the target is too far from the coil or its
depth cannot be accurately gauged.
1
2
3
4
3
1
3
2
6
4
57
9
10
11
Iron Mask. This shaded block indicates whether IRON
MASK function is ON or OFF. See page 45.
Discrimination pattern. The shaded and unshaded
areas of the screen schematically represent the current
target discrimination characteristics. See pages 42-43
for basic information.
Pinpoint. This shaded block indicates whether
PINPOINT function is ON or OFF. See page 59.
Target Crosshair. Represents the detected object’s
properties on a two-dimensional scale of
discrimination. See page 42.
Target frame. Any area of the screen enclosed by this
frame may be excluded from or become part of your
preferred target pattern.
Vertical navigation. Pressing the shift buttons next
to these arrows moves the target frame up or down
screen.
Battery life. This shaded block indicates the charge
remaining in the installed batteries. See page 27.
7
8
9
10
11
8
ADVANCED MODE’S EDIT DISPLAY
6
5
THE MINELAB EXPLORER
74
ADVANCED USE
6
www.minelab.com
tutorial
*
LEARN’S TARGET SELECTION
... continued
Figure 6.5 Adjusting size of learnt region
LEARN’S TARGET SELECTION
Phase 2: Learning and Saving the target pattern
STEP 7 Wave the search coil several times above the desired
target until the detector learns it by clearing an area on
the screen. Learn needs to ‘see’ the target consistently to
accept it for inclusion. If you have more than one target,
repeat the procedure for each one. In Figure 6.5, two
current high denomination coins have been used.
STEP 8 When you have finished learning the targets, press the
shift button next to the flashing tick.
STEP 9 Press the shift button next to the Save icon to go directly
to the SAVE DISCRIM menu. Press a button next to your
choice of option S1–S6 (for example S1 in Figure 6.6).
This will save the learnt discrimination pattern for future
use.
STEP 10 Press the DETECT shortcut button to return to the
detect screen. SELECT DISCRIM will then use this
saved pattern as the current search pattern.
NOTE For more detail on SAVE DISCRIM, turn to page 80.
Figure 6.6 Saving the newly-edited
discrimination pattern