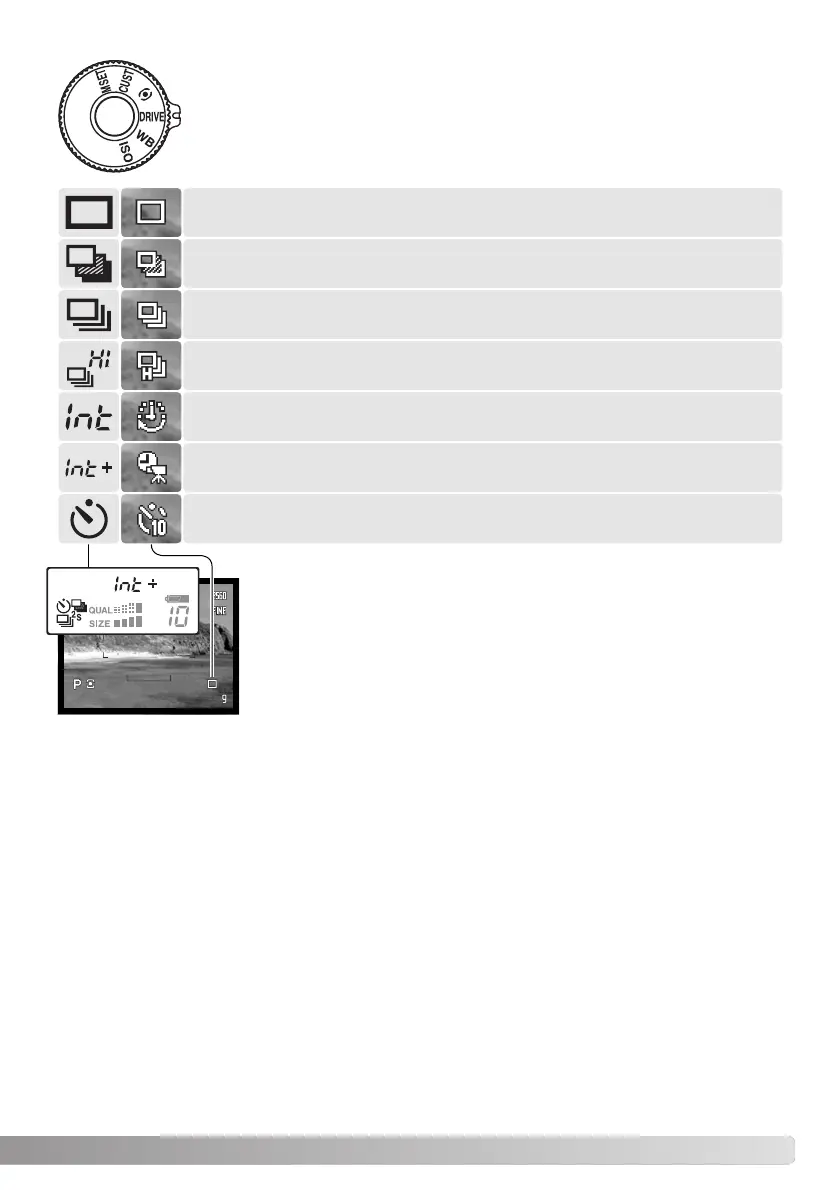
61
The drive modes control the rate and method images are captured. Indicators
indicating the selected drive mode appear on the data panel and monitors.The
drive mode is set with the function dial (p. 60).
DRIVE MODES
Continuous advance - to take a series of images when the shutter-release but-
ton is pressed and held (p. 64).
Bracketing - to take a series of images with differing exposure, contrast, satura-
tion, and color (p. 62).
Interval - to take a series of images over a period of time (p. 66).
All indicators have been shown for clarity. The single-frame advance and
continuous advance indicators occupy the same area of the data panel.
All the drive-mode indicators appear at the same location in the monitors.
When a large amount of image data is captured in a short period, the
camera’s internal buffer memory becomes full; the frame counter turns
yellow on the monitors. Time must be given for this data to be written to
the memory card. Wait for the indicator to turn white before capturing
more images.
High-speed continuous advance - to take a series of images at approximately
2,8 frames per second (p. 64).
Interval and time-lapse movie - to take a series of still images and a movie clip
of a slow moving event (p. 66).
Single-frame advance - to take a single image each time the shutter-release
button is pressed (p. 33).
Self-timer - to delay the release of the shutter by 10 or 2 seconds. Used for self-
portraits (p. 68).