(2181) 33
■■
■■
■
Fig.2Fig.2
Fig.2Fig.2
Fig.2
2181 ADJ. PROGRAM
SS ADJ.
SPC ADJ.
PRETRIGGER ADJ.
GN ADJ.
PI-PR ADJ.
AF ADJ.
ASSIST MODE
■■
■■
■
Fig. 1Fig. 1
Fig. 1Fig. 1
Fig. 1
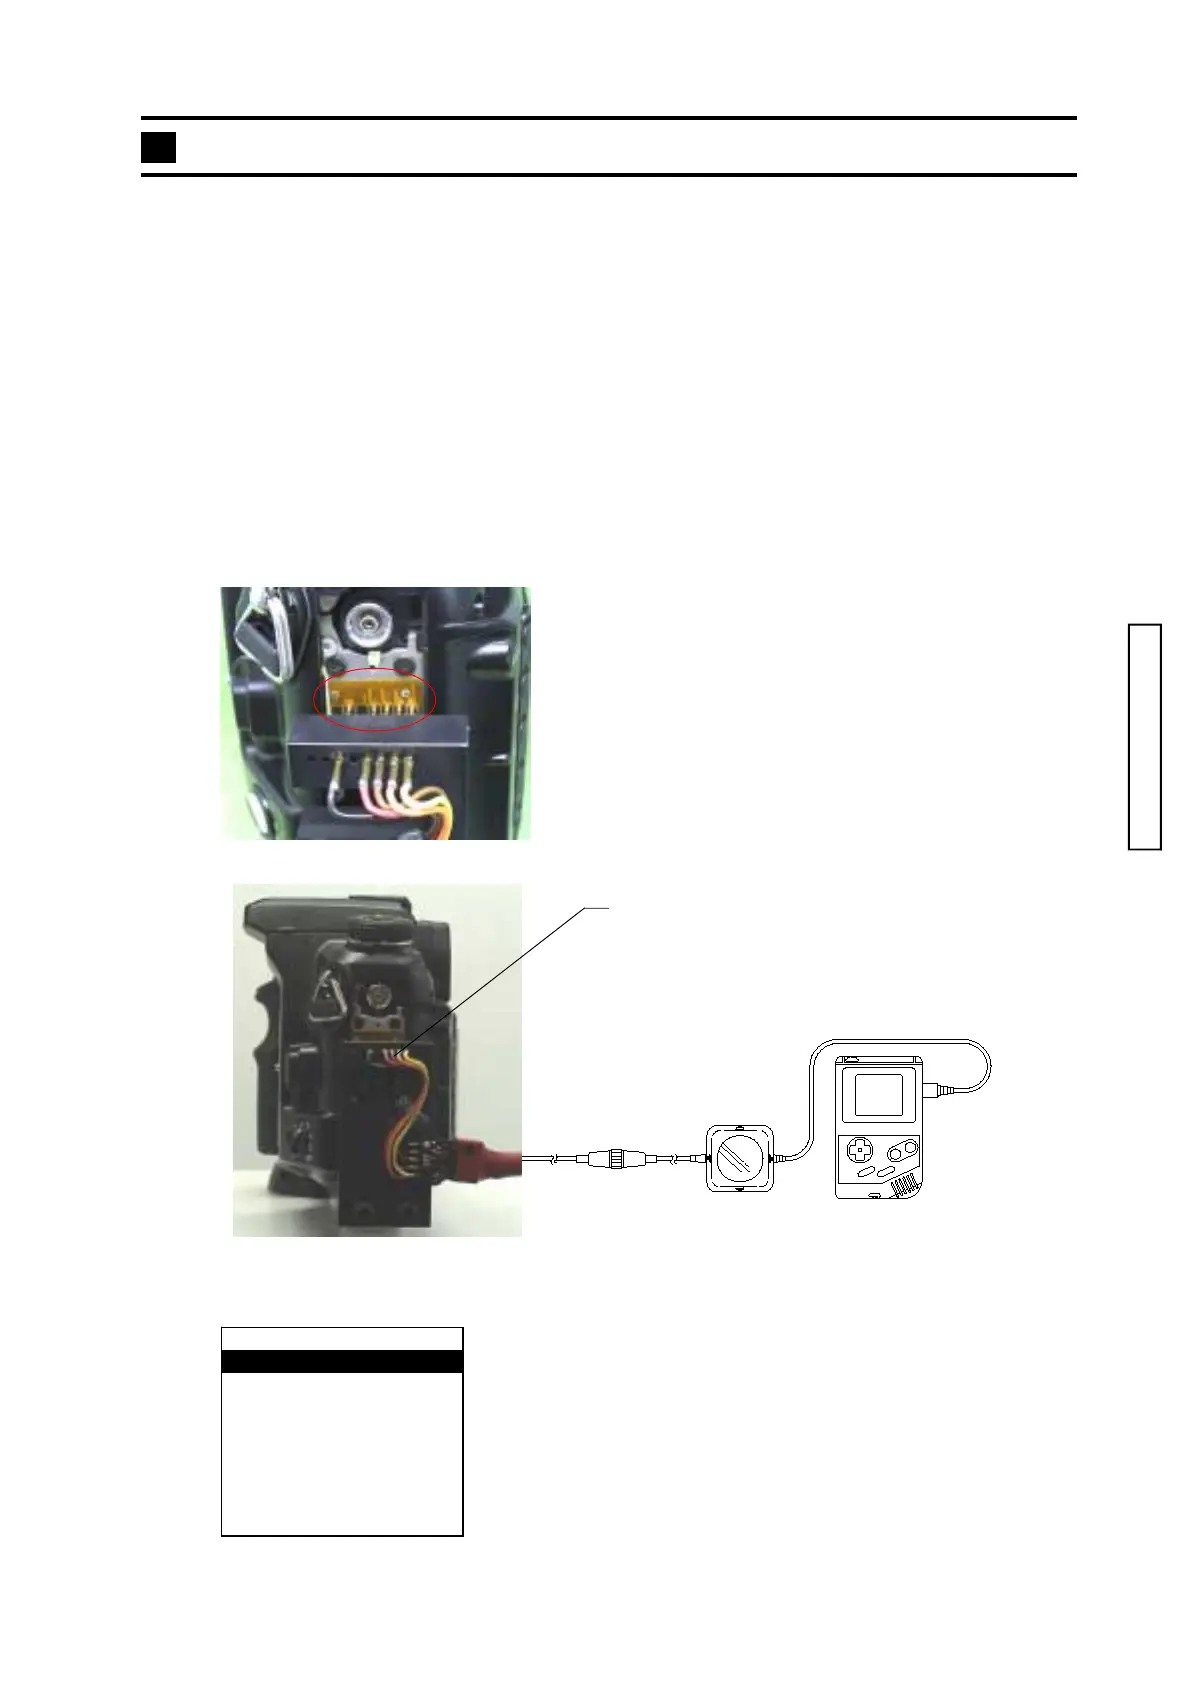
Using HIT System
Basic operation
Before attaching the contact jig-* to or detaching from the camera, be sure to remove the power supply from
the camera and turn off the HIT controller.
In case of making a Data Copy of adjustment data, keep the controller activated.
1. Attach the contact jig to the camera so that the probes of the jig properly make contact with the check
lands. (Fig. 1)
2. Set up the equipment as in Fig. 1.
3. Power the camera, then turn on the camera and HIT Controller. Main menu will appear in HIT Con-
troller display. (Fig. 2)
4. Select an item with Control Pad. The selected item appears in a black box. Then press SELECT
Button to enter.
ROM Pack for 2181ROM Pack for 2181
ROM Pack for 2181ROM Pack for 2181
ROM Pack for 2181
HIT ControllerHIT Controller
HIT ControllerHIT Controller
HIT Controller
HIT I/F BoxHIT I/F Box
HIT I/F BoxHIT I/F Box
HIT I/F Box
CONTACT JIG FOR 2181CONTACT JIG FOR 2181
CONTACT JIG FOR 2181CONTACT JIG FOR 2181
CONTACT JIG FOR 2181
Attach contact jig to the camera as theAttach contact jig to the camera as the
Attach contact jig to the camera as theAttach contact jig to the camera as the
Attach contact jig to the camera as the
rightmost pin of the contact jig make contactrightmost pin of the contact jig make contact
rightmost pin of the contact jig make contactrightmost pin of the contact jig make contact
rightmost pin of the contact jig make contact
with the rightmost land of the camera.with the rightmost land of the camera.
with the rightmost land of the camera.with the rightmost land of the camera.
with the rightmost land of the camera.
Set Set
Set Set
Set
Shutter lockShutter lock
Shutter lockShutter lock
Shutter lock
to to
to to
to
OffOff
OffOff
Off
in the in the
in the in the
in the
CUSTOM menu of camera.CUSTOM menu of camera.
CUSTOM menu of camera.CUSTOM menu of camera.
CUSTOM menu of camera.

 Loading...