(2181) 43
■■
■■
■
Fig.3Fig.3
Fig.3Fig.3
Fig.3
■■
■■
■
Fig.1Fig.1
Fig.1Fig.1
Fig.1
■■
■■
■
Fig.2Fig.2
Fig.2Fig.2
Fig.2
1,955mm1,955mm
1,955mm1,955mm
1,955mm
①①
①①
① AF Area Adjustment
Adjustment
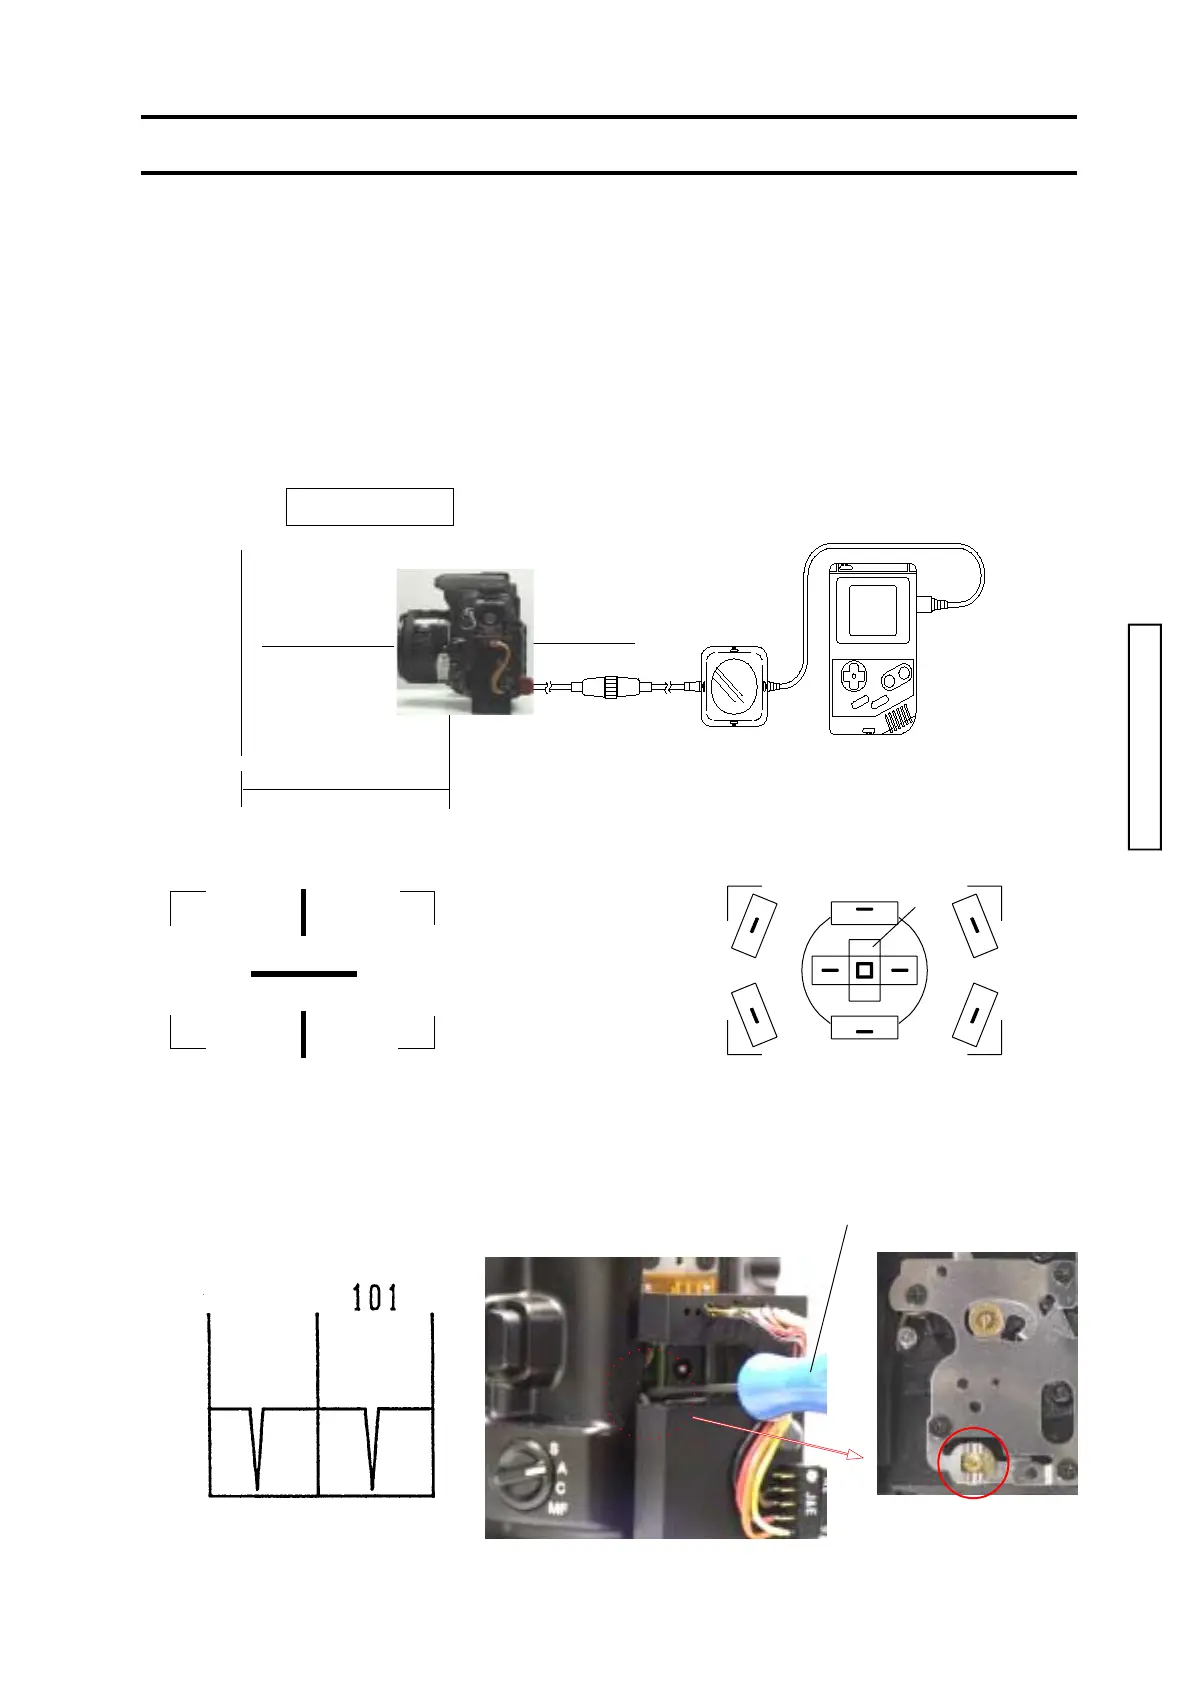
1. Set up the equipment as in Fig. 1.
2. Select "AREA ADJ." from the main menu and press SELECT Button.
3. Press and hold Shutter-release Button partway down after Naviagation Display goes out, so that lines
with two dents and a value appear in the display and remain for 3 sec.
Check that each line has two dents like the ones in Fig. 2, and reading is within the standard.
If not, adjust as follows.
4. Adjust the sub-mirror position using TORX L-Wrench as in Fig.3.
5. Repeat step-3 and -4 until the reading is within the standard.
6. Press SELECT Button while pressing and holding Shutter-release Button partway down (S1 ON) to
return to the previous menu.
AF Chart-III for 2163AF Chart-III for 2163
AF Chart-III for 2163AF Chart-III for 2163
AF Chart-III for 2163
5th5th
5th5th
5th
4th4th
4th4th
4th
6th6th
6th6th
6th
7th7th
7th7th
7th
8th8th
8th8th
8th
2nd2nd
2nd2nd
2nd
3rd3rd
3rd3rd
3rd
1st1st
1st1st
1st
TORX L-WrenchTORX L-Wrench
TORX L-WrenchTORX L-Wrench
TORX L-Wrench
AF Master LensAF Master Lens
AF Master LensAF Master Lens
AF Master Lens
Lens mount surfaceLens mount surface
Lens mount surfaceLens mount surface
Lens mount surface
CameraCamera
CameraCamera
Camera
Focus mode: MF Focus mode: MF
Focus mode: MF Focus mode: MF
Focus mode: MF
Stanndard:96-104
Align center of each island with the chart.Align center of each island with the chart.
Align center of each island with the chart.Align center of each island with the chart.
Align center of each island with the chart.

 Loading...