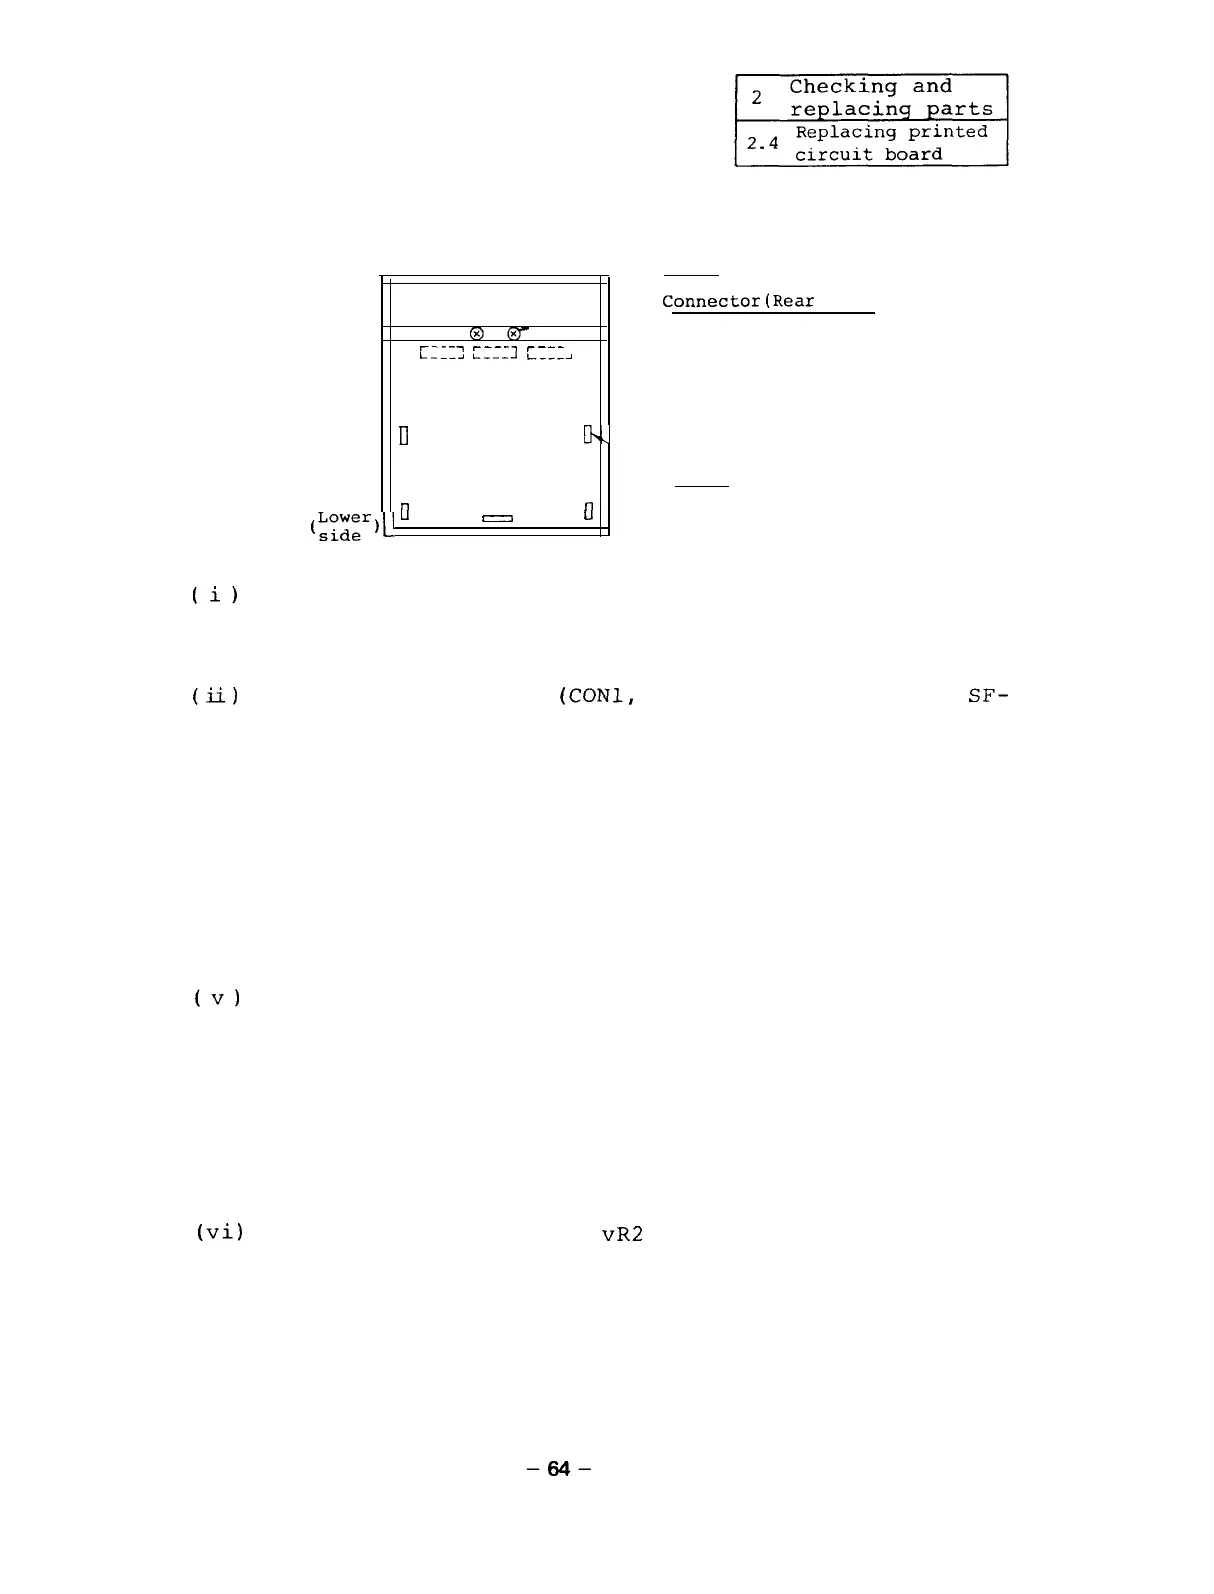
2.4.4
Replacing SF-CA card
Screw
SF-PW
(Power supply)
Connector(Rear
side)
@@-
r_._-)
r_-_~
r---
L__-_I
L-----l
L___-J
Cavity+-
--Cavity
II
I-V
SF-CA card
Nail
(;;;"eY_.
0
I7
0
(i)
By referencing Appendixes 2-l to 2-3, remove the
following option card from the SF-CA card.
SF-OR card or SF-OR10 card or SF-TL card
(ii)
Remove the connectors
(CONl,
CON2, and CON3) on the
SF-
CA card and the connections on the terminal block TB2.
(iii) Remove the five nails on the SF-CA card and loosen
the two screws.
(iv) Raise the SF-CA card from the lower side and remove
it from the hinge panel.
Last,
insert your fingers into the hinge panel cavi-
ties (2 positions) and remove the entire SF-CA card
from the hinge panel.
(v)
After the SF-CA card is replaced, assemble the parts
being disassembled in the reverse order of the assem-
bling procedure.
(Note)
(vi)
Adjust
meter.
When mounting the card, by pushing the connec-
tor (rear side) from the front side with your
fingers and check that the connector is securely
connected to the card.
the offset volume
vR2
and VR3 using A DC volt-
-64-

 Loading...