8 - 32
8. DEBUGGING FUNCTION
3) "Trigger Point"
The point at which the trigger is executed is set. Select one of the following:
4) "Added Trace Information"
Set information to be added at each trace. Select one or multiple item(s) of
the following: (Making no selection is possible.)
(2) Write the set trace device and trace condition to the memory card.
(a) Set the trace file and storage destination.
Set the drive number and file name at "1. ( ) Execute Trace & Display Status" on
the "Sampling Trace" screen.
(b) Write the trace file to the memory card.
Write the trace file to the memory card by using "9. ( ) Write to PC (Condition)" on
the "Sampling Trace" screen.
Since file names are used when writing to the memory card, multiple trace files
can be written.
At Instruction Execution : When executing STRA instruction
At Request of PDT : When operating trigger using GPP functions
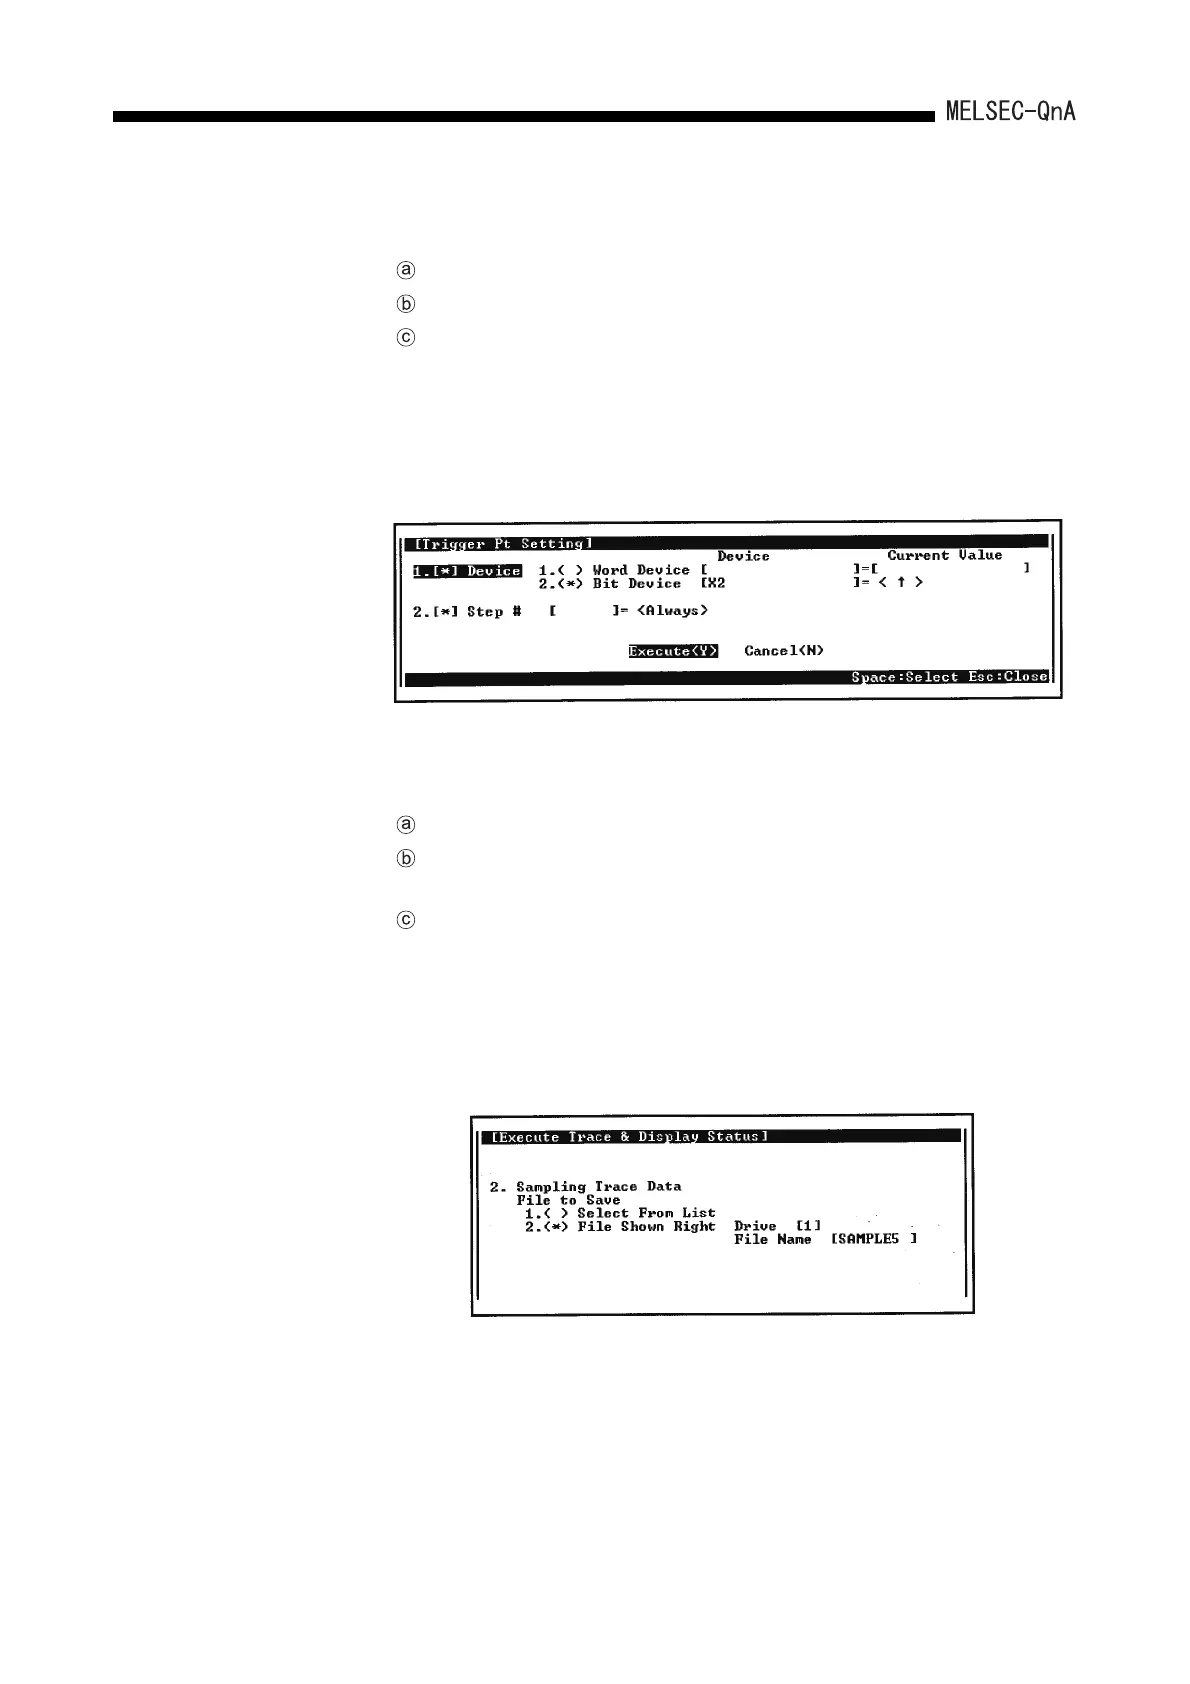
Specify Detail Condition
: Set a device and step number.
The following shows setting examples: The
details on how to make the settings and trigger
execution timing are the same as described in
Section 8.2 Monitor condition setup in Monitor
Function.
Time : The time at which the trace was executed is stored.
Step No. : The step number at which the trace was executed is
stored.
Program Name
: The program name for which the trace was executed
is stored.
 Loading...