29
Preparing the Installation
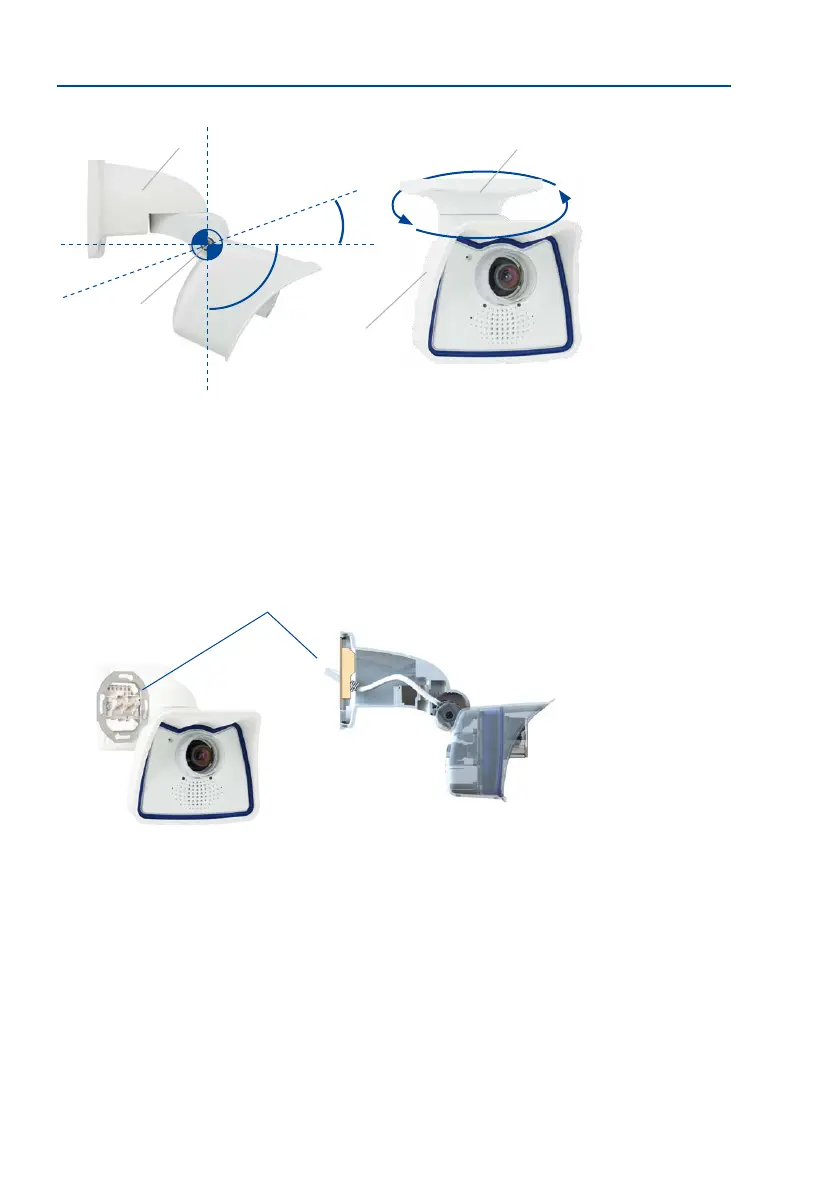
The VarioFlex mount consists of a central joint, which is directly screwed into place with the
weatherproof M26 housing, and a wall and ceiling mount, which is fastened to the central
joint with just one screw. In addition to being easy to install, the VarioFlex mount enjoys the
advantage of a completely concealed cabling and high impermeability to water and dust
(IP66). Wall and ceiling mounts are designed so that they can be mounted over conventional
ush-mounted sockets (without the frame) or cavity sockets and conceal them completely.
In addition, the wall mount easily covers a MOBOTIX interface box.
Before attempting to mount the camera to a wall or ceiling, make sure that you have found
the best camera position. It is important that the camera’s eld of view is not obstructed
in any way. Once the camera has been mounted to a wall or ceiling, you can ne-tune its
position. If the monitored area changes from time to time or the camera has to be installed
in a dierent location, the camera lens can be exchanged in just a few easy steps and used,
without having to upgrade to new video soware.
*The ceiling mount is
only included if this had
beenspeciedwhen
ordering the camera!
Turning/tilting mounted
to wall
• horizontally: 180°
• vertically: -90° to +20°
Turning/tilting mounted
to ceiling
• horizontally: 360°
• vertically: -90° to +20°
-90°
+20°
360°
Mounting to a CeilingMounting to a Wall
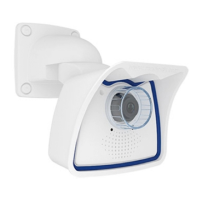
Wall mount
Central joint
Weather
protection
Ceiling mount*
Space for RJ45 wall outlet/concealed cabling
VarioFlex wall mount with
concealed cabling, covering
ush-mounted sockets and
MOBOTIX Interface boxes