Do you have a question about the Mold-Masters TempMaster M2 Plus Series and is the answer not in the manual?
Defines the purpose and intended application of the M2 Plus controller.
Provides a table of standard units and their conversion values.
Lists global headquarters and regional offices with contact details.
Lists international representatives and their contact information.
Emphasizes user responsibility for system integration and safety compliance.
Identifies common safety hazards associated with injection molding equipment.
Details potential hazards during the operation and maintenance of the equipment.
Explains common safety symbols and their meanings, including warnings and cautions.
Provides instructions and cautions for checking system mains and controller-to-mold wiring.
Outlines safety procedures for isolating power and preventing accidental startup during maintenance.
Details the procedure for electrical lockout and tagout, emphasizing energy isolation.
Highlights specific safety hazards related to the M2 Plus controller, especially electrical.
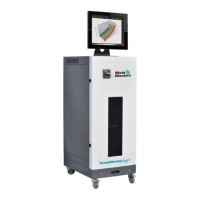
Lists general specifications for the M2 Plus controller, including case details and protocols.
Explains the consistent layout and navigation elements of the M2 Plus controller screens.
Guides the user through selecting a screen theme for the console display.
Guides users on how to select individual zones or ranges for parameter adjustments.
Explains how to access and use different operating modes like Run, Standby, and Shutdown.
Introduces the ToolStore screen for managing tool settings and banks.
Describes the Apps screen, which provides access to various controller functions and utilities.
Explains the Settings screen for configuring system and tool parameters.
Explains the Pictures screen for linking zone temperatures to physical positions on uploaded images.
Explains how to load and use pictures on the EasyView screen for monitoring.
Describes the Zoom screen for viewing Deviation and Power graphs with zone settings.
Guides on creating a new tool configuration, requiring Serial Port mode.
Explains how to configure detected control cards, set zone types, and prevent false alarms.
Explains how to configure tool and system parameters for general use.
Guides on setting temperatures for single zones or multiple zones using the Range function.
Explains the leakage detection system that monitors zone power usage for changes.
Explains how to import images from a USB stick for use with the EasyView screen.
Guides on setting up the EasyView screen after importing a picture.
Provides instructions for turning on the M2 Plus controller and console.
Explains the recommended procedure for safely switching off the controller.
Guides on logging into and out of the controller for system access.
Lists and describes the available control modes for all zones (Run, Standby, Startup, etc.).
Describes Slave mode for linking a malfunctioning zone to a properly working zone.
Explains the importance of saving the current tool before loading another.
Explains how to load a tool locally from the ToolStore, requiring Stop mode or Allow Toolload enabled.
Explains how backing up tools saves settings for recovery or transfer.
Explains how sequences and time columns allow users to run preset actions.
Guides on setting up and using the EasyView screen as the main display.
Explains how to export tool data to a CSV file via the Export screen.
Guides on connecting to the controller remotely using a VNC application.
Describes the User Access screen for configuring user levels and permissions.
Introduces the User Admin screen for managing user details and settings.
Guides on creating new user accounts with specific IDs, names, and passwords.
Guides on configuring wired or wireless network connections for the controller.
Explains how to share files between controllers or via SmartMold over a network.
Guides on upgrading the controller software using a USB memory stick.
Details the procedure for calibrating the touchscreen for precise alignment.
Explains how to perform diagnostic tests (fast, full, power only) on zones or the entire controller.
Guides on interpreting the results of diagnostic tests, including satisfactory and unsatisfactory outcomes.
Provides instructions for safely disconnecting and reconnecting the controller console.
Provides general warnings and cautions for servicing and repairing the controller.
Explains the location and types of fuses and overcurrent protection in the controller.
Explains the LED indicators on controller cards for status and fault diagnosis.
Lists fault and warning messages, their causes, and recommended actions.
Explains the Star/Delta option for three-phase power supply designation.
Details how to connect the Star/Delta option by altering internal cabinet connections.
Describes the optional cabinet connector for alarm output and auxiliary input signals.
Details the functions enabled by the USB port, such as backup and printer output.
Provides a schematic diagram of the touchscreen and controller cabinet connections.
Provides installation guidelines for water manifolds, emphasizing proper plumbing and mounting.
Details the three coolant properties that can be monitored: temperature, flow, and pressure.
Guides on detecting and configuring analogue cards for flow and sensor channels.
Explains how to set parameters for flow zones individually and for all zones.
Explains how to set the flow rate for individual or multiple zones.
Describes the 16 Channel Digital Logic Input card for accepting digital inputs.
Explains the WT4 card for J or K-type thermocouples, providing channel monitoring.
Describes the AI8 analogue input cards for reading output devices like flow sensors.
Introduces the Quad IO screen for configuring parameters of Quad IO cards.
Lists and describes the optional inputs for the Quad IO card, such as Boost and Shutdown.
Lists and describes the optional outputs for the Quad IO card, such as Cavity Alarm and Controller Ready.
Explains how the IO5 card enables remote tool loading via specific connectors.
Introduces the Sequence Valve Gate (SVG) card for controlling remote gates cyclically.
Outlines the parameters required for setting up SVG functionality.
Explains the two modes for the SVG option: Standard and Relay Output.
Explains how to configure digital inputs for SVG functionality, enabling or disabling them.
Guides on configuring analogue inputs for SVG, including screw calibration.
Explains how gate timing can be programmed using time values or screw position.
Guides on previewing and testing the programmed SVG sequence.
Provides troubleshooting steps for gates in Manual mode, including opening and closing pins.
Explains Relay Output mode, where high temperature alarms trigger a 24V DC signal.
Details external wiring connections for SVG card outputs and inputs.
Lists the ports available on the Fitlet2 system, including USB, HDMI, and Ethernet.
Guides on connecting the Fitlet2 to external devices via Ethernet cable and display.
| Model/Series | TempMaster M2 Plus Series |
|---|---|
| Controller Type | Temperature Controller |
| Control Type/Algorithm | PID Control |
| Temperature Accuracy | ±1 °C |
| Input Voltage | 100-240 VAC |
| Certifications | CE, UL |
| Communication Interface | RS-485 |
| Thermocouple Types | J, K |
| Heater Output | 15A |
| Alarm Outputs | 2 relay outputs |
| Protection Features | Over-temperature protection, short circuit protection |