2 – English
EN
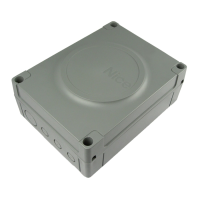
ELECTRICAL CONNECTIONS
3
The electrical connection of the various devices (photocells, digital keyboard,
transponder card readers, etc.) contained in the automation with the control
unit must be made by means of the Nice “Bluebus” system.
3.1 - Description of electrical connections (fig. 6)
AERIAL input for the radio receiver aerial
FLASH output for 1 flashing light with 12V (maximum 21W) bulb. [*]
ELS output for 12Vac (maximum 15VA) electric lock. [*]
S.C.A. “Open Gate Light”: output for 1 indication lamp (24V maximum
4W). [*]
BLUEBUS input for compatible devices (MOFB, MOFOB, MOB and
MOTB); they are connected in parallel using two conductors
through which both the electricity supply and the communi-
cation signals travel; no polarity needs to be observed. The
electrical connection to be used is of the parallel type and no
polarity needs to be observed. During the learning stage, the
control unit will recognise individually all devices connected to it
thankstoauniquecode.Eachtimeadeviceisaddedorelimi-
nated, it will be necessary to make the control unit perform the
learning operation (see paragraph 3.6).
STOP input for devices that cause the immediate interruption of the
manoeuvre in progress (with a short reverse run); NO and NC
contacts, as well as devices with 8.2 kΩ constant resistance
output (sensitive edges) can be connected to this input. Each
device connected to this input is recognised individually by the
control unit during the learning stage (paragraph 3.6); in this
stage, if the control unit detects any variations with respect
to the learned state, it causes a STOP. One or more devices
of the same or different kinds can be connected to this input:
–connectanumberofNOdevicesinparallelwithoutquantity
limits;
– several NC devices can be connected in series, with no limits
astoquantity;
– connect 2 devices with 8.2 kΩ constant resistance output in
parallel. If there are more than 2 devices, they must be connect-
ed in a cascade with just one 8.2 kΩ termination resistance;
– connect 2 NO and NC devices in parallel, placing a 8.2 kΩ
resistance in series on the NC contact (this also allows for a
combination of three devices NO - NC and 8.2 kΩ)
P.P. input for devices which control Step-by-Step manoeuvres. NO
contacts can be connected to this input
OPEN input for devices which control only opening manoeuvre. NO
contacts can be connected to this input
CLOSE input for devices which control only closure manoeuvre. NO con-
tacts can be connected to this input
ENC1 input encoder – gearmotor 1 (terminal 1, 2); it is not necessary
to observe any polarity
ENC2 input encoder – gearmotor 2 (terminal 4, 5); it is not necessary
to observe any polarity
M1 output for gearmotor 1 (terminal 7, 8, 9)
M2 output for gearmotor 2 (terminal 10, 11, 12)
[*] The FLASH, ELS and S.C.A. outputs can be programmed with other
functions (see “TABLE 5 - 1st level functions”; or via Oview programmer, see
chapter 7.2).
3.2 - Electrical connections of MC824H control unit
After mounting the control unit box and preparing the electrical cable holes
(chapter 2.4 and fig. 3), make the electrical connections:
IMPORTANT!
– All electrical connections must be made with the unit disconnected
from the mains power supply and with the buffer battery disconnected,
if present in the automation.
– Connections must be made exclusively by qualified personnel.
– The electrical power line must be fitted with a device that enables complete
disconnection of the automation from the mains. The disconnection device
must have a gap between contacts that ensures complete disconnection in
the conditions of overvoltage category III, in compliance with installation regula-
tions. If necessary, this device guarantees rapid and safe disconnection from
the mains, and therefore should be located in view of the automation. However,
if located in a concealed position, it must have a system that blocks against
inadvertent or unauthorised reconnection to prevent all risks. The disconnec-
tion device is not supplied with the product.
•Makesurethatthefixingzoneisnotsubjecttoflooding.Ifnecessary,mount
the product raised from the ground.
•Ensurethatthespacearoundtheproductenableseasyandsafeaccess.
•Makesurethatalltheelectricalcablesusedareofthetypelistedin
Table 1.
•Makesurethattheautomationisprovidedwithmechanicalstopsonboth
closing and opening.
2.2 - Product application limits
The product may be used exclusively with gearmotors listed in Table 3.
2.3 - Typical system
Fig. 2a shows an example of an automation system set up with Nice components:
a - Control unit
b - Gearmotor
c - Flashing light
d - Photocell
e -Digitalkeyboard-Transponderreader-Keyselector
f - Photocell post
g - Opening mechanical stops
h - Closure mechanical stops
i - Electric lock
These parts are positioned according to a typical standard layout. With refer-
ence to fig. 2a, locate the approximate position for installation of each com-
ponent making up the system. Important – Before installation, prepare the
electrical cables needed for your system, referring to fig. 2b and “Table 1 -
Technical characteristics of electrical cables”.
Important – During installation of ducting for electrical cables and the introduc-
tion of cables into the control unit enclosure, be aware that due to possible
water deposits in the junction boxes, the connecting ducts may form conden-
sation inside the control unit which is liable to damage the electronic circuits.
2.4 - Installation of control unit
To mount the control unit, proceed as shown in fig. 3:
01. Open the control unit box by undoing the relevant screws (fig. 3-A);
02. Prepare the electrical cable routing holes (fig. 3-B);
03. Mount the box (fig. 3-C);
04. The electrical connections can now be made: see chapter 3.
Important! – To prepare the inlets for the electrical cable ducting, holes must
be drilled in the lower side of the control unit box. Note – If necessary, the
lateral cable inlet may be used, but only with the aid of suitable duct fittings.
To install the other devices present in the automation, refer to the relevant
instruction manuals.
Connection Cable type Maximum admissible length
A: CONTROL UNIT POWER cable 1 cable 3 x 1,5 mm
2
30 m (note 1)
B: FLASHING LIGHT with aerial cable 1 cable 2 x 0,5 mm
2
20 m
1 shielded cable type RG58 20 m (less than 5 m recommended)
C: BLUEBUS DEVICES cable 1 cable 2 x 0,5 mm
2
20 m (note 2)
D: KEY-OPERATEDSELECTORSWITCHcable 2 cables 2 x 0,5 mm
2
(note 3) 50 m
E: GEARMOTOR POWER cable 1 cable 3 x 1,5 mm
2
(note 4) 10 m
F: ENCODER CONNECTION cable 1 cable 2 x 1 mm
2
(note 4) 10 m
G:ELECTRICLOCKCONNECTION 1cable2x1mm
2
10 m
Note 1 –Ifthepowercableislongerthan30m,acablewithalargercross-sectionisrequired(3x2.5mm
2
) and safety earthing is necessary in the vicinity
of the automation.
Note 2–IftheBluebuscableislongerthan20m(uptomax.40m),acablewithalargercross-sectionisrequired (2 x 1 mm
2
).
Note 3 – These 2 cables can be replaced by a single 4 x 0.5 mm
2
cable.
Note 4 – These 2 cables can be replaced by a single 5 x 1.5 mm
2
cable.
IMPORTANT! – The cables used must be suited to the installation environment.
TABLE 1 - Technical specifications of electrical cables (fig. 2b)
 Loading...