Setting AUDIO
46 47
Select AUDIO in the menu.
1
Changing the EQ Setting
Push the lever in + /
-
directions to select EQ and then, push the lever in
direction or press it to enter.
2
Push the lever in + /
-
directions to elect the EQ item and then, push the lever in
direction or press it to
save the setting. After saving, device will automatically return to the previous menu.
3
Using the EQ Button
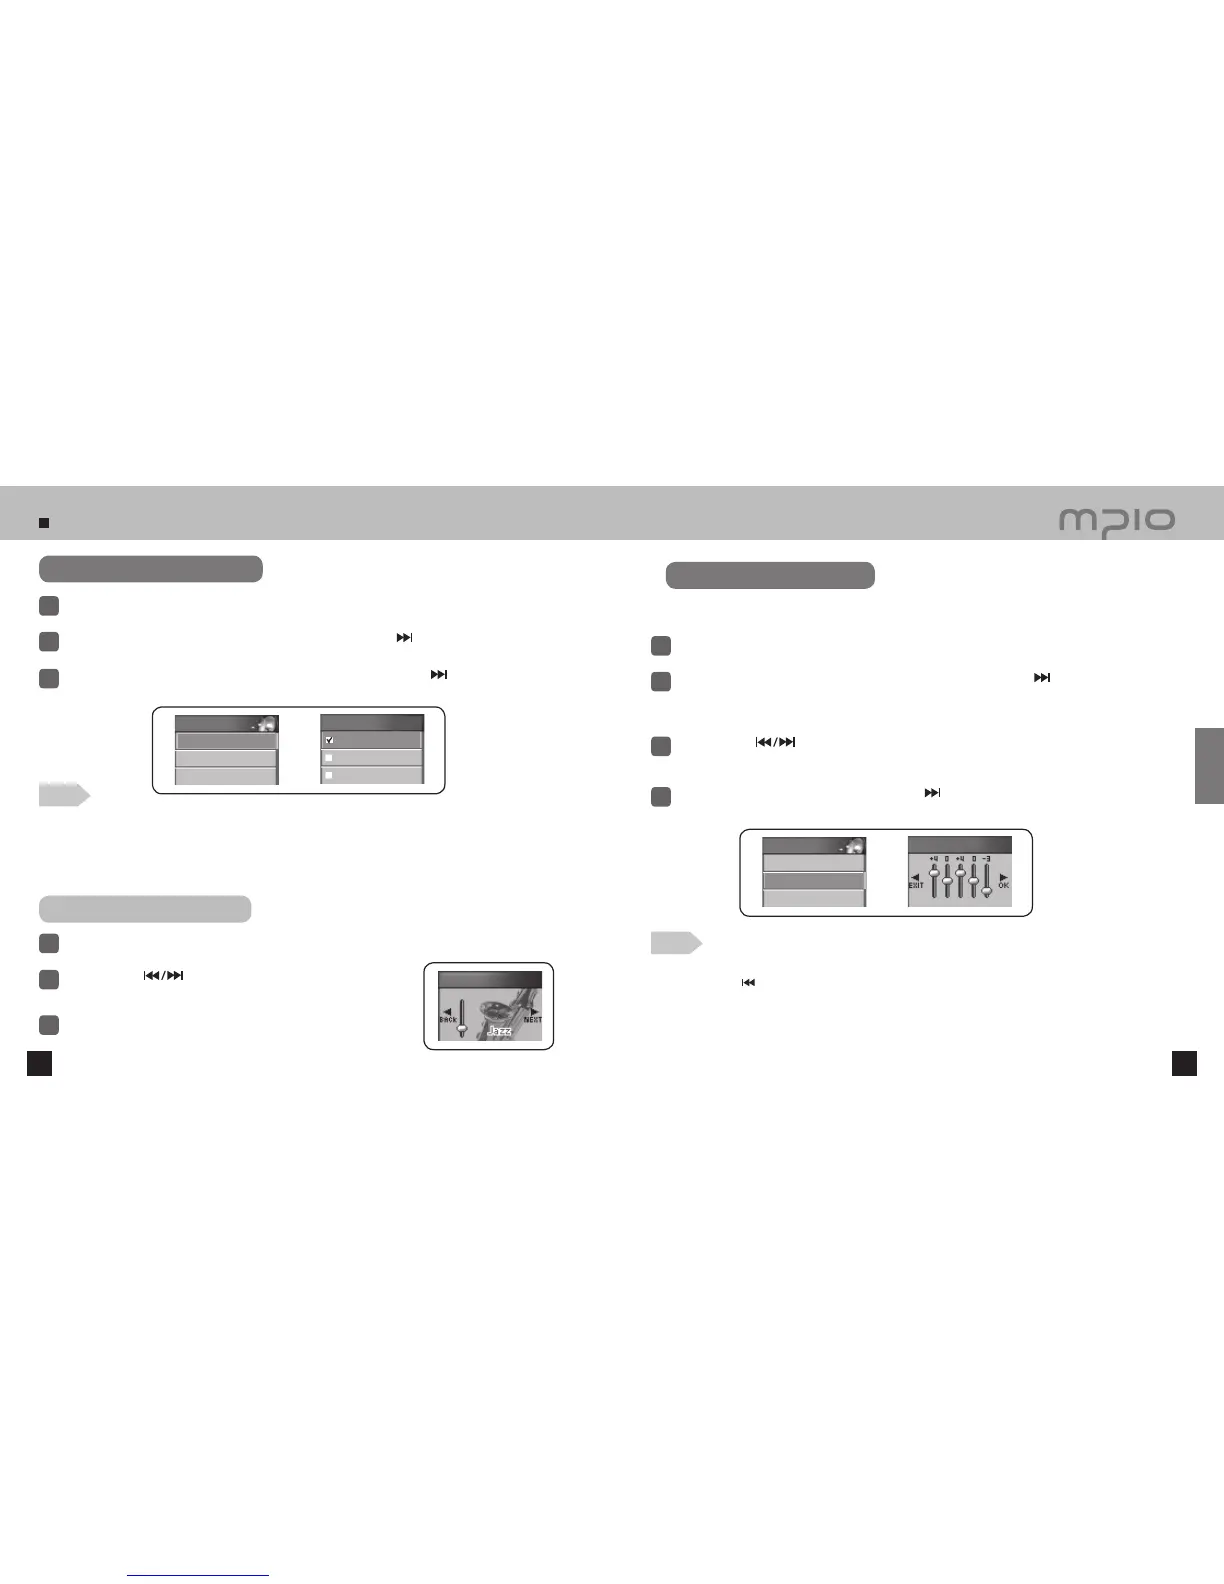
Press the EQ button while music is playing.
1
Note
●
EQ Icon order
The EQ icons will be changed in the following order:
Normal (NOR) → Pop (POP) → Rock (ROCK) → Jazz (JAZZ) → Techno (TECH) → Reggae (REGG) →
Live (LIVE) → Soft (SOFT) → Classic (CLAS) → User’s EQ (USER EQ)
●
Press the FUNC button to change directly in the Playback screen.
Setting User EQ
You can define your own EQ effect by adjusting the setting values in each frequency range,
instead of the pre-defined EQ setting values.
Select AUDIO in the menu.
1
Push the lever in + /
-
directions to select User EQ and then, push the lever in
direction or
press it to enter.
●
User EQ setting will appear in the LCD screen.
2
Push the lever in
directions to change the frequency band and then, push the lever in
+ /
-
directions to adjust the frequency band settings.
3
After adjusting each frequency band, push the lever in
direction toward OK to save the
setting. Pressing the lever shortly also saves the setting.
4
Note
●
Canceling User EQ Settings
Push the lever in
direction and move to the EXIT to cancel User EQ setting.
Push the lever in
direction to select EQ and then, push the lever in
+ /
-
directions to select the EQ mode.
2
Press the EQ button to save the setting. The device will return to
the previous menu.
3
Normal
Pop
Rock
EQ
AUDIO
1. EQ
2. User EQ
3. 3D Effect
User EQ
Save channel
1. EQ
2. User EQ
3. 3D Effect
Usage
EQ