Step 1: Check the grid voltage and frequency with an AC voltmeter. It should be the
same to “VAC” value on the product label.
Step 2: Turn off the circuit breaker.
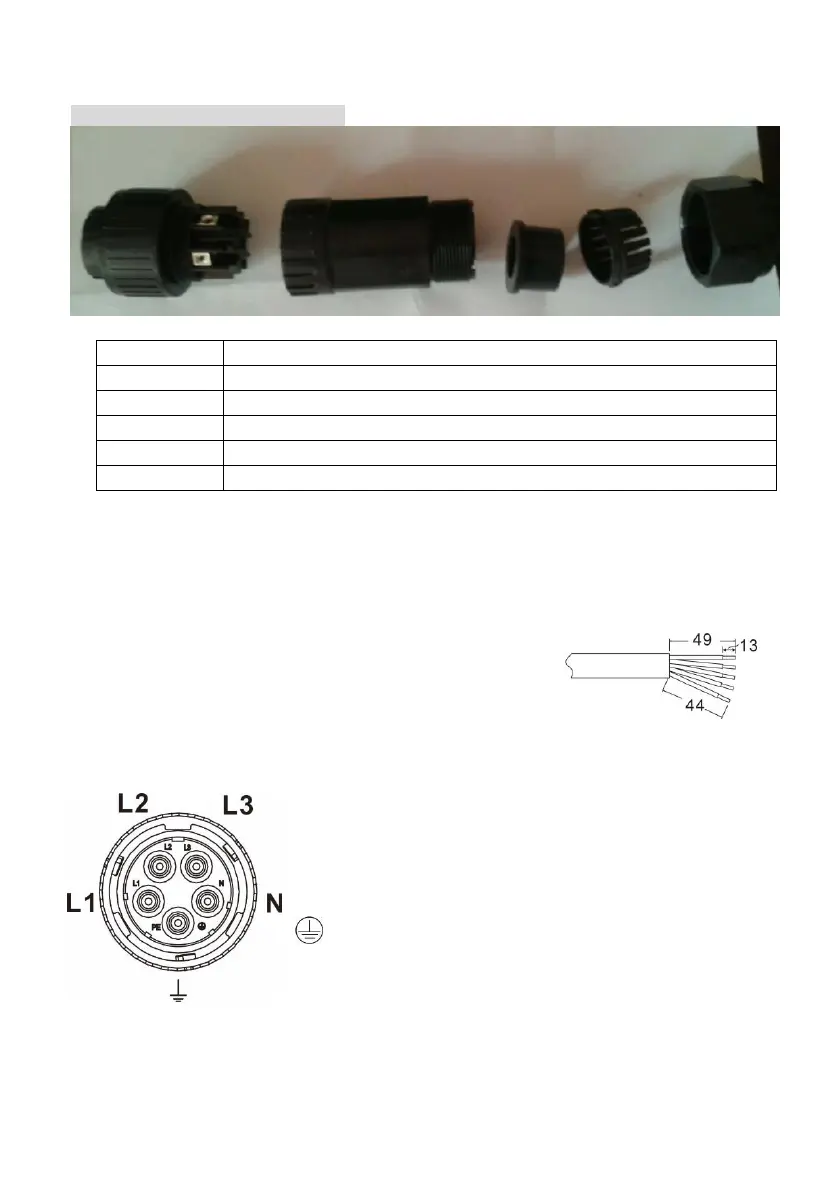
Step 3: Remove insulation sleeve 13 mm for five conductors.
Step 4: Thread the five cables through pressure dome
(A), clip (B), sealing nut (C) and protective element (D) in
sequence.
Step 5: Thread five cables through socket element (E)
according to polarities indicated on it and tighten the screws to fix wires after
connection.
L1→ LINE 1 (Black)
L2→ LINE 2 (Grey)
L→ LINE 3 (Brown)
→ Ground (Yellow-Green)
N→ Neutral (Blue)
The reference tightening torque is 1.5-2.5 N.m.
Step 6: Push protective dome (D) on to socket element (E) until both are locked tightly.
Then, twist protective element (D) and pressure dome (A) so that all cables are firmly
connected.

 Loading...