32 Part Number 9294699 12/16/15
Operation Section 3
Procedure to Install a Product Bag
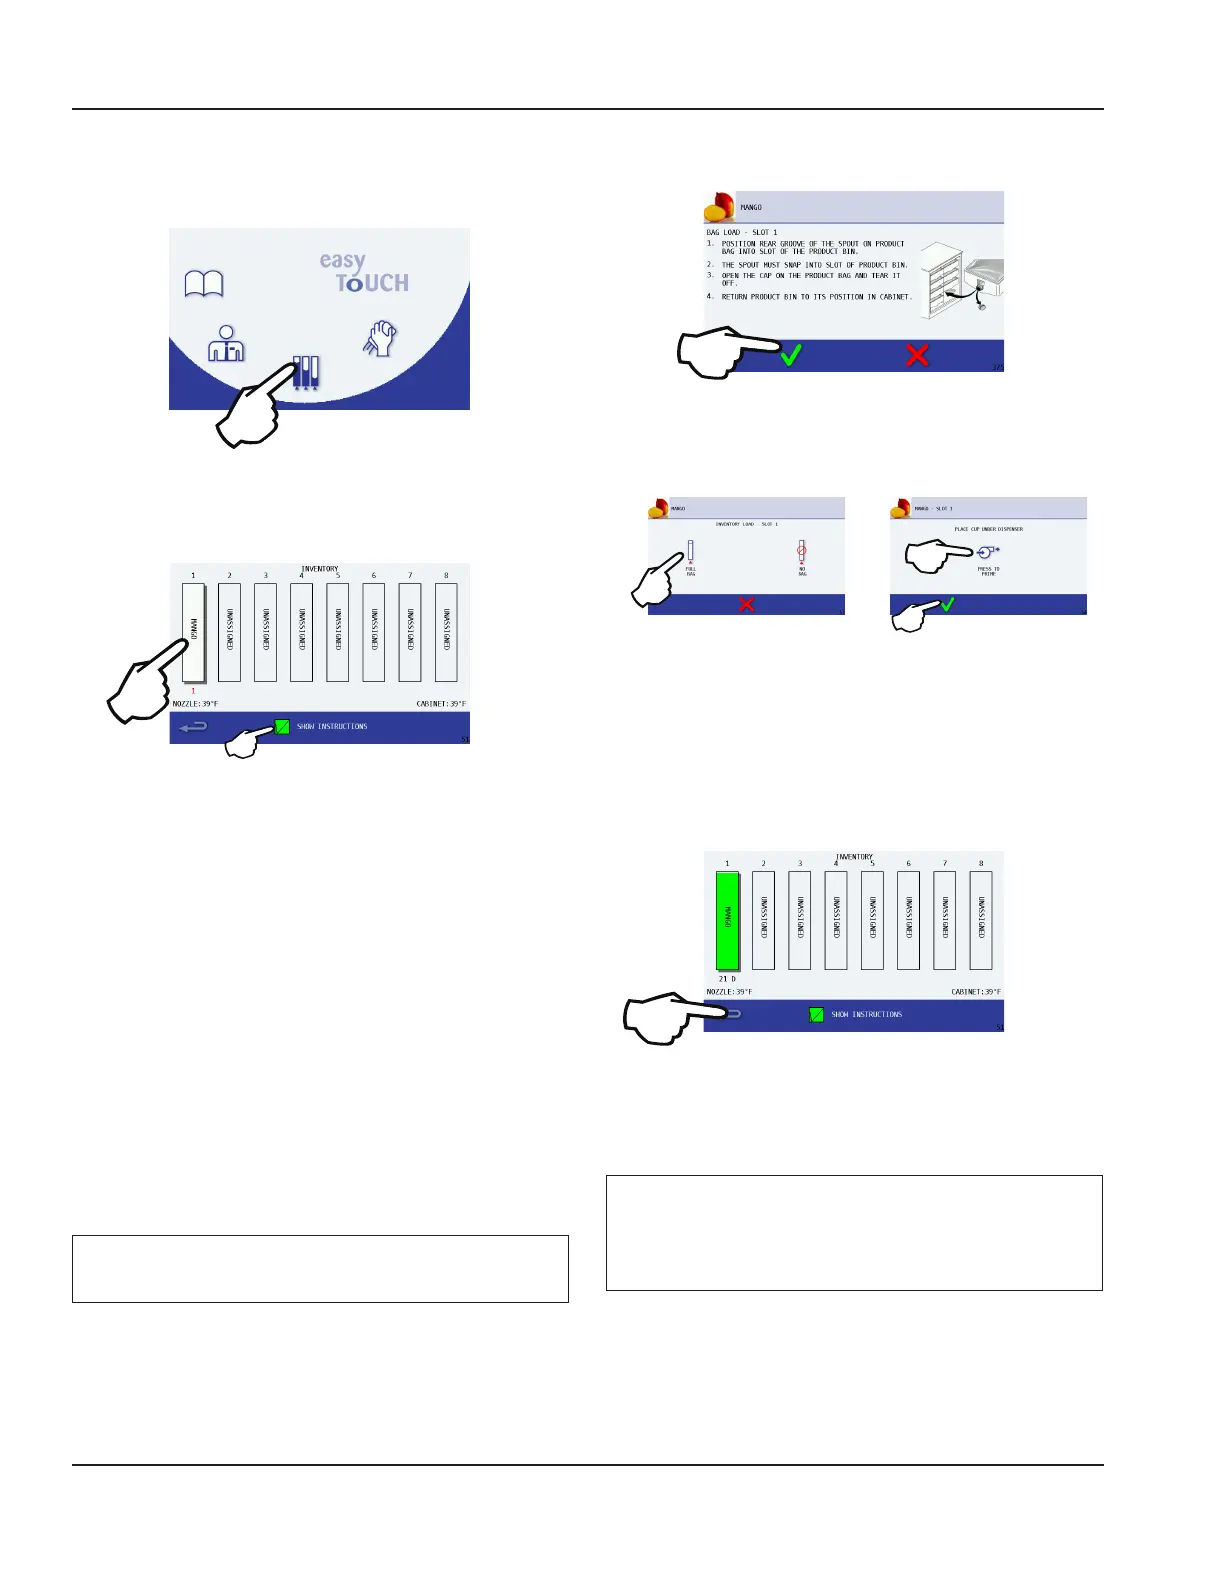
1. From the Main Menu touch the Inventory icon.
2. On the Inventory screen, select the product to be
installed.
NOTE: To see the on screen instructions during bag load
the “Show Instructions“ will need to be ON and displaying a
green box with a check mark.
• Products with less than 10% inventory or less than 2
hours until product expires will be displayed with a
yellow bar.
• Products that are expired will be displayed with a red bar.
3. Prepare unit for new product bag.
• Remove product bin from cabinet and discard empty
bag if there is one.
• Wipe the inside of the product bin with a clean towel.
• Place new product bag with the spout facing down
into product bin.
• Follow the on screen instructions.
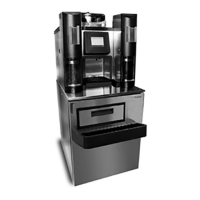
4. Position rear groove of the spout on product bag into
slot of the product bin.
Important
The spout must snap into the slot of the product bin!
5. Open the cap on the product bag and tear it off.
6. Return product bin to its position in cabinet.
7. Press the Green Check to continue.
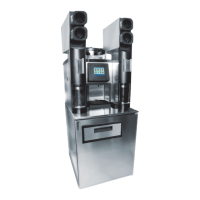
8. Select inventory level from FULL BAG or NO BAG.
9. Select FULL BAG when installing a new product bag
and the Prime screen will display.
10. Place cup under dispenser and press the Prime icon to
prime the line with the new product bag, DISPENSING
will display on the screen. Repeat until product
consistently flows into the cup.
11. Press the green check to continue.
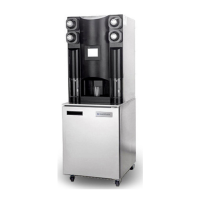
12. Installation is now complete. The inventory bar will now
display full, green, and days until expiration will reset.
13. Select another product to be installed or return to the
previously active screen by pressing the back arrow.
Important
Resetting a product’s inventory without replacing the
product bag will cause the Product Inventory screen,
percentages, and expiration to be inaccurate.