Chapter 1. PVR Setting
1)HDD Formatting
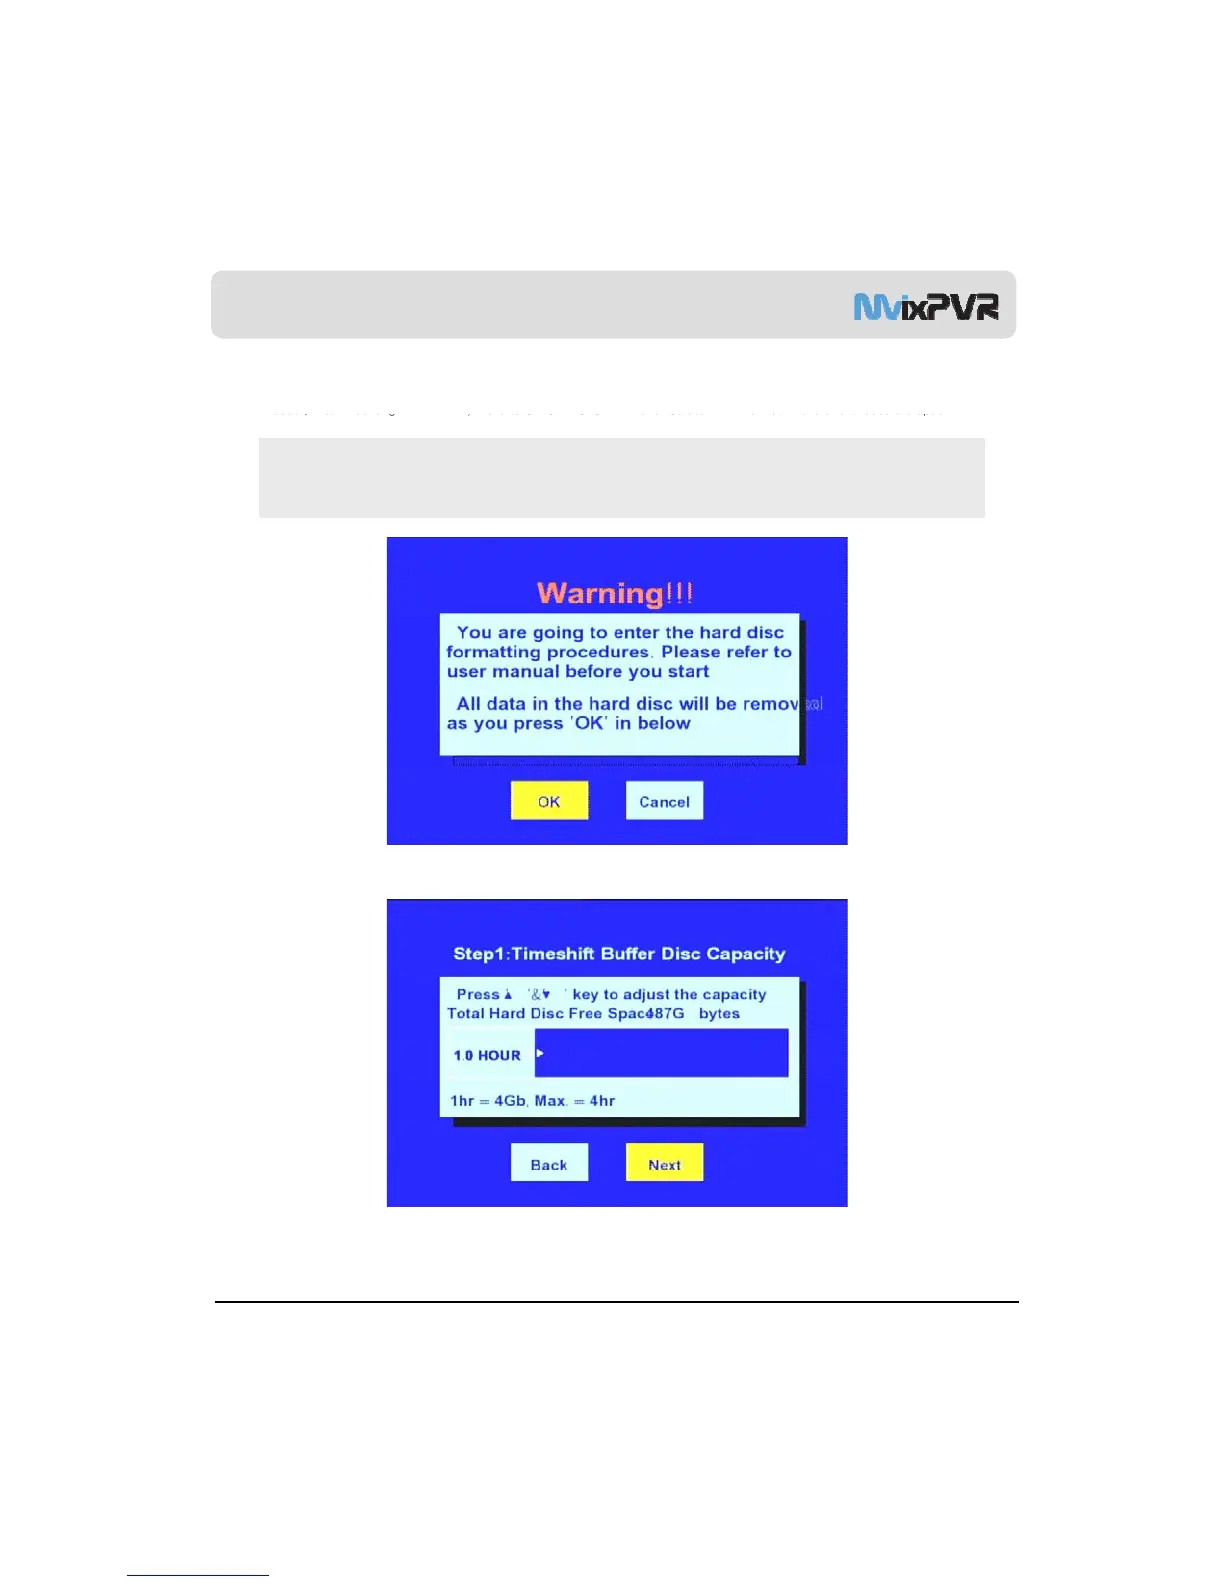
To use product, install the HDD and format it by using format menu. (HDD formatted in Windows –based PCs cannot be
mounting HDD in PVR, move to SETUP
->
“
”
*주의 : 포맷을 진행하면 HDD에 저장된 모든 파일이 지워지며 복구가 불가능하므로 중요한 파일이 있을 경우 백
업하시기 바랍니다. 사용자 동의로 이루어지는 포맷이므로 부주의로 인한 손실은 책임지지 않습니다.
->HDMI를 연결하여 사용할 경우 해당화면이 보이지 않는 경우가 있습니다.이는 영상 출력방식이 TV와 일치되지 않아
보이지 않는 경우입니다. 화면이 출력되지 않을 경우 A/V 케이블을 이용하여 연결 하시면 화면을 보실 수 있습니다.
*Note: Formatting erases all files saved in HDD and the files cannot be restored. Make sure to backup important files. Format
is carried out upon user’s consent. Therefore, we do not assume responsibility for loss caused by negligence.
->When HDMI is connected, the screen may not be displayed. This is because the method of image output does
not match up with TV. If screen is not displayed, connect TV using A/V cable.
1. Select OK button and press ENTER in remote controller.
MvixUSA
17
2. The first stage of time shift is adjusted. You can set values by pressing up/ down keys in remote controller. After setup,
select ‘Next’. Default: 1 hour/ Max. of 4 hours, file system UNIX (UDF)