4.3 EtherNet/IP master settings
4-17
9
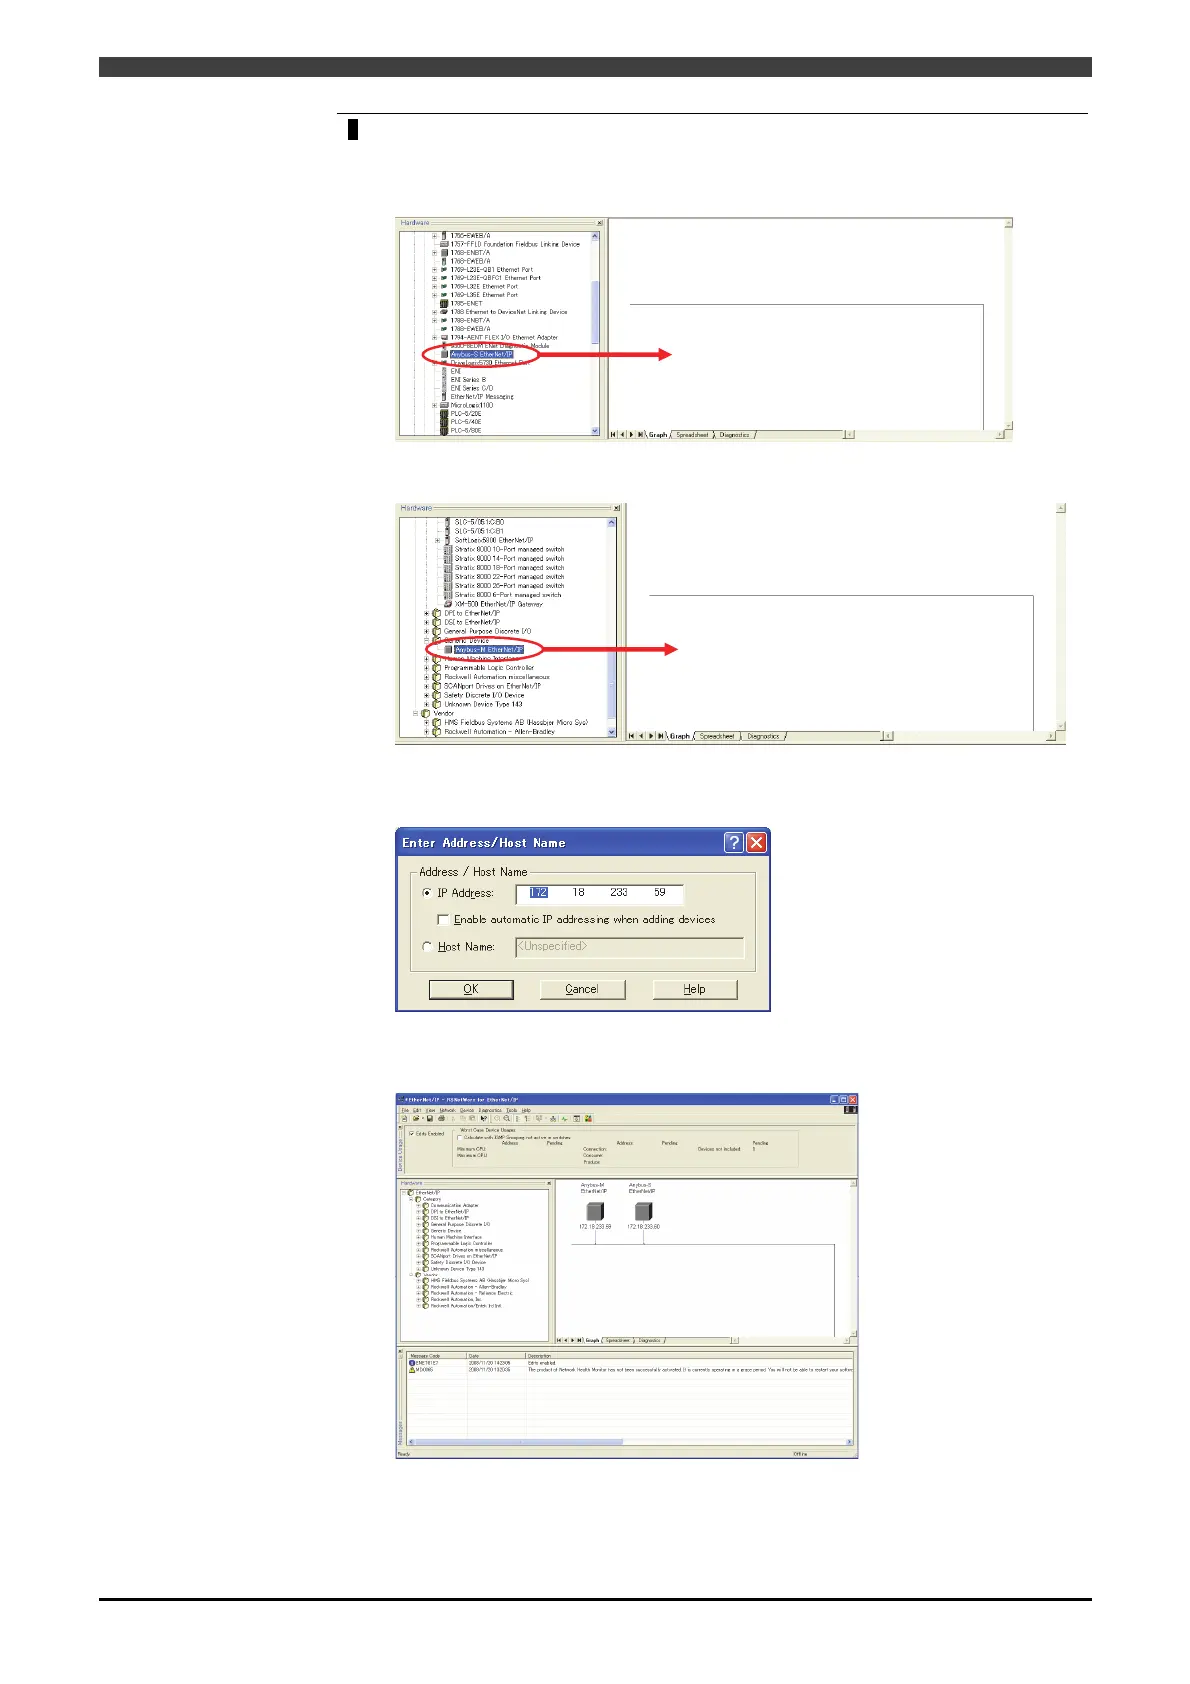
On the “Hardware” window, drag and drop an appropriate node to the “Graph”
window to register it.
Select “Anybus-S EtherNet/IP” on the “EtherNet/IP->Category->Communication
Adapter” of the “Hardware” window to drag and drop it to “Graph” window.
Select “Anybus-M EtherNet/IP” on the “EtherNet/IP->Category->Generic Device” of
the “Hardware” window to drag and drop it to “Graph” window.
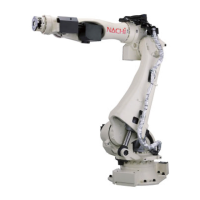
As the following window starts up when dragging and dropping the node, set the
appropriate IP address in “IP Address”. (For the IP address, set the number according
to the IP address configured by the robot controller beforehand.)
As shown below, register all the necessary nodes.
The following examples show the configuration of master 1 and slave 1, appeared as
follows after registered.