EasyOne Pro™ / EasyOne Pro™ LAB 25
Start-up and Initial Preparation
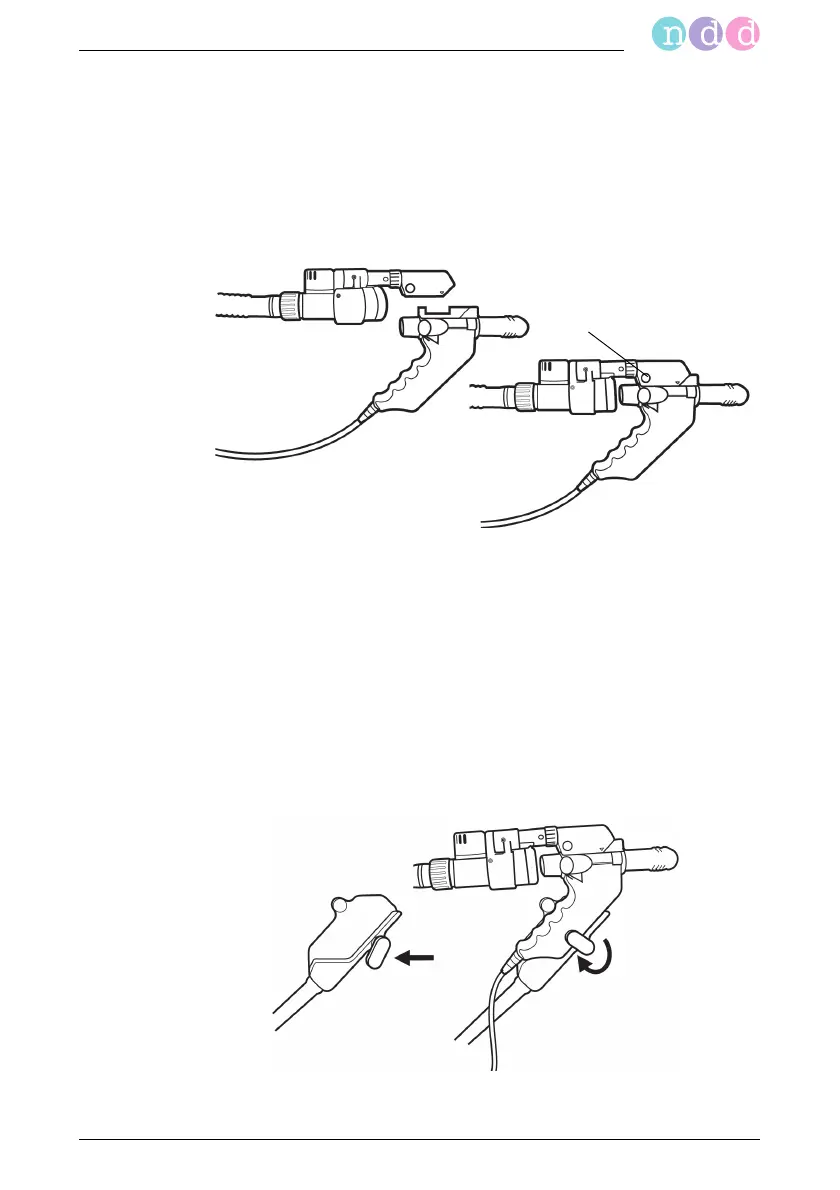
Attach the valve unit to the sensor (aligning the arrow) and advance the
valve unit until you hear it click into place (press button a to unlock).
Note
The valve unit must be mounted on the sensor only for DLCO
and FRC tests. All other tests are performed without the valve
unit.
Pull out the sensor holder on the left side of the device (a, Fig. 2-1) and
place the sensor in the holder.
If you are working with the sensor stand (optional accessory), you can posi-
tion the sensor such that the patient is not required to hold it during the
tests.
Using the clamp, screw the sensor stand to the table top.
Open the catch and insert the sensor.
Close the catch.
Fig. 2-7 Attaching the valve unit to the sensor
Fig. 2-8 Inserting the sensor in its stand