Do you have a question about the Netafim NMC-JUNIOR PRO and is the answer not in the manual?
Essential pre-installation checks for power, grounding, and environment conditions.
Guidelines for managing electrical interference from frequency inverters during installation.
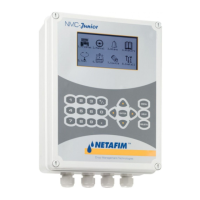
Provides physical dimensions of the controller unit.
Instructions for safely removing the controller from its packaging.
Details on how to mount the controller enclosure.
Step-by-step guide for connecting the main power to the controller.
Procedures for verifying electrical connections and voltage after installation.
Instructions on how to update the controller's system firmware.
Overview of the controller's internal input and output terminal layout.
Details on connecting devices to the controller's output terminals.
Details on connecting sensors and devices to the controller's input terminals.
Setup for connecting the controller to a PC or other controllers.
Initial steps for powering on and starting the controller for the first time.
Configuring how devices (valves, pumps) are assigned to controller outputs.
View of configured devices and their quantities within the controller.
Configuration and assignment of digital input sensors.
Configuration and assignment of analog input sensors.
Explanation of shortcuts and display screens for quick access to functions.
Procedure for testing the functionality of the controller's output relays.
Procedure for testing the operation of digital inputs and connected sensors.
Procedure for testing the readings from analog sensors.
Display and verification of current temperature sensor readings.
Display and verification of current humidity sensor readings.
Defining startup and shutdown sequences for irrigation devices.
Setting up and configuring pump stations for irrigation.
Configuring valve assignments, pump connections, and drain meters.
Setting nominal, minimum, and maximum flow rates for valves.
Configuring water meters for flow measurement and calculation.
Setting up individual dosing channels with methods and reactions.
Configuring EC/pH control, alarms, and injection methods for dosing.
Setting up drainage measurement and delay parameters.
Configuring EC and pH sensor ranges and control parameters.
Setting up programs for controlling cooling systems.
Setting up programs for controlling misting systems.
Defining how frequently sensor data is stored in the history logs.
Procedures for checking and verifying EC/pH levels and irrigation parameters.
Advanced settings for configuring pump station operations.
Configuring and managing multiple water meters for flow measurement.
Exploring different methods for configuring dosing operations.
Advanced configuration options for EC/pH control in dosing.
Setting up and configuring automatic irrigation programs.
Adjusting irrigation settings based on environmental factors.
Defining the duration or quantity of water for each irrigation program.
Setting up and managing dosing programs for fertilizer injection.
Configuring irrigation triggers based on external dry contacts or analog sensors.
Setting up the agitator for mixing fertilizers and acids.
Using selectors to manage multiple fertilizer stock tanks.
Configuring the automated filter flushing process.
Setting up programs for controlling cooling systems.
Setting up programs for sequential misting valve operation.
Setting up programs to maintain water temperature.
Temporarily pausing all irrigation cycles.
Manually starting or stopping a configured irrigation program.
Manually starting or stopping individual valves.
Manually initiating the filter flushing procedure.
Setting the system's current time, date, and end of crop daytime.
Configuring general system settings like language, units, and hotkeys.
Calibrating temperature sensors for accurate readings.
Calibrating humidity sensors for accurate readings.
Procedures for calibrating EC and pH sensors and their transmitters.
Defining which sensors' data should be logged by the controller.
Saving controller settings to a data plug for backup.
Restoring controller settings from a data plug.
Troubleshooting steps for when the controller's display is not functioning.
Diagnosing issues when outputs (valves, pumps) are not working.
Instructions for replacing the controller's power supply card.
Instructions for replacing the controller's relay card.
Wiring and connection details for EC and pH sensors.
Wiring and connection details for temperature and humidity sensors.
Technical specifications for various sensors and their connecting cables.
General technical specifications for the controller's hardware.
Overview of the various internal components of the controller unit.
| Brand | Netafim |
|---|---|
| Model | NMC-JUNIOR PRO |
| Category | Irrigation System |
| Language | English |