4. Select Remote Control > Console Redirection.
5. Click Launch Console.
You might have to install Java or update it.
6. When the console opens, click Virtual Media > Virtual Storage.
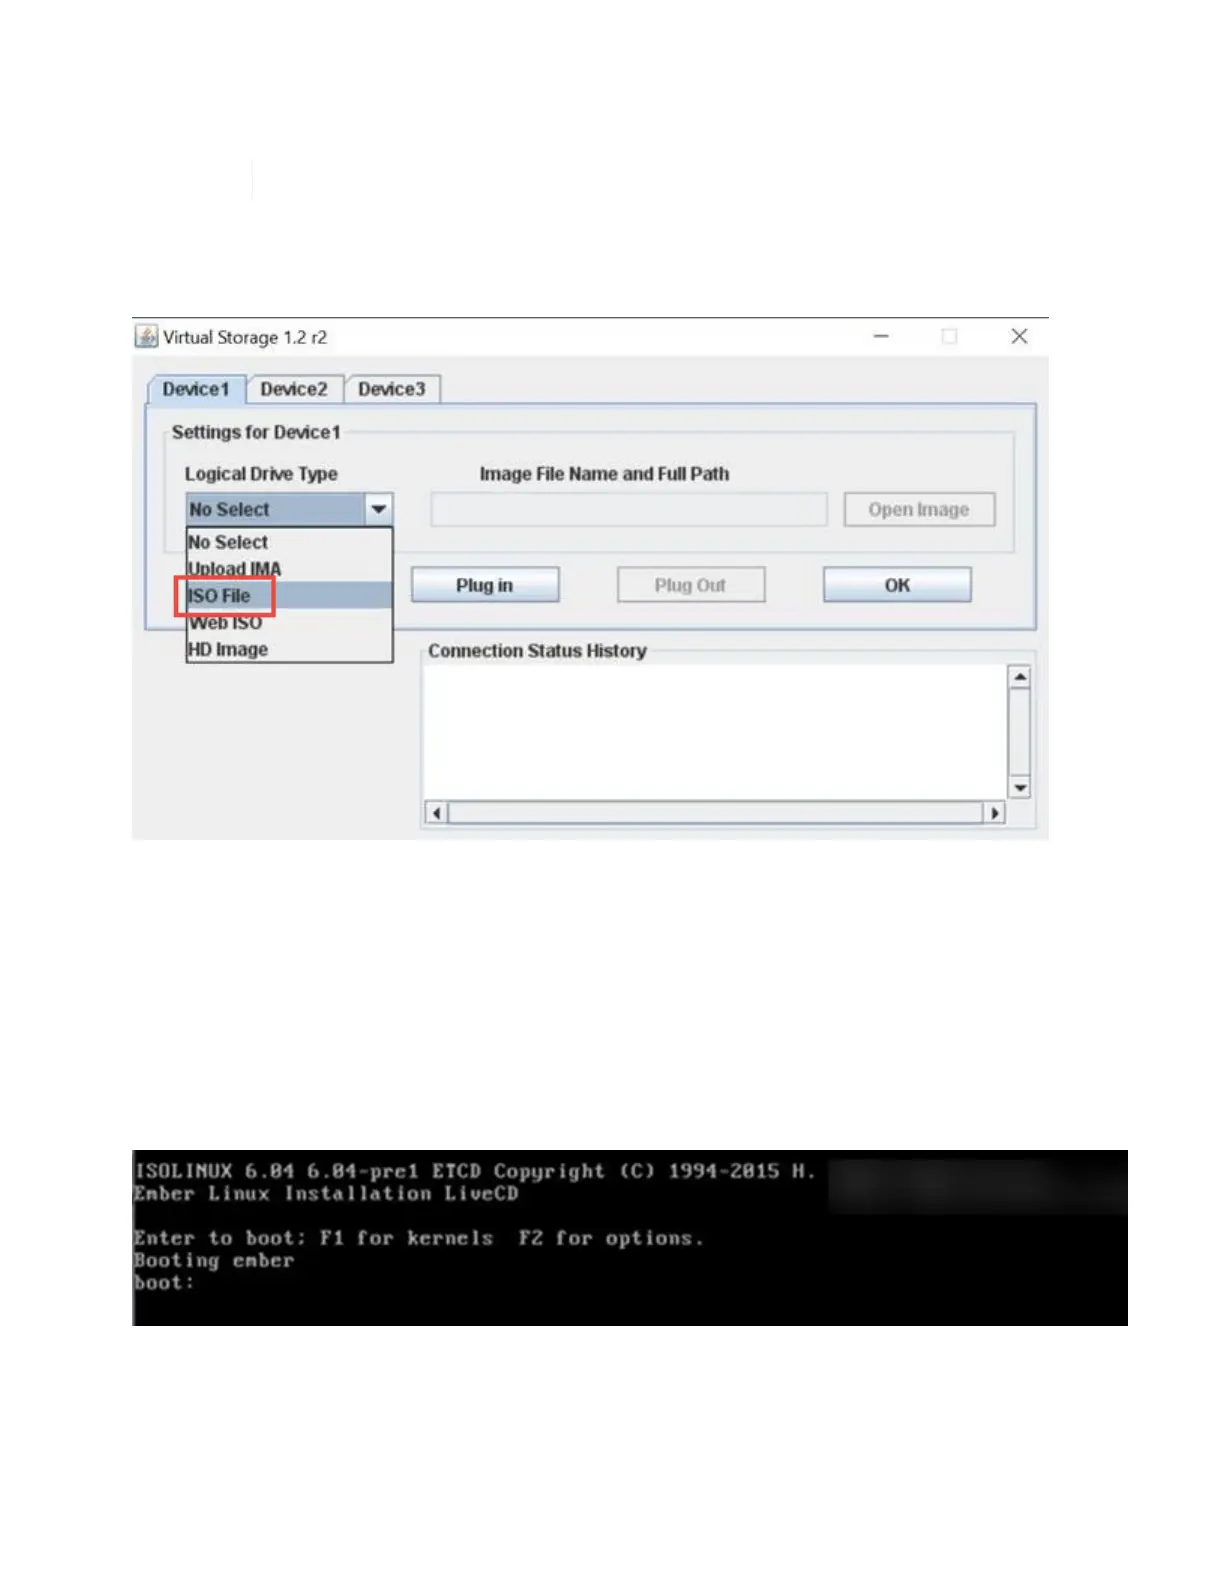
7. On the Virtual Storage screen, click Logical Drive Type, and select ISO File.
8. Click Open Image to browse to the folder where you downloaded the ISO file, and select the ISO file.
9. Click Plug In.
10.
When the connection status shows Device#: VM Plug-in OK!!, click OK.
11. Reboot the node by pressing F12 and clicking Restart or clicking Power Control > Set Power Reset.
12. During reboot, press F11 to select the boot options and load the ISO. You might have to press F11 a few
times before the boot menu is displayed.
You will see the following screen:
13. On the above screen, press Enter. Depending on your network, it might take a few minutes after you press
Enter for the upgrade to begin.