Page 20
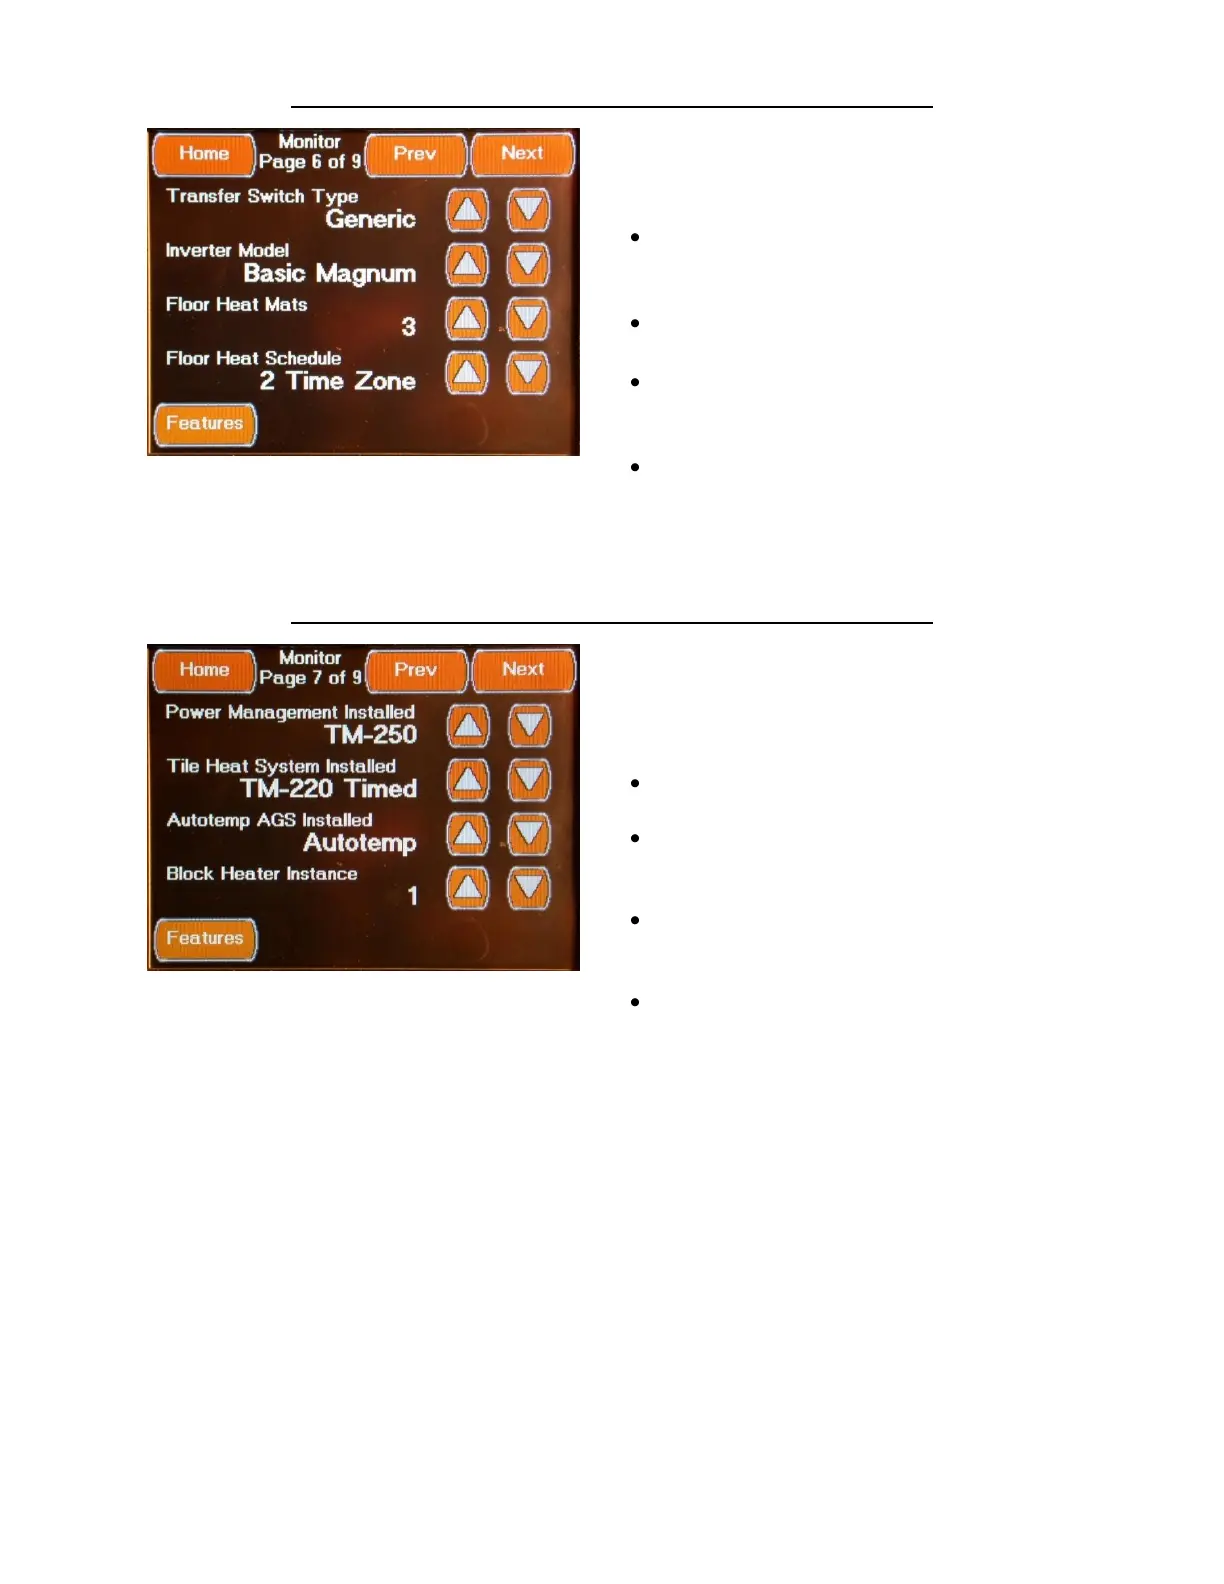
FEATURES MONITOR CONFIGURATION SCREEN 6
The sixth Monitor Configuration Screen is
accessed by pressing the Next Button located
on the fifth Monitor Configuration Screen or
from the “Prev” Button located on seventh
Monitor Configuration Screen. This Screen
allows you to set the following Display Settings:
Transfer Switch Type Set to “Generic”
(Automatic if RV-C Communications Port Used)
Select using the Up / Down Arrows
Inverter Model Set to “Basic Magnum”
Select using the Up / Down Arrows
Floor Heat Mats Set to “0” if no Floor
Heat Installed / Set to “3” if Floor Heat Installed
Select using the Up / Down Arrows
Floor Heat Schedule (None, 2 Time Zone or 4
Time Zone)
Select Appropriate Setting using the Up /
Down Arrows
FEATURES MONITOR CONFIGURATION SCREEN 7
The seventh Monitor Configuration Screen is
accessed by pressing the Next Button located
on the sixth Monitor Configuration Screen or
from the “Prev” Button located on eighth
Monitor Configuration Screen.
This Screen allows you to set the following:
Power management Installed Set to TM-250
Select using the Up / Down Arrows
Tile Heat System Installed Set to TM-220
Timed – if Floor Heat is installed
Select using the Up / Down Arrows
Autotemp AGS Installed Set to
Autotemp for Temperature Autogen Control
Select using the Up / Down Arrows
Block Heater Instance Set to 1
Select using the Up / Down Arrows