Do you have a question about the Nice SPIDER Series and is the answer not in the manual?
| Brand | Nice |
|---|---|
| Model | SPIDER Series |
| Category | Door Opening System |
| Language | English |
Important safety instructions and general warnings for installation and use.
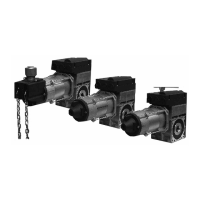
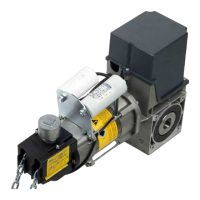
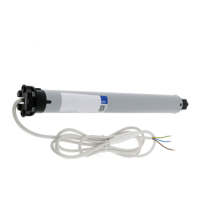
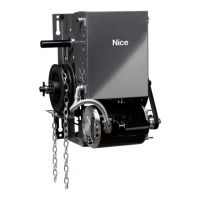
Identifies the main components included in the SPIDER kit and product identification.
Essential checks and requirements before proceeding with product installation.
Defines operational limits, dimensions, and illustrates kit components.
Details the preparation of electrical cables and system layout before installation.
Step-by-step instructions for mounting the gearmotor onto the guide system.
Instructions for intermediate guide fastening, bracket insertion, and belt tensioning.
Instructions for installing wall and ceiling mounting brackets for the gearmotor.
Procedure for manually unlocking and locking the gearmotor for door operation.
Important checks to perform before making any electrical connections to the system.
Detailed wiring diagram and description of terminal connections for the control unit.
Explains button functions and the procedure for addressing BlueBUS devices.
Instructions for connecting the power supply, emphasizing qualified personnel and safety.
Procedures for learning devices and manually programming opening/closing positions.
Procedure for automatic force search and checking door movement for proper operation.
Procedure to change the motor's rotation direction, requiring a device learning restart.
Comprehensive testing procedures to verify all safety devices and automation functions.
Steps for final commissioning, including documentation and user handover.
Overview of the control unit's integrated radio for one-way and two-way remote controls.
Procedures for memorising transmitter buttons using standard (Mode 1) or custom (Mode 2) methods.
Details function pairings for transmitters and lists available extended commands.
Procedure to verify the encoding system of memorised transmitters.
Instructions for memorising radio commands in Mode 1 (all buttons) on the control unit.
Covers Mode 2, near-receiver, and enabling code memorisation for transmitters.
Procedures for deleting single commands or the entire receiver's memory.
How to lock or release memorisations for 'near the control unit' and 'enabling code' procedures.
Describes the functions of the [Open], [Stop/Set], and [Close] buttons for operation and programming.
Configuration of basic ON/OFF functions and the procedure to modify them.
Configuration of adjustable parameters and the procedure to modify them.
Configuration details for FLASH output, OGI output, Motor Force, Sensitivity, and Discharge.
Details on special functions and how to connect and configure Wi-Fi.
Explains Wi-Fi module LED indicators and the BiDi-Wi-Fi interface connection.
Details connecting Pro-View, Z-Wave, and performing memory deletion.
Table of common problems with recommended checks and solutions for malfunctions.
Interpreting warning light flashes and control unit LED signals for diagnostics.
Describes the behavior of motor head LEDs and terminal LEDs on the control unit.
Explains the status indications of LEDs L1 through L8 on the control unit buttons.
Interpreting the signals of LED R on the control unit for radio diagnostics.
Instructions for adding or removing devices from the automation system.
Details BlueBUS technology, STOP input, and I/O expansion boards.
Procedures for learning new devices and connecting SM-type radio receivers.
Wiring and configuration for relay photocells with the PHOTOTEST function for enhanced safety.
Wiring instructions for relay photocells without using the PHOTOTEST function.
Connecting an electric lock and installing the emergency power supply battery.
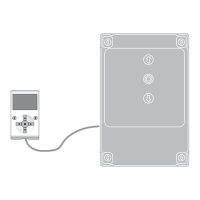
Instructions for connecting the Oview programmer and powering external devices.
Explanation of symbols used in parameter and function descriptions.
Describes common parameters like Name, Series, Address, and Group.
Parameters for BlueBus search, cruising speed, and door position programming.
Configuration of basic parameters: Automatic closing, Pause time, Close after photo.
Configuration of Always Close, Force management, and Manual force level parameters.
Parameters for adjusting sensitivity to obstacles and motor speed settings.
Configuration for surge function, pre-flashing signals, and stand-by modes.
Parameters for automation lock, button lock, anti-tamper, and time settings.
Lists and describes the fundamental commands for automation operation.
Lists and describes advanced commands for condominiums and companies.
Associates commands with inputs and defines their operating modes.
Configures safety functions related to STOP input intervention and obstacle detection.
Describes various operating modes like Hold-to-run, Condominium, and Industrial mode.
Provides detailed explanations of various operating modes and their behaviors.
Details configurations for terminal block inputs like Photo, Step-by-Step, and Emergency inputs.
Details functions for control unit outputs: Warning light, OGI, Gate open/closed, Maintenance.
Details functions for expansion module outputs: Traffic lights, Buzzer, Radio channels.
Further details on specific expansion module outputs like PhotoTest, Warning lights, and Electric lock.
Detailed technical specifications for SPIDER800 and SPIDER1200BL gearmotors.
Technical specifications for the incorporated radio receiver and Wi-Fi module.
Details the EU Declaration of Conformity and incorporation of partly completed machinery.
Guidelines for regular maintenance of the gearmotor to ensure longevity and safety.
Instructions for proper disposal of the product in compliance with environmental regulations.
Covers safety precautions, operation with defective devices, and child safety.
Guidance on responding to anomalies, power failures, and performing routine maintenance.
Step-by-step instructions for unlocking the gate for manual movement.
Procedure for manually locking the gearmotor after manual movement.