Chapter 4 Setting Up the Microscope
4.2 Setup Procedure
1-86
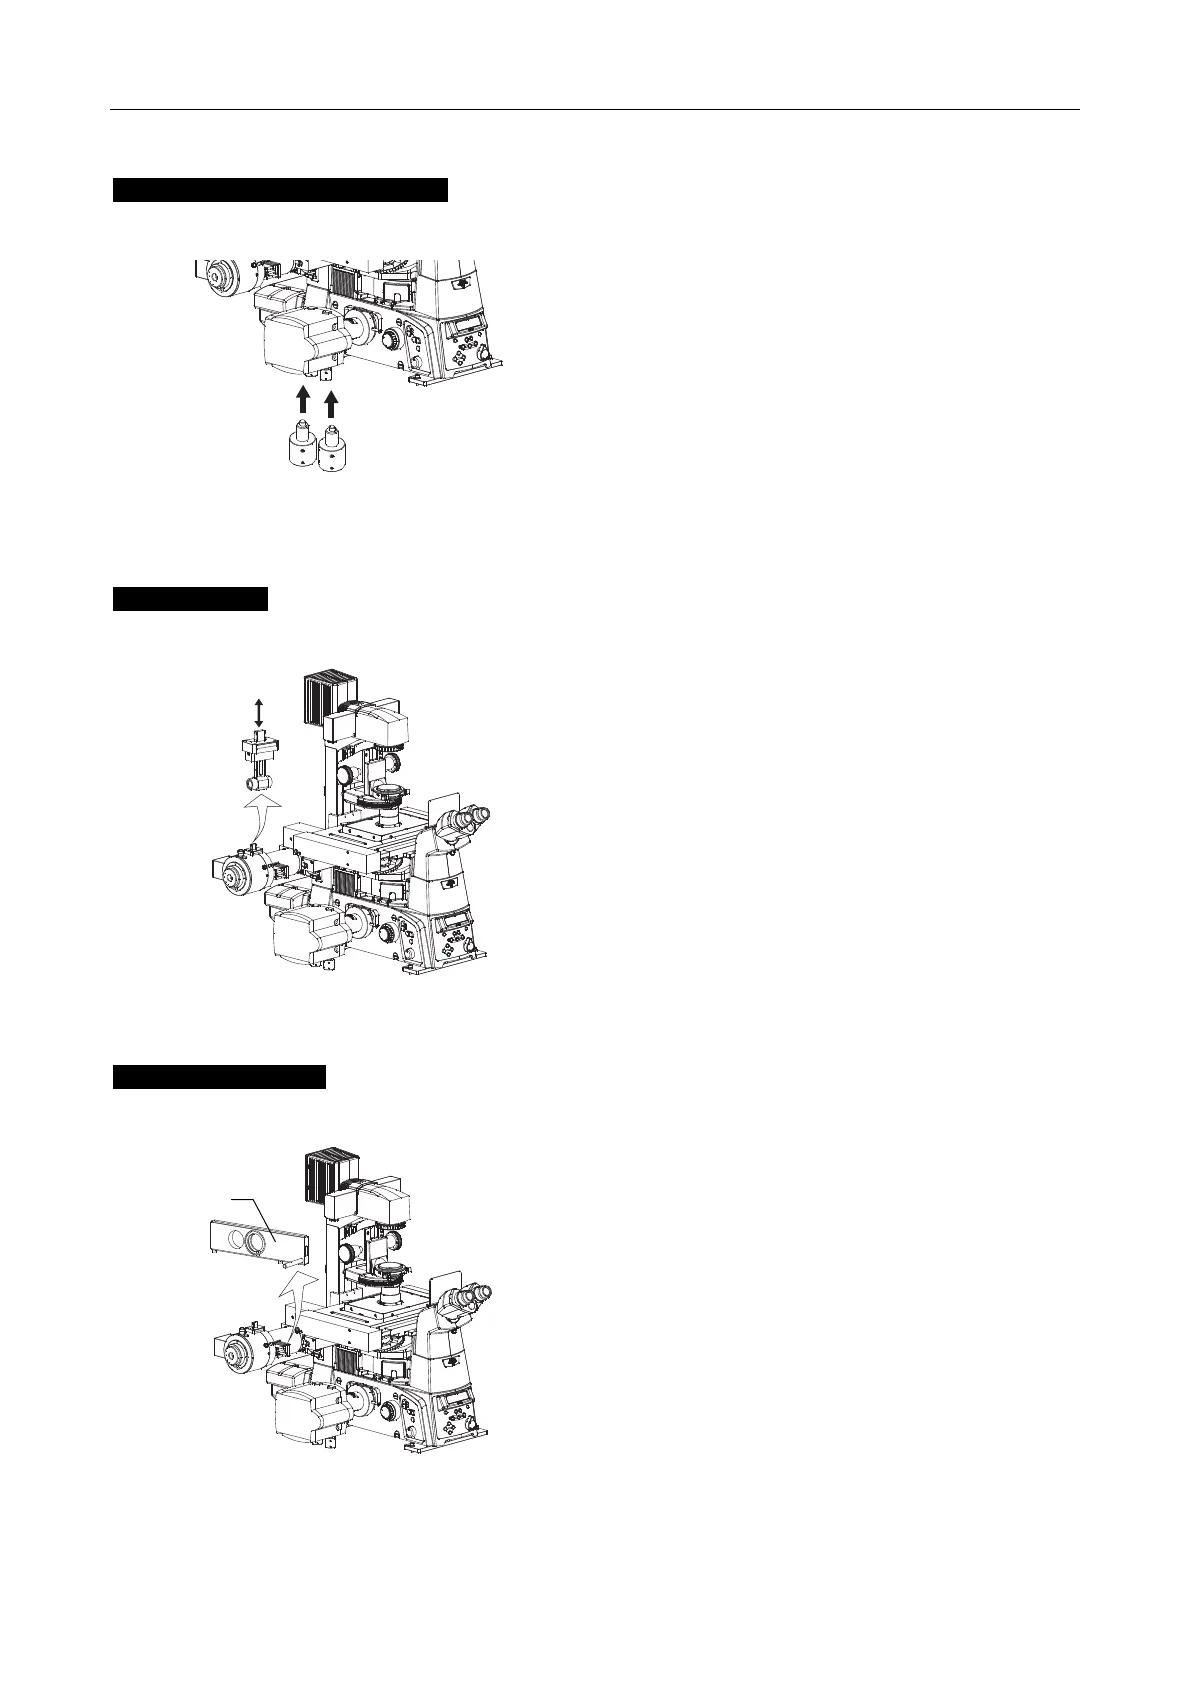
DSC support columns (2 pieces)
Attach supports to fix the camera to the anti-vibration table.
DSC support columns
Figure 4.2-22
Screw the supports in the screw holes in the camera
(Andor iXon) body.
Secure the camera to the side 3D-STORM port of the
microscope and set the magnet base to ON.
STORM slider
Insert the dedicated optical system into the TIRF optical system to perform N-STORM microscopy.
Figure 4.2-23
Detach the cover at the upper part of the laser
introduction section in the motorized TIRF illuminator
unit.
You can see a slot to insert the STORM slider. Insert
the slider into the slot.
Then attach the cover to prevent the slider from
coming off.
Insert this slider during N-STORM microscopy, but
slide it out of the optical path in other cases.
Lambda plate slider
Insert an optical device for polarization adjustment to perform N-STORM microscopy.
Figure 4.2-24
Remove the stopper screw and detach the ND16 of
the motorized TIRF illuminator unit.
Insert the lambda plate slider into the same position.
Install the stopper screw.
Insert this slider during N-STORM microscopy, but
slide it out of the optical path in other cases.
IN
OUT
Lambda
plate slide
STORM slider