Chapter 6 Connection between the Laser Unit and the Microscope
6.2 Attaching the Optical Fiber to the Light Source
2-60
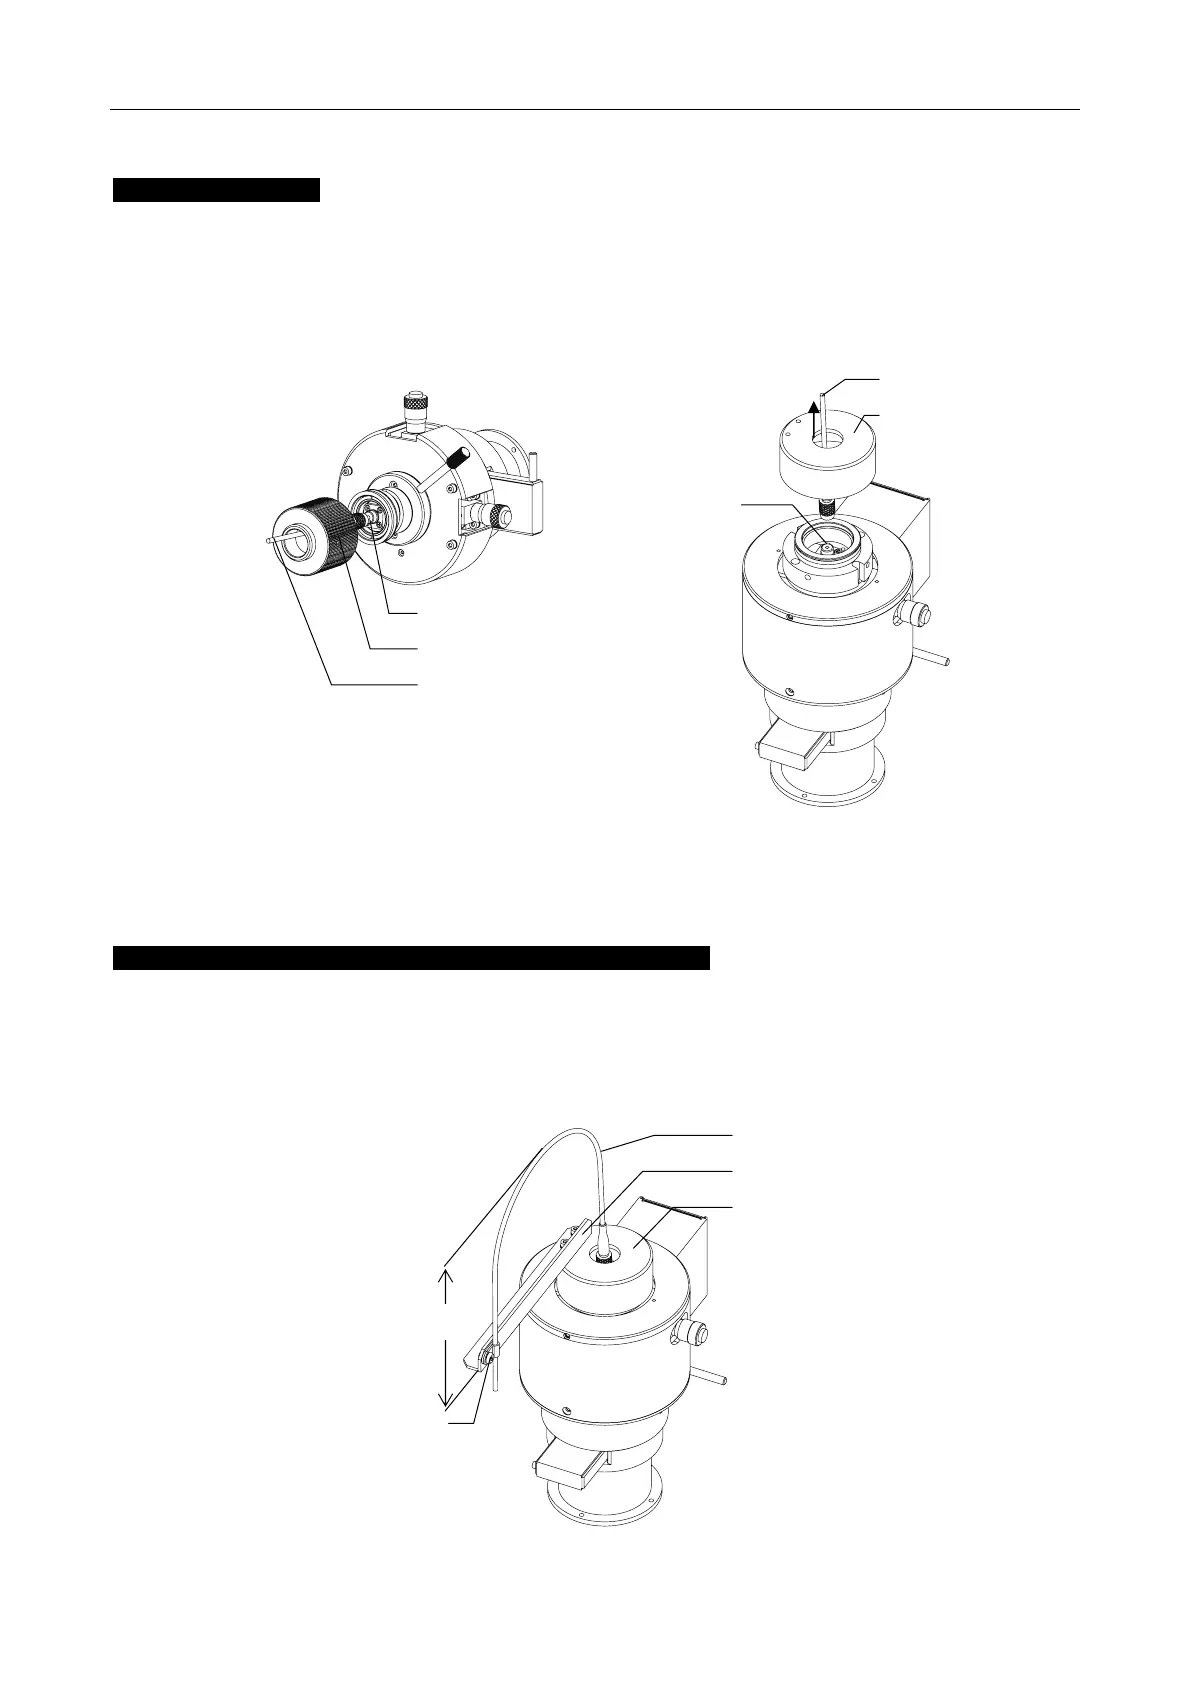
Attaching the Fiber
1. Loosen the two M4 setscrews, and remove the round ring metal cover.
2. Draw the optical fiber through the round ring metal cover and attach the optical fiber to the FC
connector. Be sure to align the optical fiber with the FC connector's notch, and fully screw in the knurled
section.
3. Secure the round ring metal cover with the two M4 setscrews.
Part used in PAU illumination operation
Part used in TIRF illumination operation
Figure 6.2-2
Fiber clamp for the part used in TIRF illumination operation
1. Secure the fiber support plate of the round ring metal cover over the part used in TIRF illumination
operation.
2. Gently bend the fiber, then pinch it over the fiber support plate with the clamp.
Bend the fiber, then adjust the height to approx. 110 mm from the top of the round ring metal cover.
When using the 100W dia pillar illuminator, be sure to avoid contact with the fiber as tilting the pillar.
Figure 6.2-3
FC connector
Round ring metal cover
Fiber
Fiber
Round ring metal cover
FC connecto
Fiber
Fiber support plate
Round ring metal cover
Clamp
pprox.
110 mm