Revision 6
4.
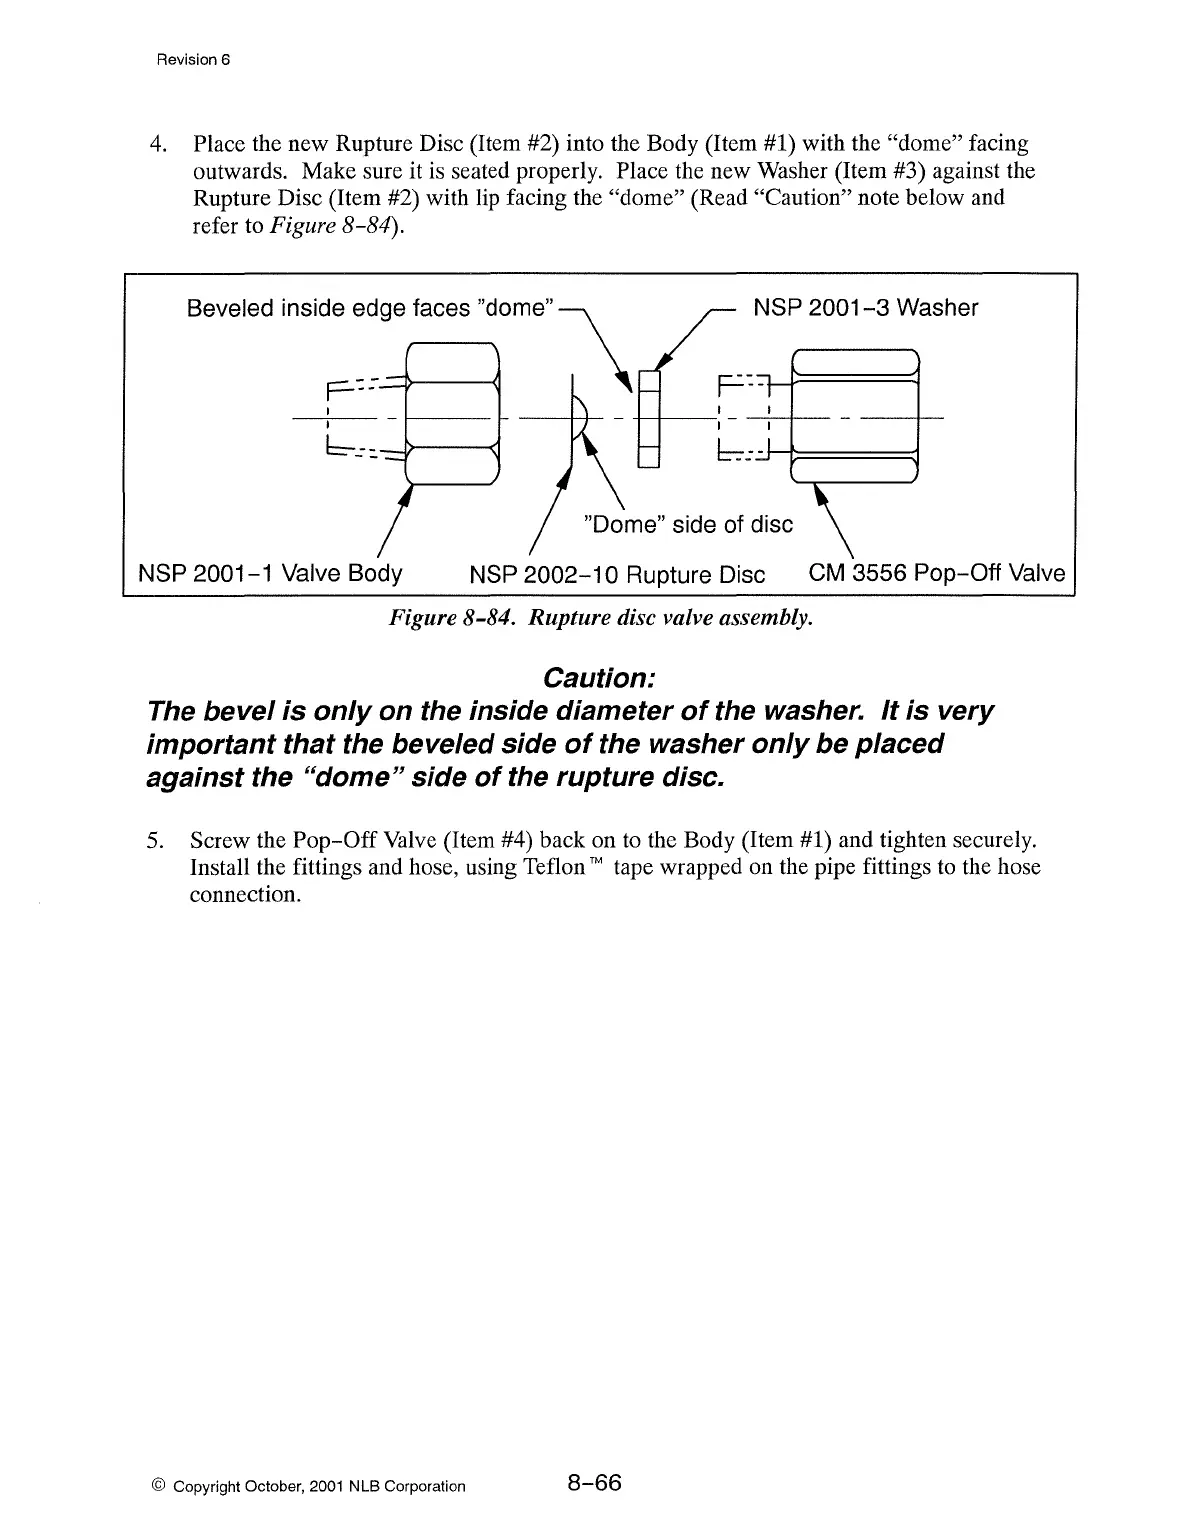
Place the new Rupture Disc (Item #2) into the Body (Item #1) with the "dome" facing
outwards. Make sure it is seated properly. Place the new Washer (Item #3) against the
Rupture Disc (Item #2) with
lip
facing the "dome" (Read "Caution" note below and
refer to
Figure 8-84).
Beveled inside
~~ge
faces
"dome"\
F--- I \
NSP
2001-3
Washer
I
b-
-
r-t=====::l
NSP 2001-1 Valve Body
NSP
2002-10
Rupture Disc
CM
3556 Pop-Off Valve
Figure 8-84. Rupture disc valve assembly.
Caution:
The bevel is only on the inside diameter
of
the washer. It is very
important that the beveled side
of
the washer only be placed
against the
"dome" side
of
the rupture disc.
5.
Screw the
Pop-Off
Valve
(Item #4) back on
to
the Body (Item #1) and tighten securely.
Install the fittings and hose, using Teflon
TM tape wrapped on the pipe fittings
to
the hose
connection.
© Copyright October,
2001
NLB Corporation
8-66