ALS functionality check
Steps
1. Connect phone to Phoenix and set the phone (e.g. on the table) so that the amount of ambient light seen
by ALS is as stable as possible.
2. Start Phoenix
3. Choose File -> Scan product
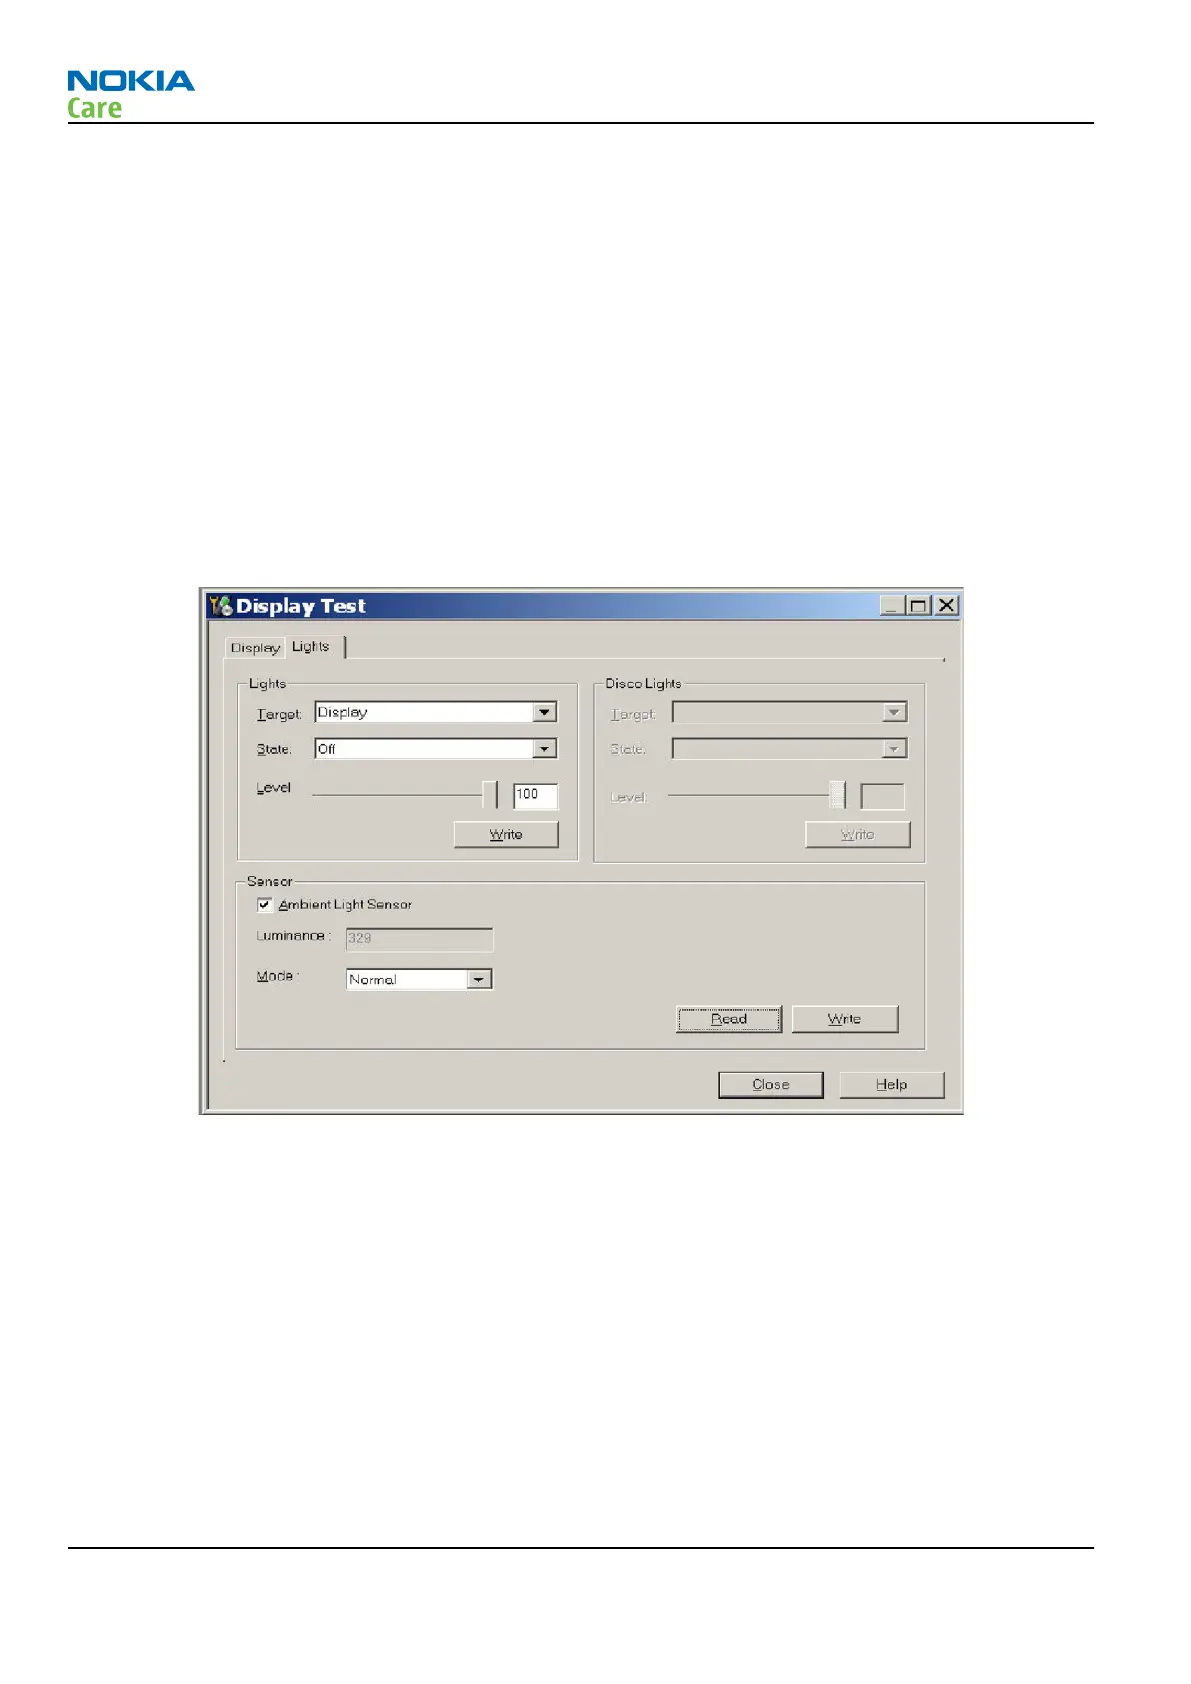
4. Choose Testing -> Display Test
5. Open the Lights tab, check Ambient Light Sensor check box, click Read, cover the sensor and click Read
again. When covered, Luminance reading should be less than after clicking Read without covering the
sensor.
6. If component doesn’t give any reading or reading doesn’t change when sensor is/is not covered, replace
the part.
Note: After replacing the ALS. If calibration values of the new sensor are lost or for some other
reason, ALS re-tuning is required (see instructions later in this document).
When doing the ALS calibration procedure, it is required to have a reference phone, which includes
calibrated ALS. ALS re-tuning instructions show why the reference phone is needed.
ALS retuning
Steps
1. Connect reference phone to
Phoenix
and set the phone (e.g. on the table) so that the amount of ambient
light seen by ALS is as stabile as possible.
2. Start
Phoenix
.
3. Choose File→Scan Product.
RM-632; RM-634; RM-699
BB Troubleshooting and Manual Tuning Guide
Page 3 – 32 COMPANY CONFIDENTIAL Issue 3
Copyright © 2010 Nokia. All rights reserved.